AC on Solar
It IS possible to run AC on solar/batts, but the best way to approach it, as with most things, is to reduce the power it requires, by increasing efficiency, and then that will of course reduce the number of solar panels and batteries needed, and extend your usable runtime. Building this camper from scratch was easier for things like this, and things like using the best insulation. But if you have an existing RV, you can still have ‘AC on Solar’, but you need to replace the roof AC with a mini-split unit, or a window unit that is mounted on the wall, amongst the cabinets, with the back of it exposed to the outside thru an opening. ‘Seems like a huge ton of work for something not needed, but the install is really not that involved, and the roof unit can be sold used, and the roof opening can be closed and insulated for zero chance of a roof leak and more roof real estate for more solar!
The biggest reason to do it is when you realize how inefficient those RV roof AC’s are They are not required to, and never do, list their efficiency number’s (SEER or EER number) the way that window and home air conditioners do! – BIG RED FLAG! That means, they either can’t, or can’t be bothered to, make them as efficient as possible. …………………And sure enough………THEY AREN’T!
Check out these simple numbers: This is a common model of 13,500BTU roof air unit:
It shows in it’s specs section that it draws 1670watts while running. Although it does not list amp draw in it’s specs, it does list wattage. Our power formula (P=IxE)(“P”power”watts” equals “I”amps times “E”volts) tells us that 1,670 watts divided by 110volts is 15.18 amps
So, that’s 13,500BTU’s……..1670watts…………..15.18 amps……………….that’s – .123watts per BTU (8.08btu’s per watt)….which means, it produces just 8btu’s of cooling for every watt you spend doing it!
Now compare that to any window or mini-split AC and you’ll see that the RV roof AC’s are the lowest efficiency air conditioners in the entire industry. And they’re usually larger in terms of BTU that you need for most mid or small sized RV’s. They also cost more, are heavier, make the roof sag, often cause roof leaks, and most of all, make it really hard to layout a lot of solar panels.
Whereas this 6,000BTU (which is actually all we need in a well insulated small camper built for efficiency) window unit draws just 540watts (small enough to run on solar/batteries)
so that’s 6,000BTU’s divided by 540watts…..(12btu’s per watt)……rated efficiency: “EER 12.2”
—–so we get 12btu’s of cooling for every watt we spend doing it! – Instead of only 8!!!
Even though the roof unit does not list an efficiency number, we can easily see that it is terribly inefficient compared to the window unit, as it draws 15.18 amps, or 1,745watts (15.18 x 115v) which is well over three times the power of the window unit at 540watts, or 4.69amps (540watts divided by 115volts), and yet it’s cooling capacity of 13,500BTU’s is just a little over twice the 6,000BTU’s of the window unit! The roof AC is extremely less efficient (about half) than even a cheap window AC.
And so that, in itself, is a perfectly valid reason to not use a roof AC over any window one.
And some window units are even a little bit more efficient than that, although they cost a little more of course. ……….and many high-efficiency mini-split units are WAY more efficient as they can produce 19btu’s of cooling per watt!! – Like this 6kbtu one: https://www.ecomfort.com/Mitsubishi-MSZ-FS06NA-MUZ-FS06NA/p112555.html
So even window A/C’s are MEASURABLY BETTER than RV roof AC’s! They are “commodity” items. Meaning they are made by the billions (literally) and sold world wide to most people on the planet, and thru that mass production, they have been improved upon ten fold over the fairly low-volume and small specialty/niche category of RV air conditioners that have shown no amount of improvement or innovation in decades! Window AC’s are smaller, lighter weight, higher output, lower current draw, and much quieter than ever before! It also removes 85lbs from high on your roof (stoping the encouragement of your roof to sag) lowering your center of gravity with just a 43lb unit a little lower. Lowers total vehicle height and gives a sleeker look. And is way cheaper and easier to replace when it does go bad.
Larger RV’s (for example that had two roof airs) can do two of those 6,000btu window units (which is good for ‘zoning’ like at night when you can just run one) OR, another good option is a “mini-split” AC which is a more sophisticated unit than a window AC, lasts much longer, has an even higher efficiency rating, runs quieter, and is a true ‘heat pump’ and can provide heat as well https://www.pioneerminisplit.com/products/pioneer-9000-btu-22-5-seer-115v-ductless-mini-split-air-conditioner-heat-pump-system-full-set?variant=32421031312&gclid=EAIaIQobChMIn5-qv_-x4gIVgntiCh3n6QWrEAEYASABEgJGyvD_BwE -This one, is 9,000btu and yet just draws 5.8 amps 665watts 82lbs – .073 watts/btu! (13.53btu’s per watt!)
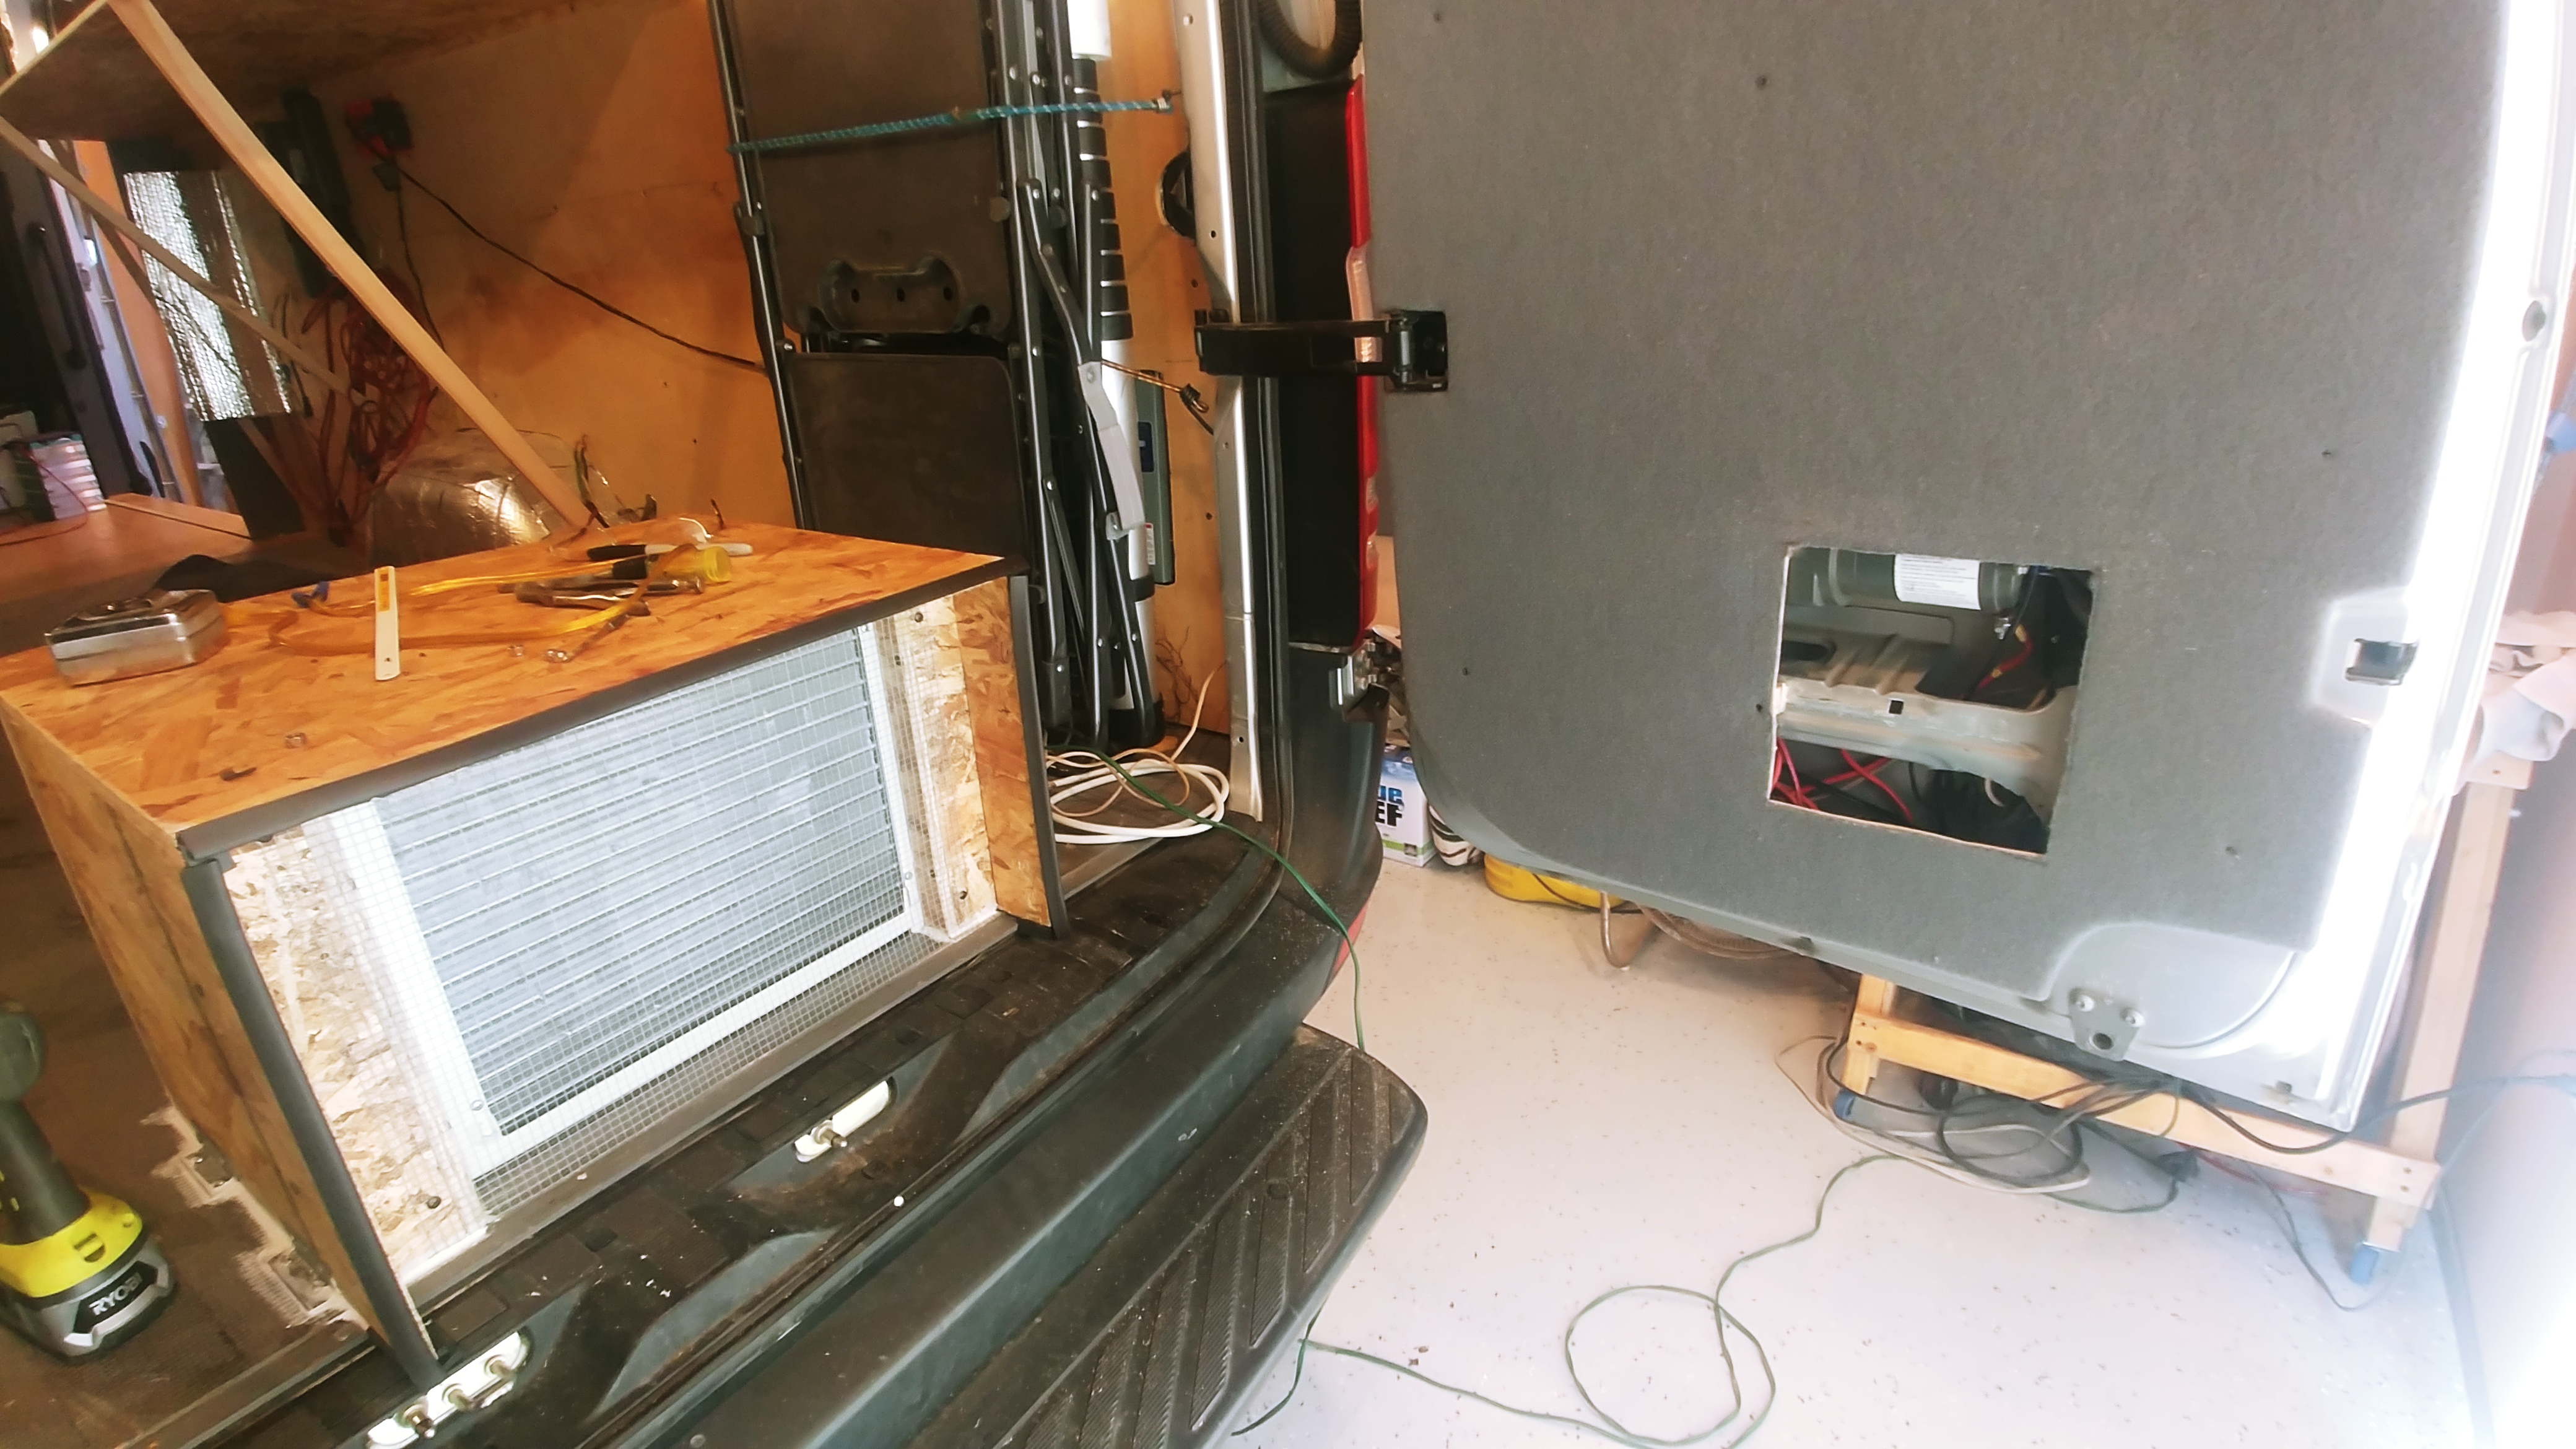
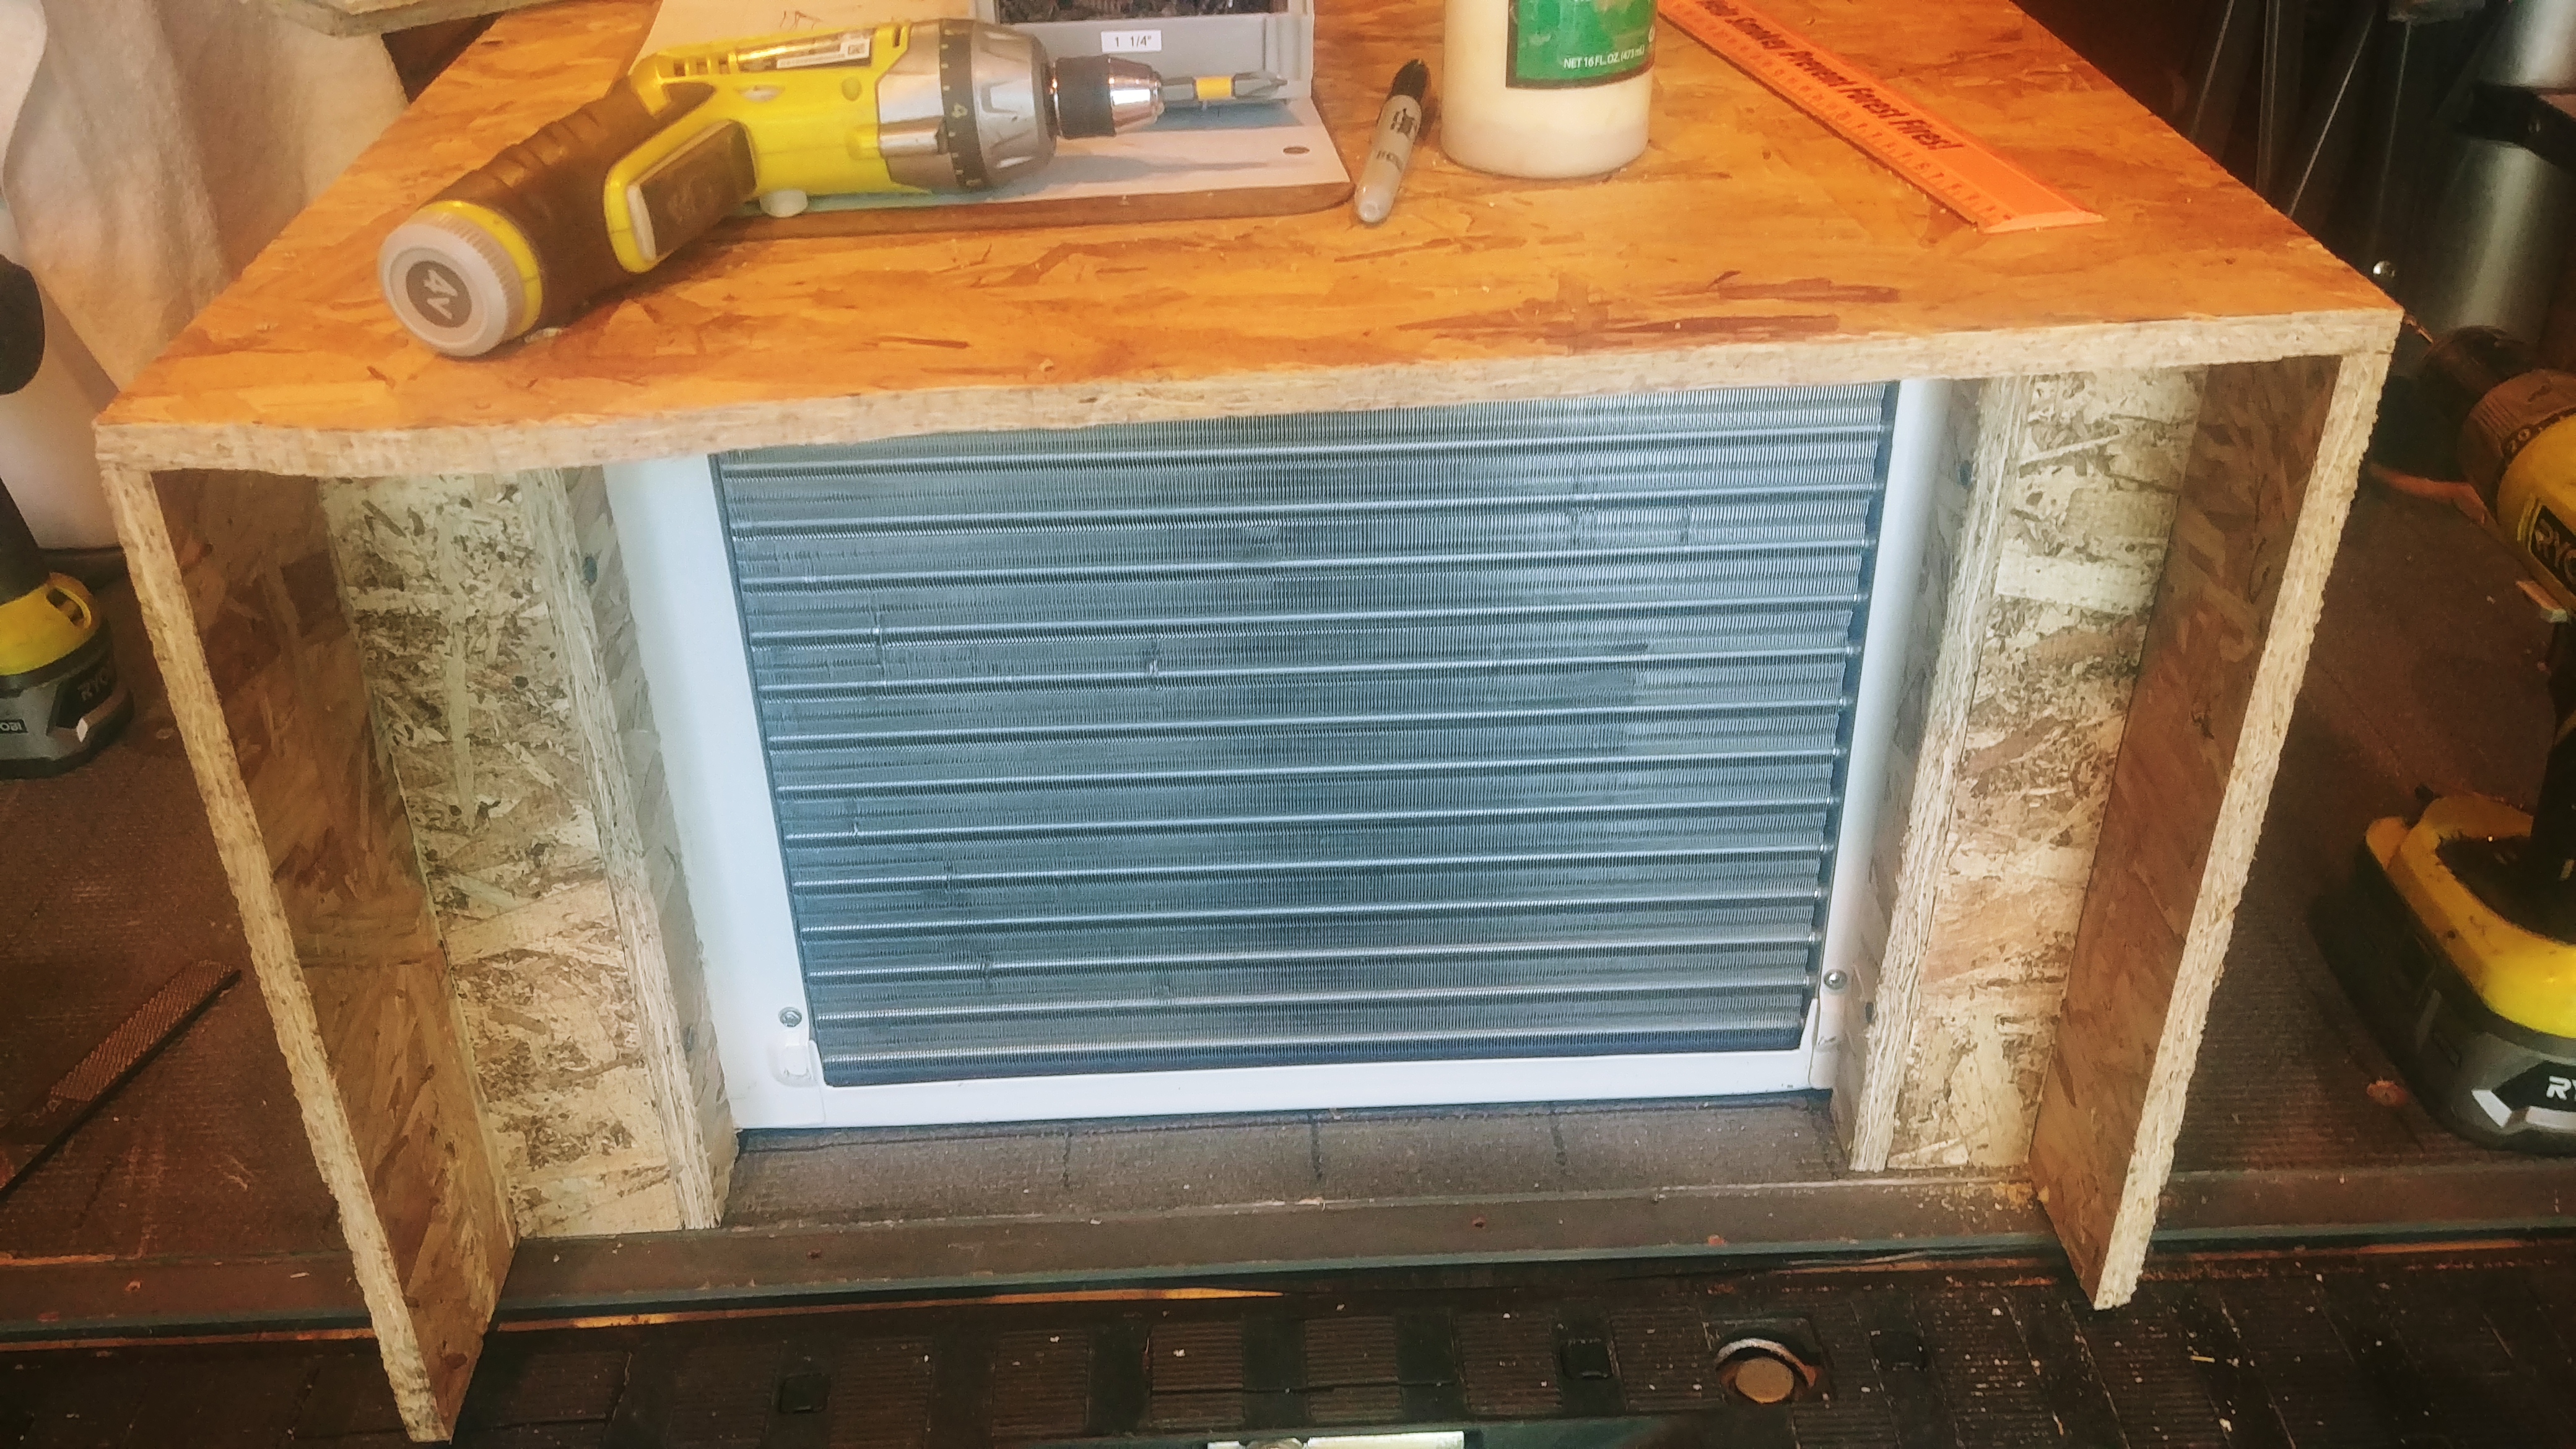
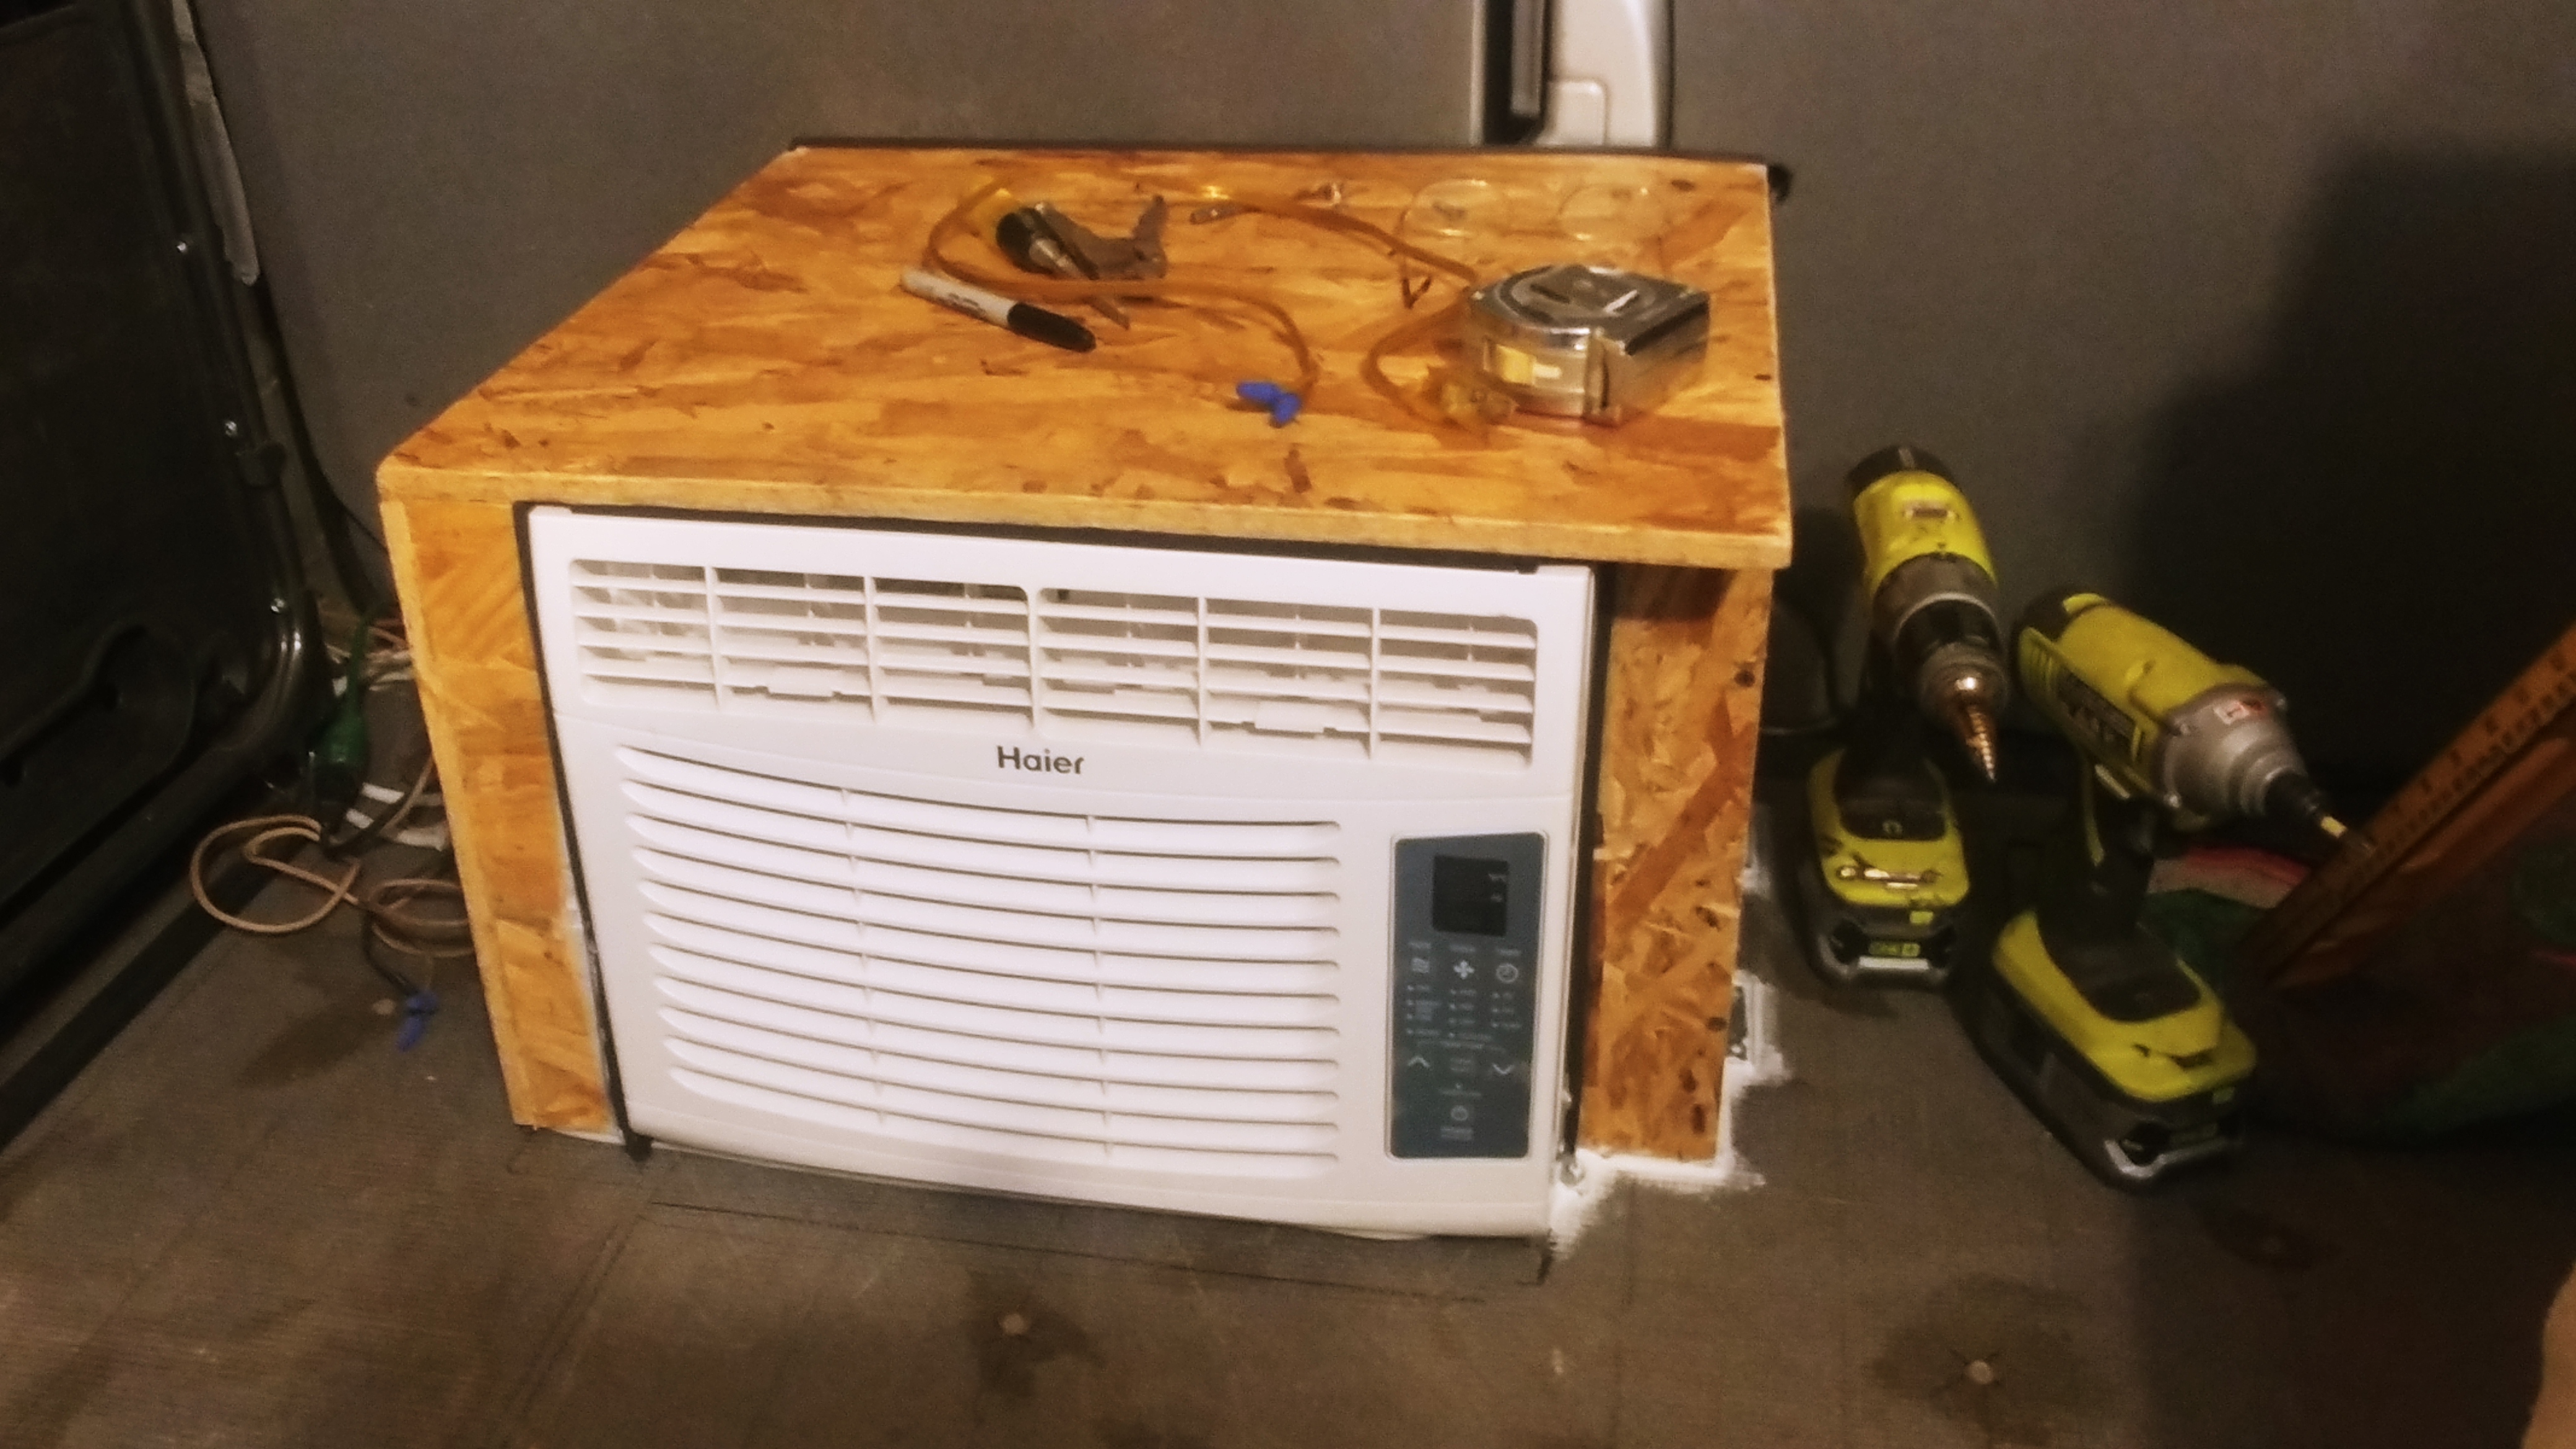
This is my solution, for ‘AC on Solar’ in a DIY Sprinter camper. Just take a 5,000btu window AC, and put it in a plywood box on the floor, at the back doors. Then let the heat escape off the back of the coils and go thru one of the doors, and out the back to the outside with the aid of two fans. Now,…in order to make this work, you must feed cool, fresh air from the outside, into the side air intake area that you always see on window units with the louvers on the side of the unit. When you mount it in a house, those side intake louvers are outside the wall, and we never really think much about them. But they are THE way that the back condenser coils cool down and release their high heat to the outdoors. Air MUST come into the sides of the unit, where it is then pushed hard thru the coils and straight out the back.
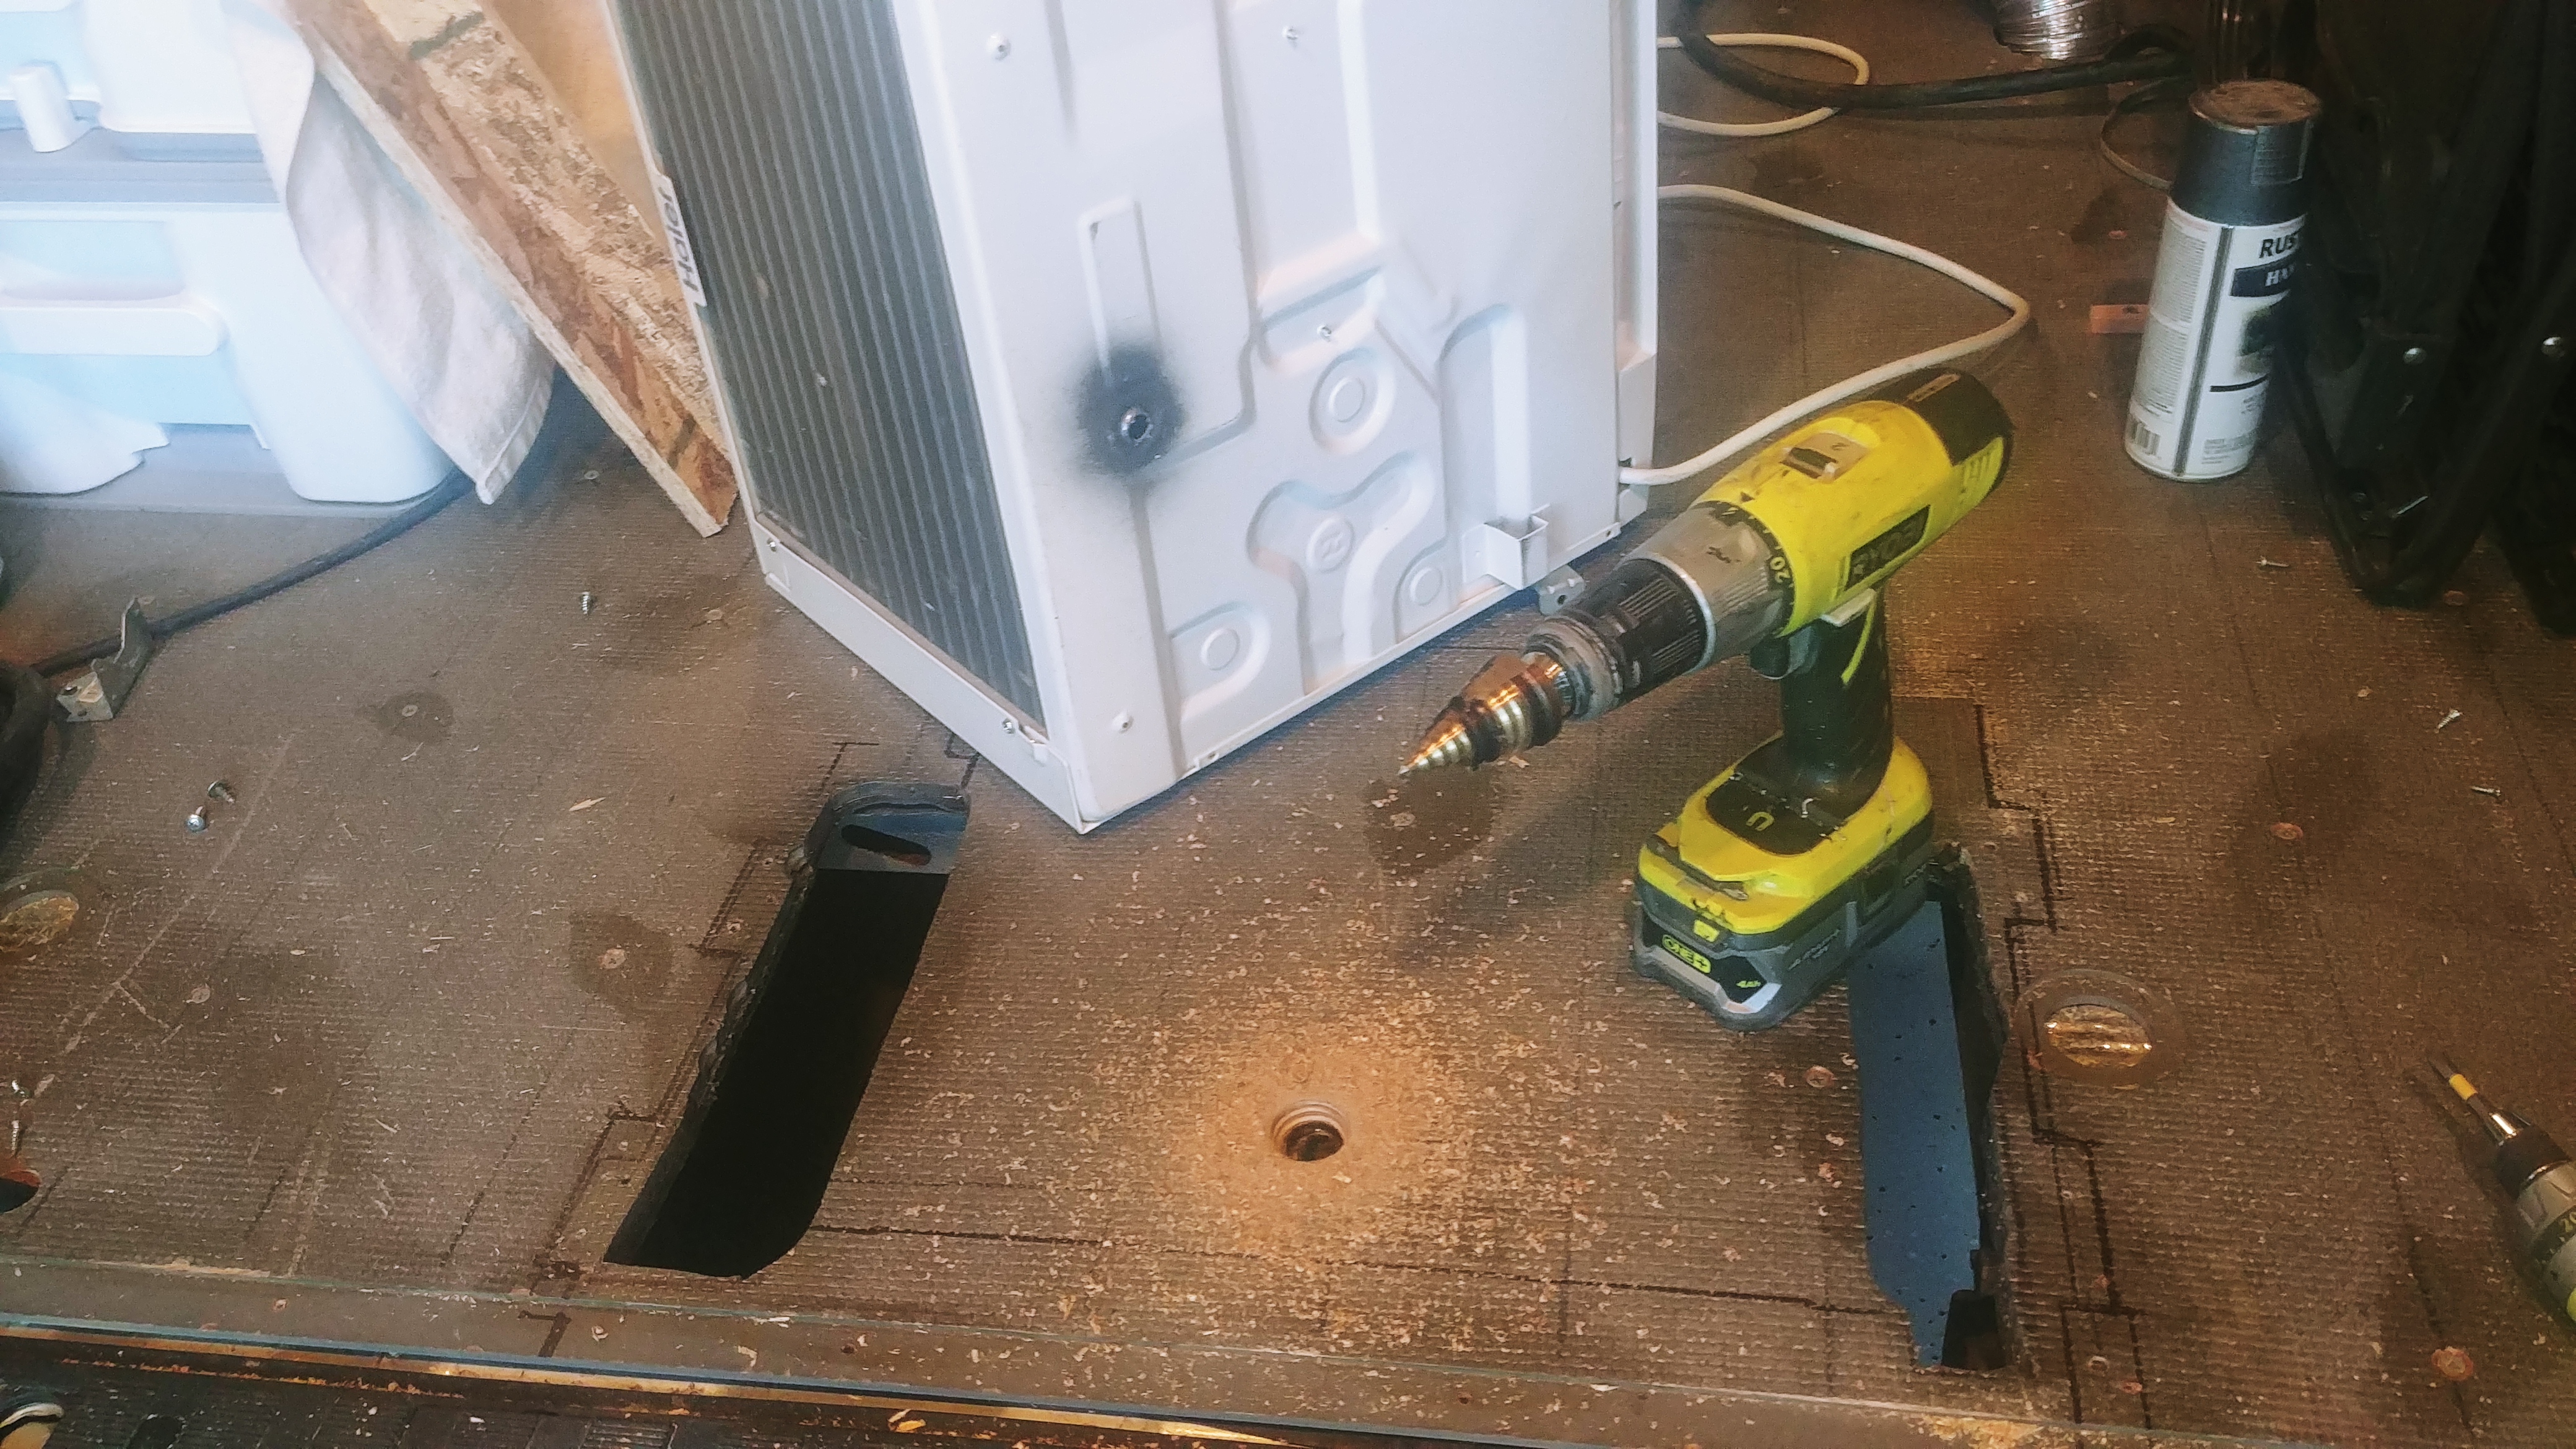
So, decide where you want it, I put mine slightly off-center but still in the centered hallway of my floorplan, so that the exhaust air can more easily go into and thru just one of the doors. Then build a box that is wider than the unit, by about 3″ on each side, but only as tall as the unit, because we don’t need air to go into the top even though there are often louvers there as well. Then cut the floor with a metal blade in a saber saw (after lowering the spare!) in such a way that outside cooler air can come up and get into the sides of the unit.
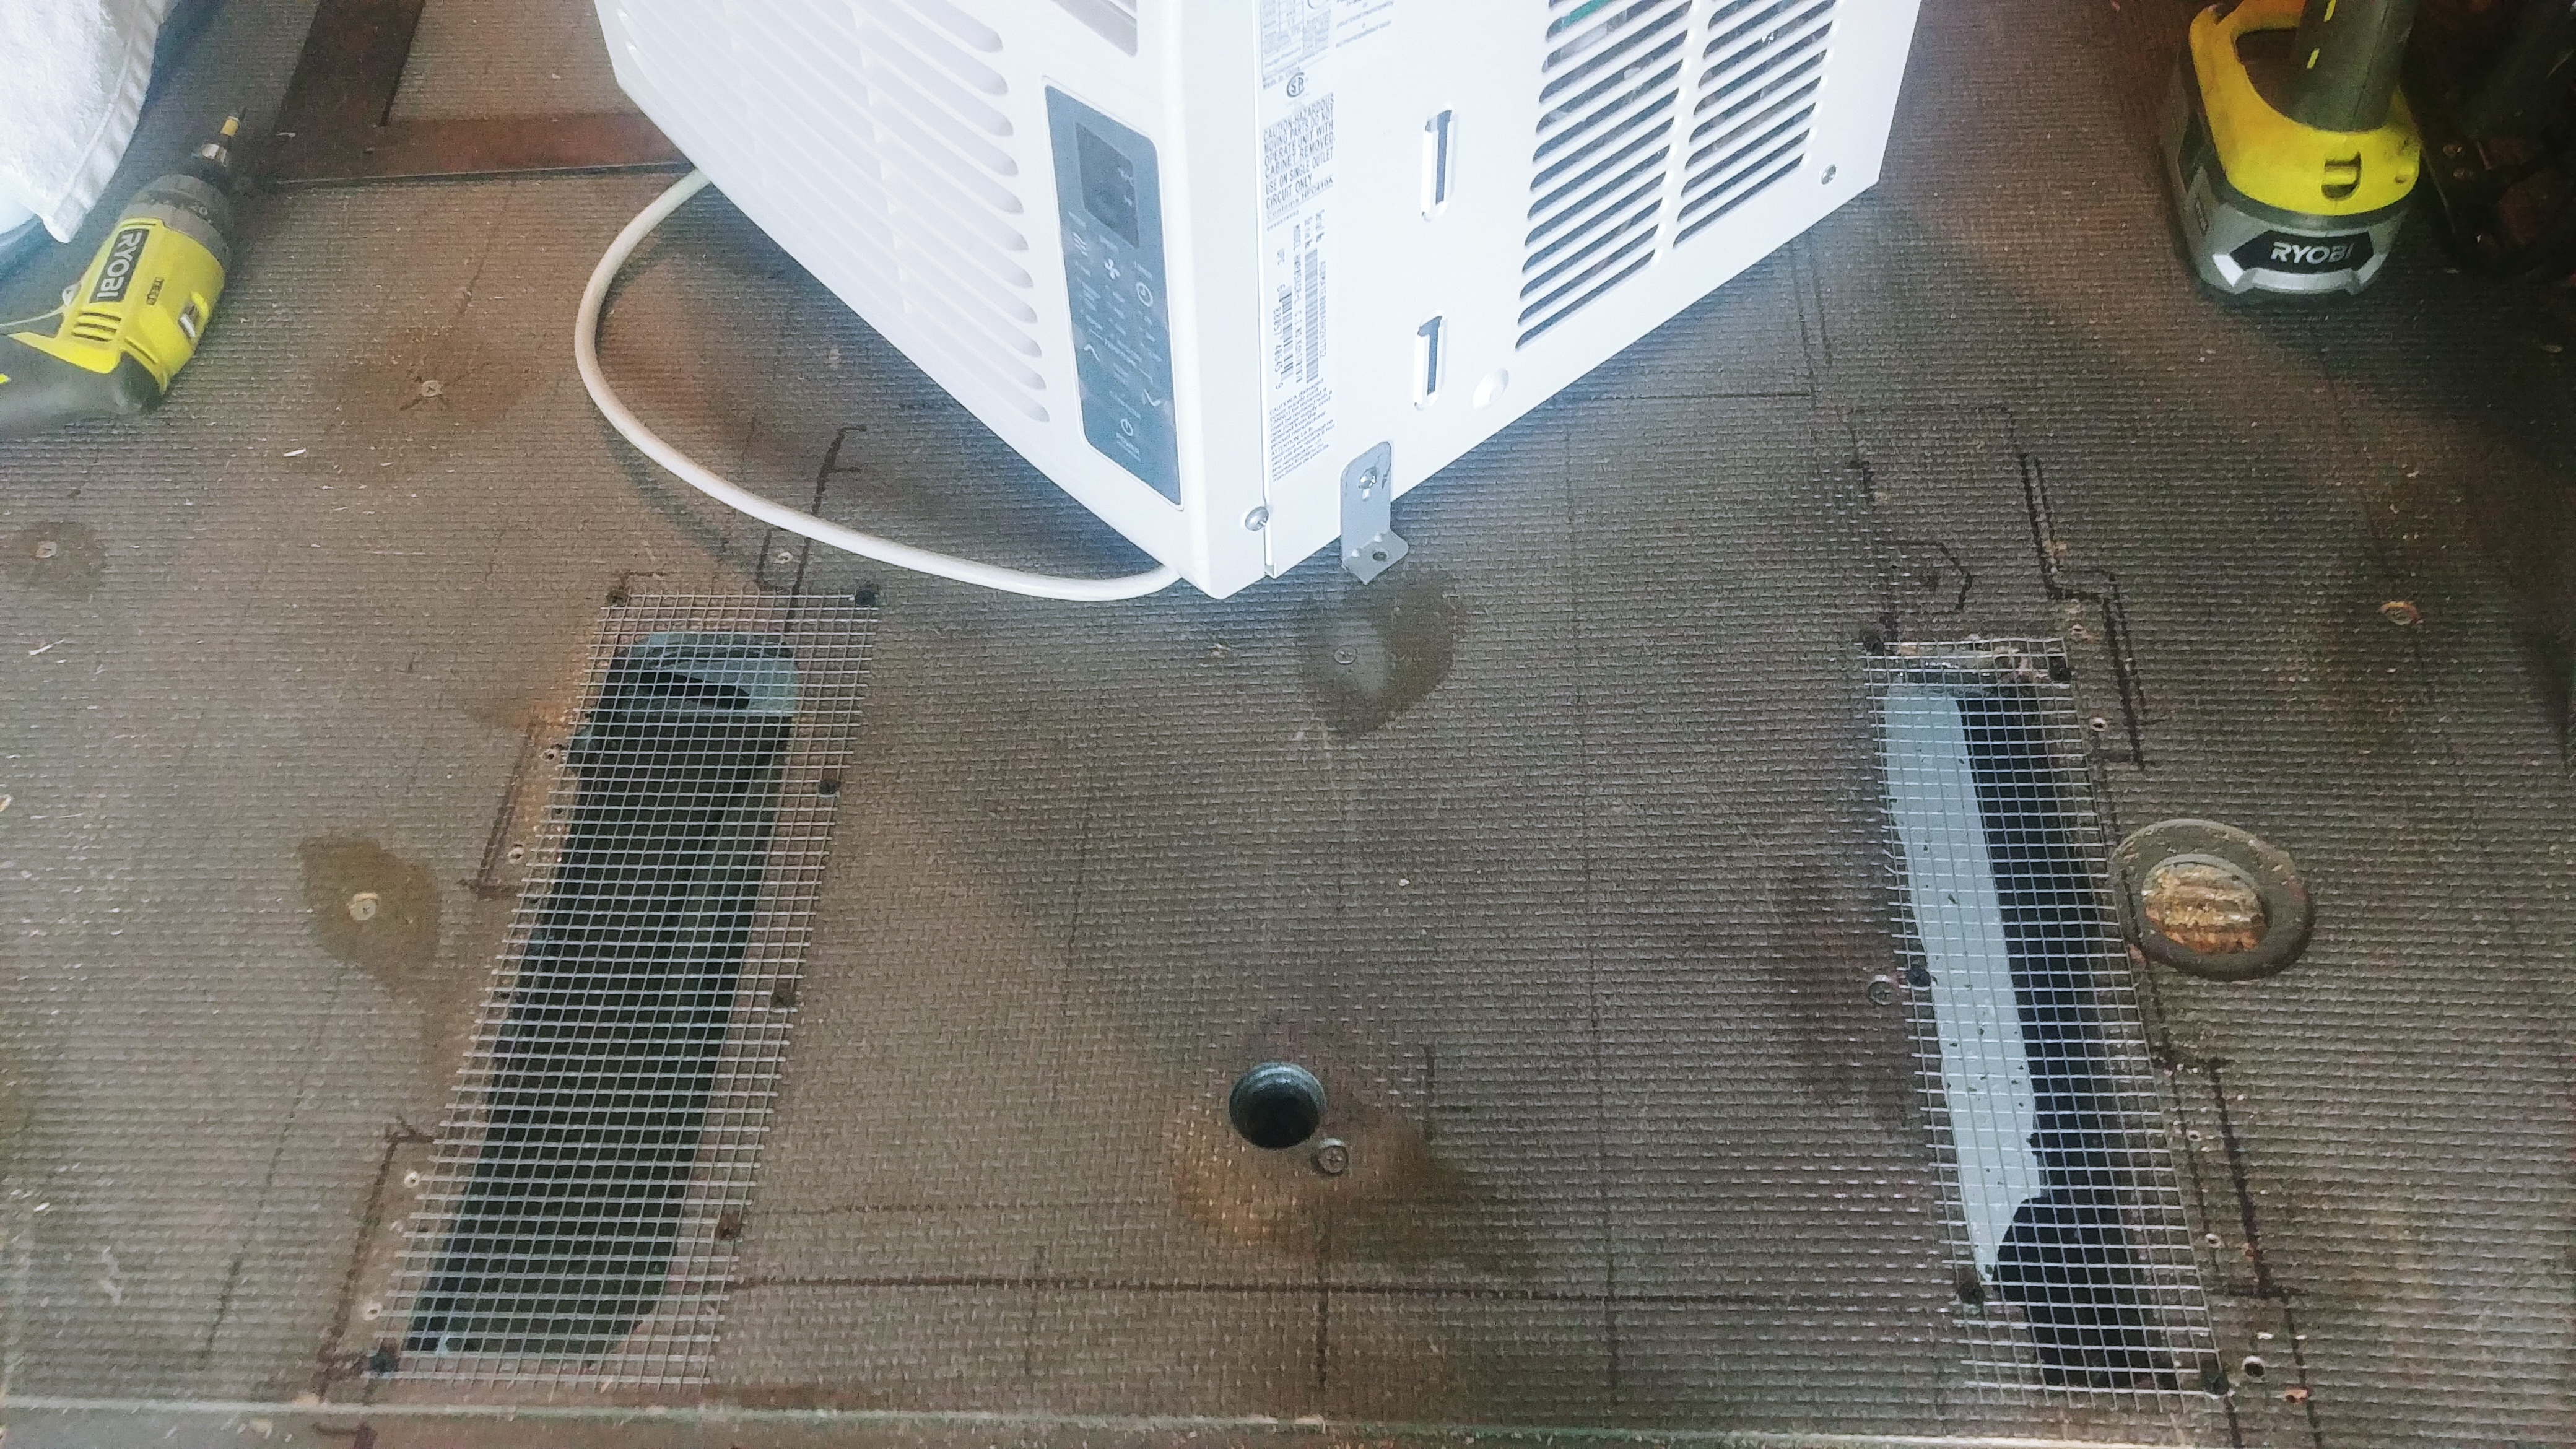
The 1″ hole you see drilled there is for where the condensation drip hole is on the unit. Just take the plug out and measure where to drill the hole, because you’re gonna travel to humid places someday and then the ‘wick-from-fan-motion’ feature they talk about in the owners’ manual will not be able to keep up, and fortunately we can simply let it drip onto the ground. Also you see here that I put some 1/8″ screen over the holes to keep any industrious bees from thinking that the inside of my AC was a good place to build a nest.

So now you have a great way to give your unit cool air, to be pulled up and into the sides, to be blown thru the coils and out thru the back door. BUT… you need little walls on the side back corner edges of the unit to keep air from just short-cutting around to the back, and not having to go thru the coils and do it’s job!
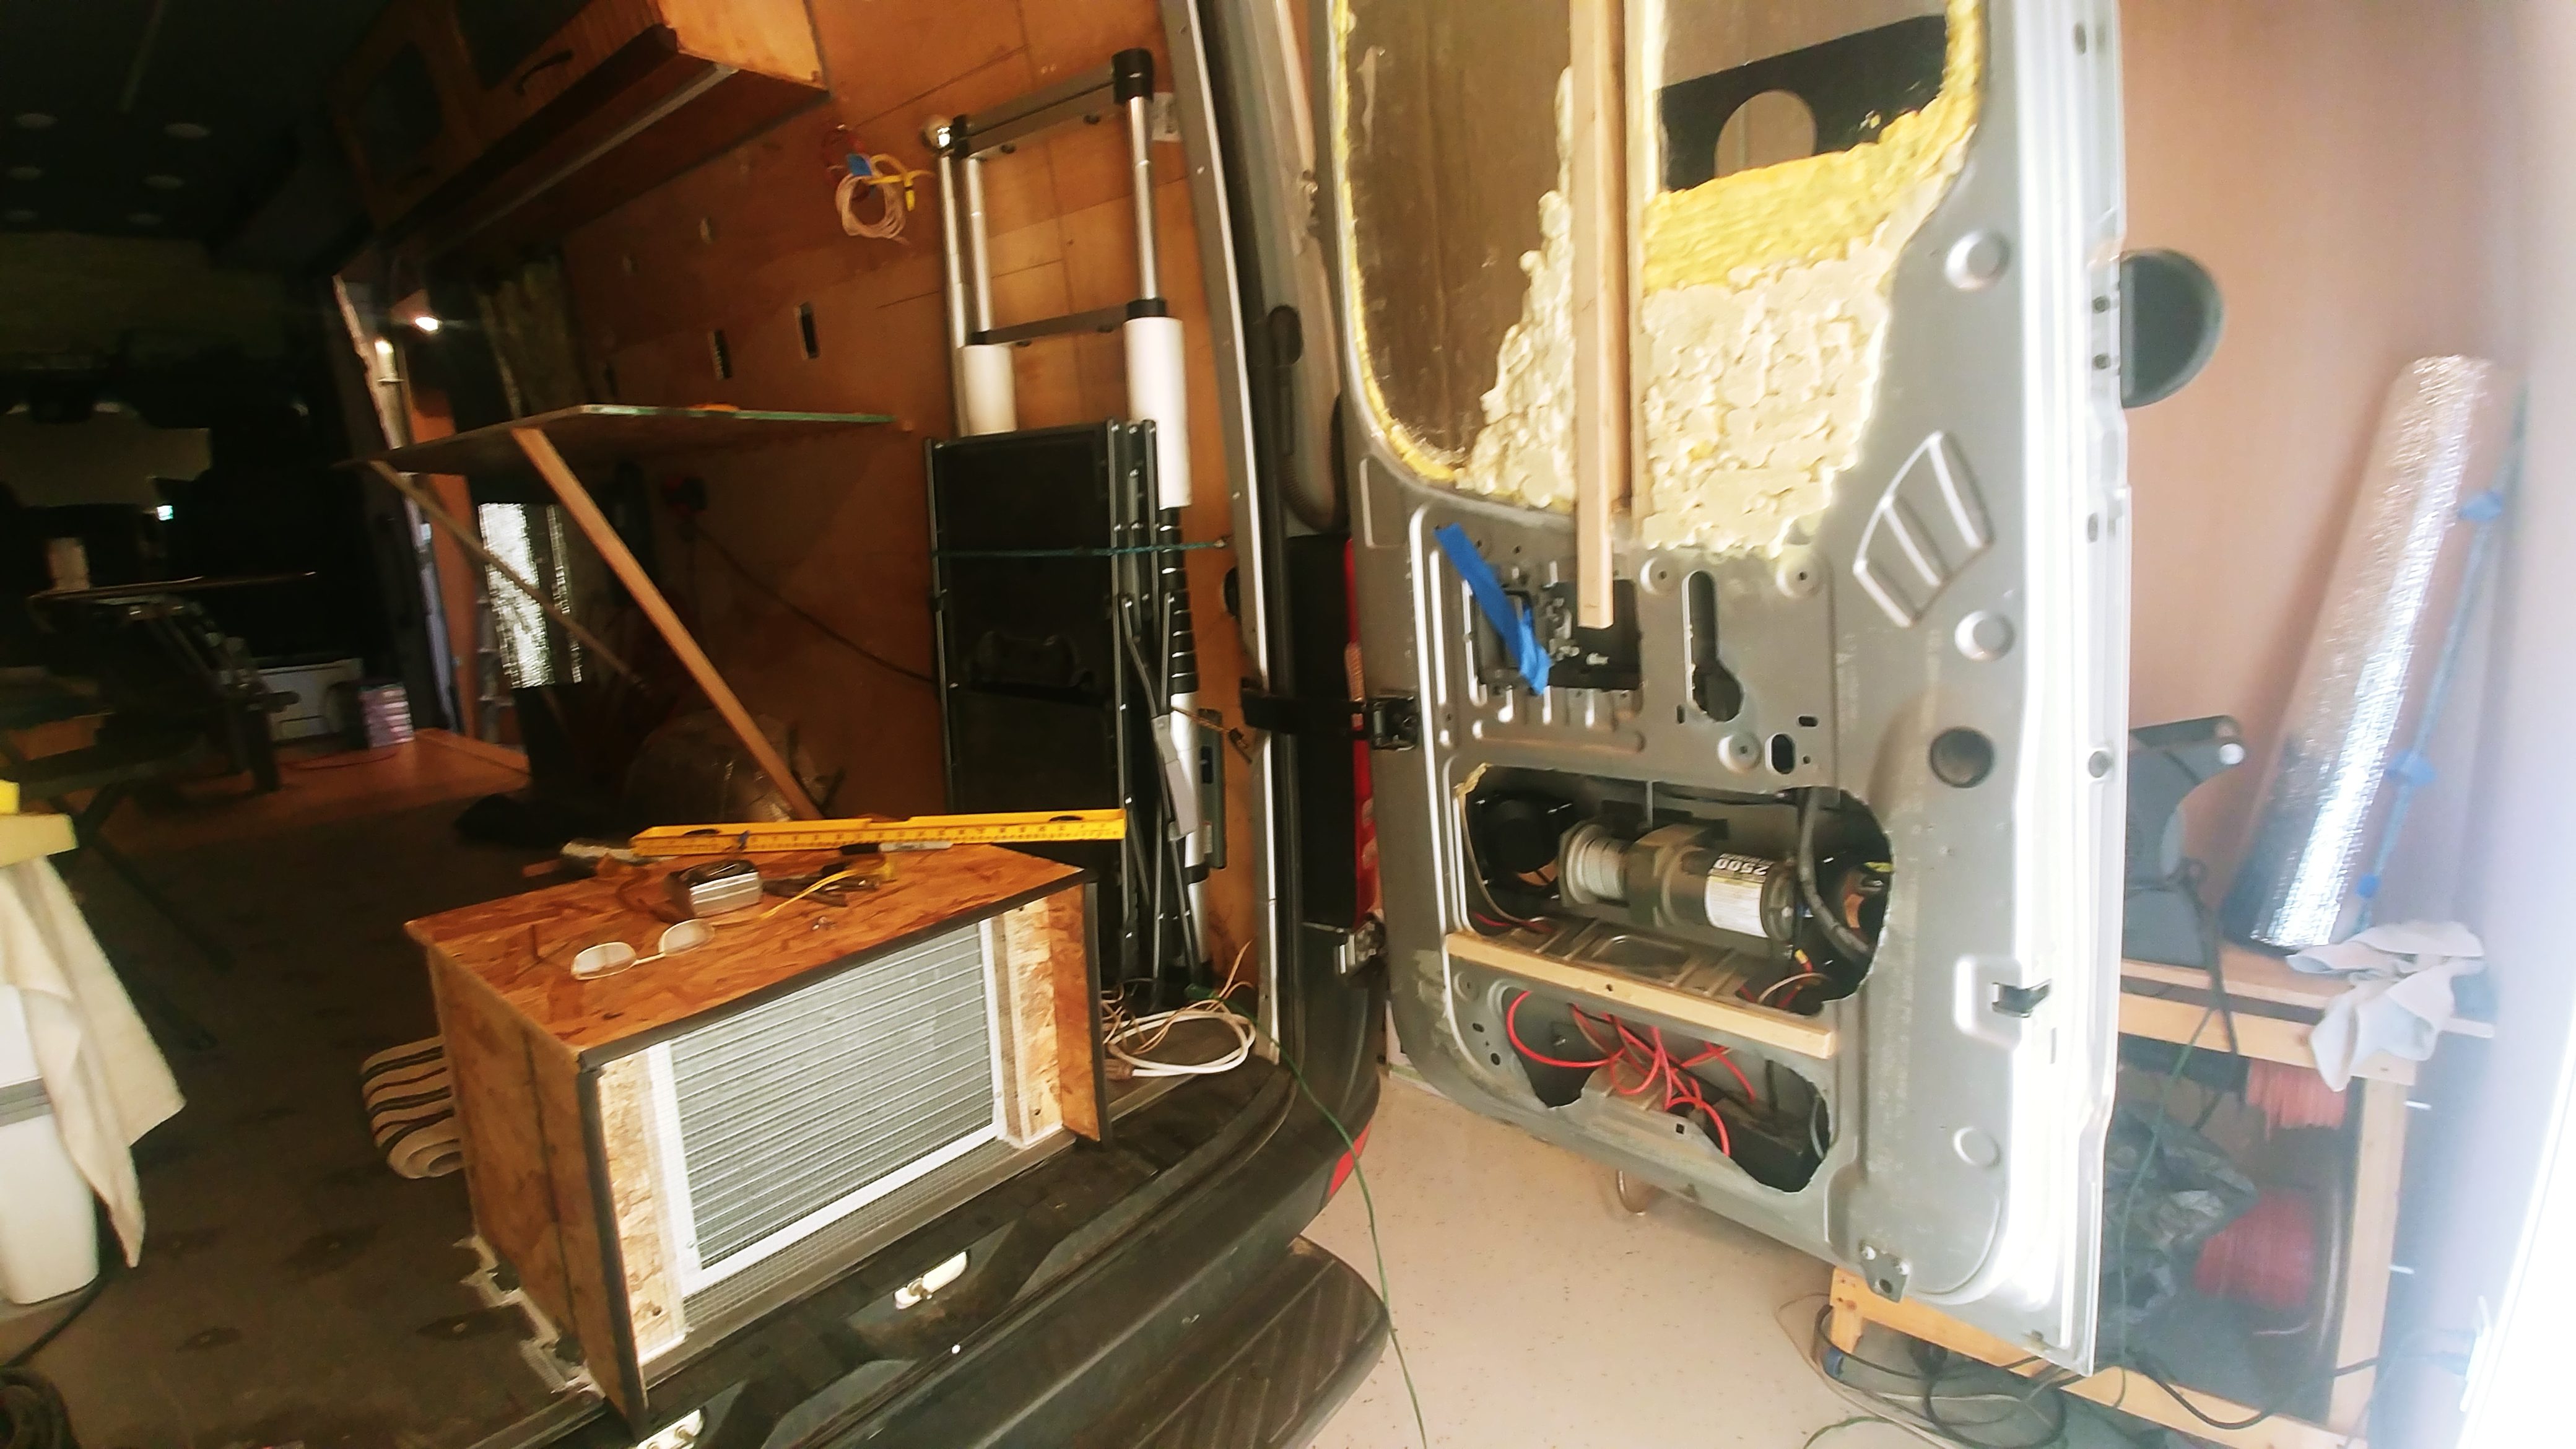
Here, in the wide view of box and door, you see how most of my door is filled with spray foam, except for the bottom foot or so due to latch mechanism and my bicycle lift winch motor which is low in the door to help lower the vans’ center of gravity, but the cable goes up to the top of the door, over a pully, and thru the boom to lift the bike up high. But this bottom of the door can just be open and empty, and you don’t need a smooth duct that goes thru the door. Any hot air that goes into the door, will go out of the door thru the booster exhaust fans.
So here you see the final step of making the box force the cool outside air thru the coils, by the addition of these little walls on the back corners.
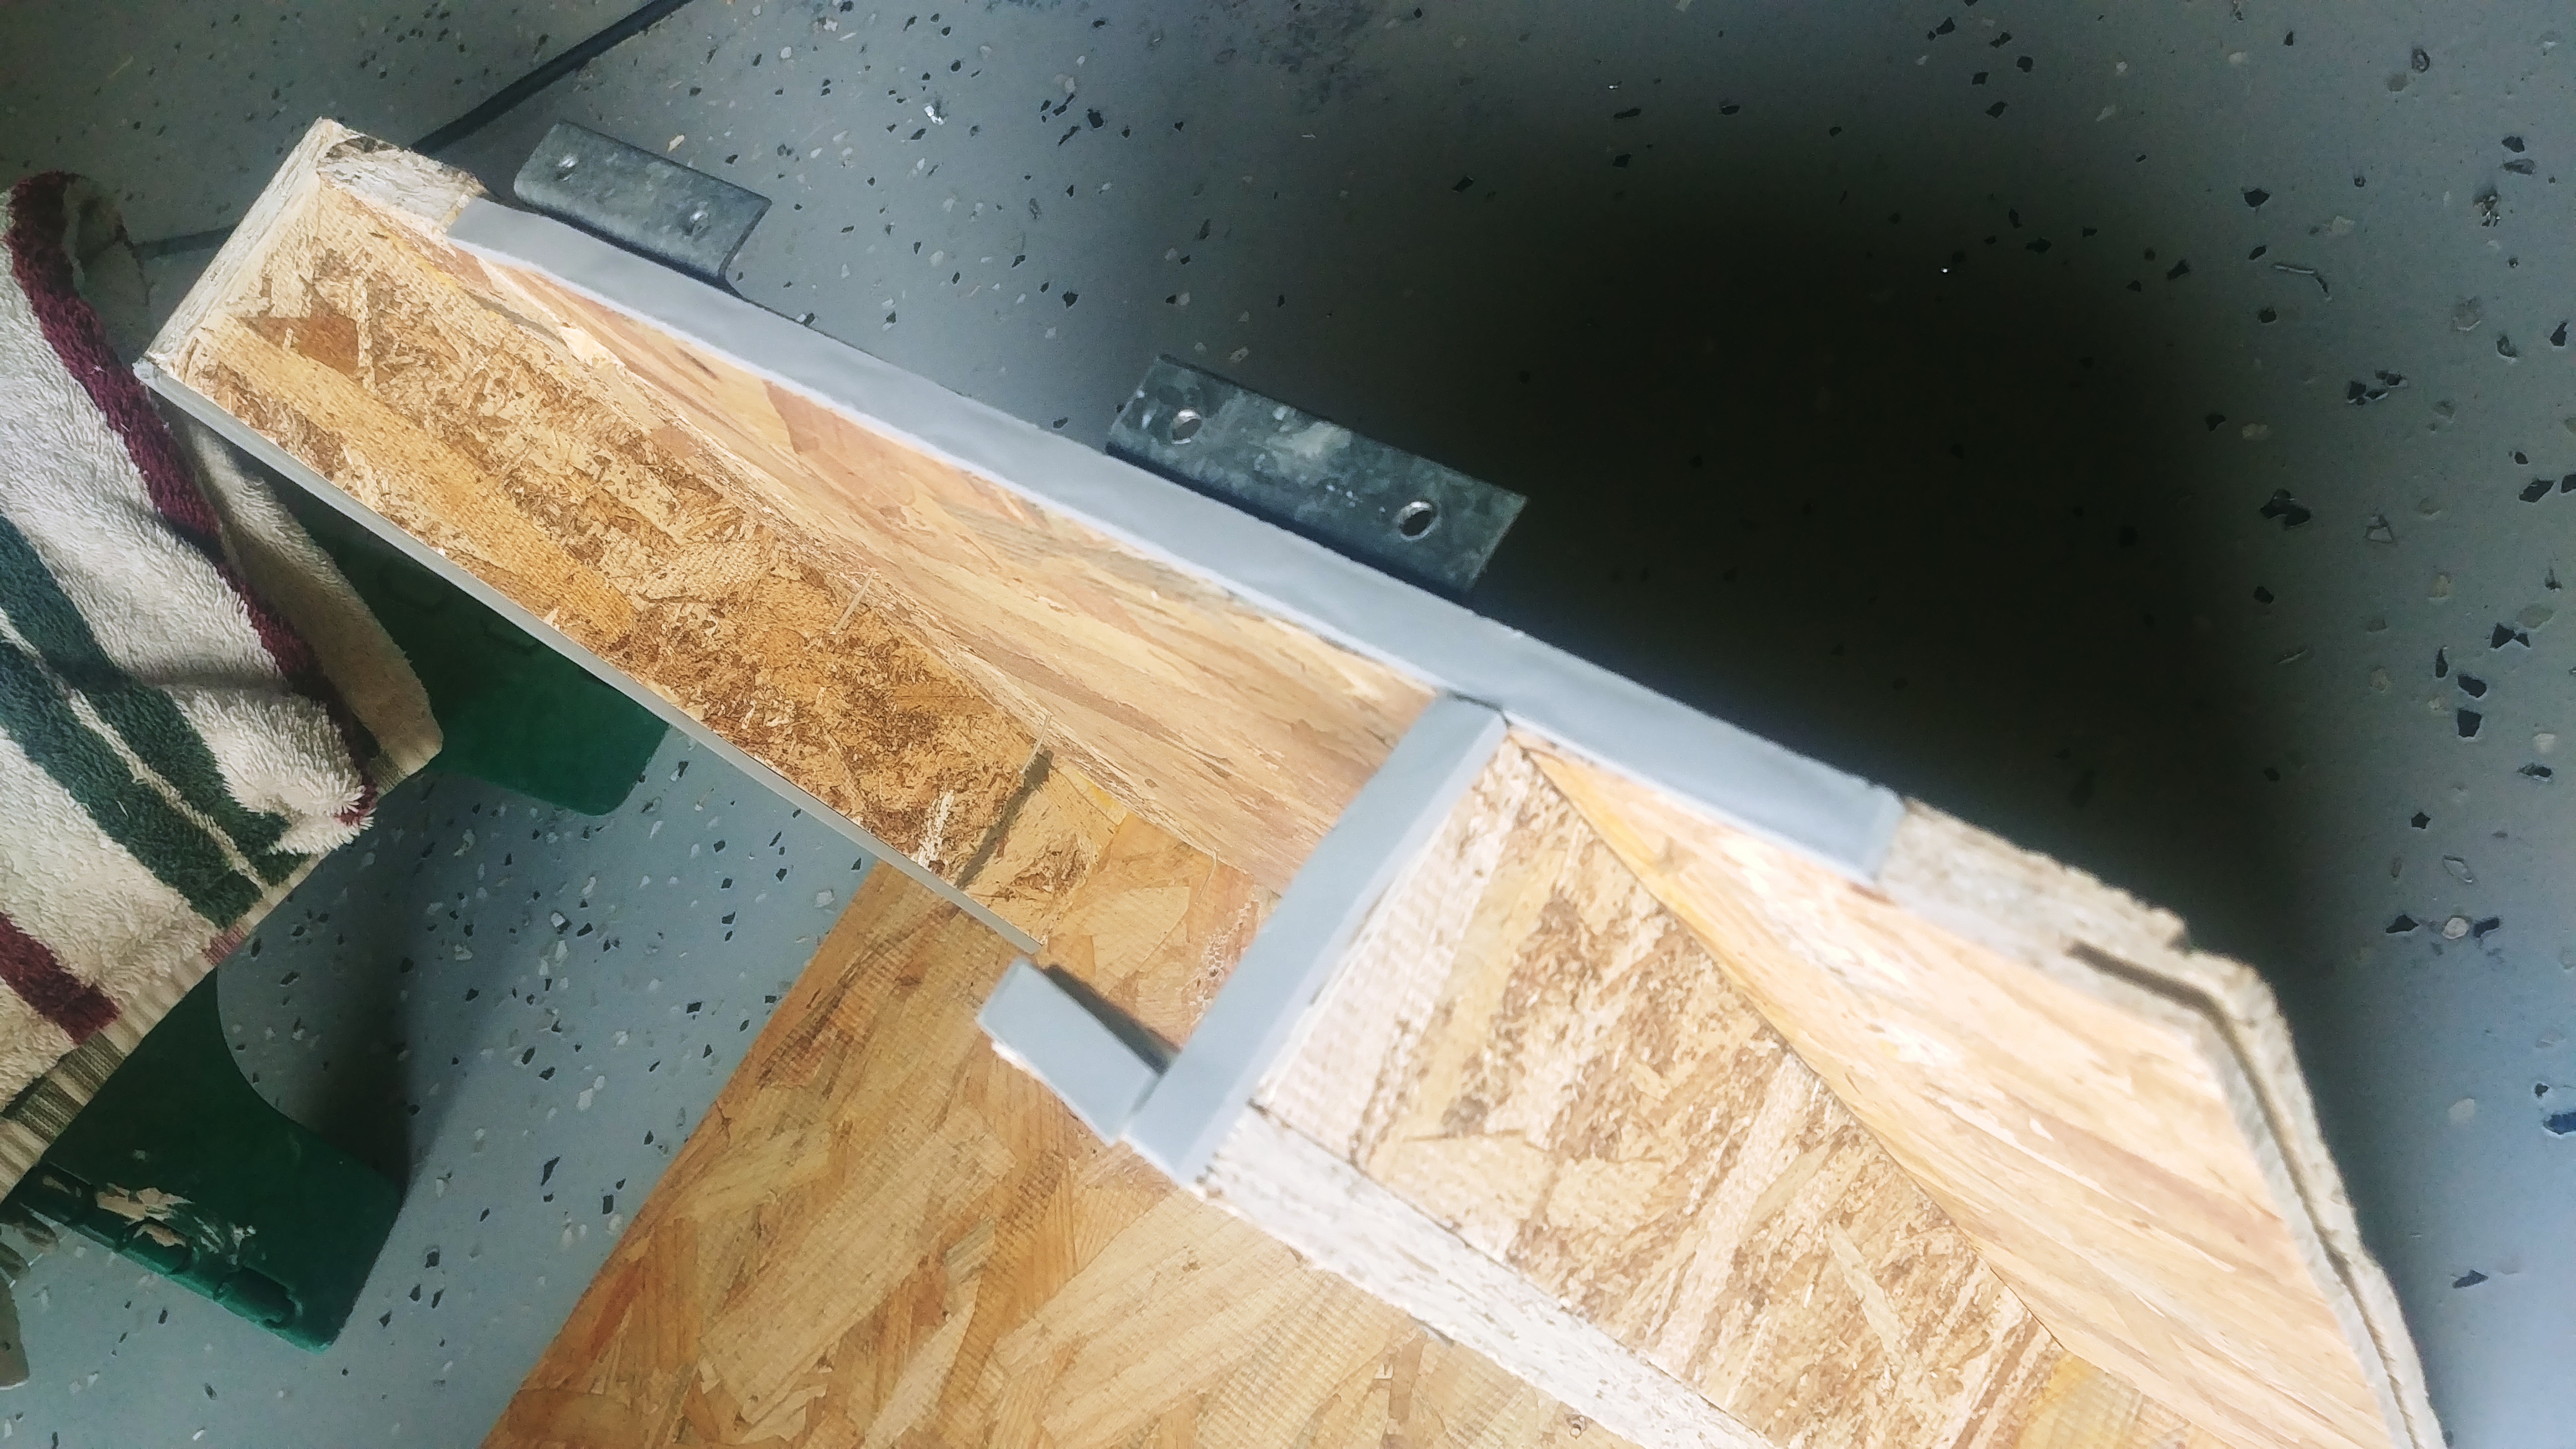
By the way, seal the box from air leaks in order to get the air to go where you need, by adding some foam gasket material and/or painters’ caulk after it is screwed down in place with L brackets. Even the top and bottom of the unit needs some thick gasket material to keep the cool intake air directed only thru the side wall intake louvers.
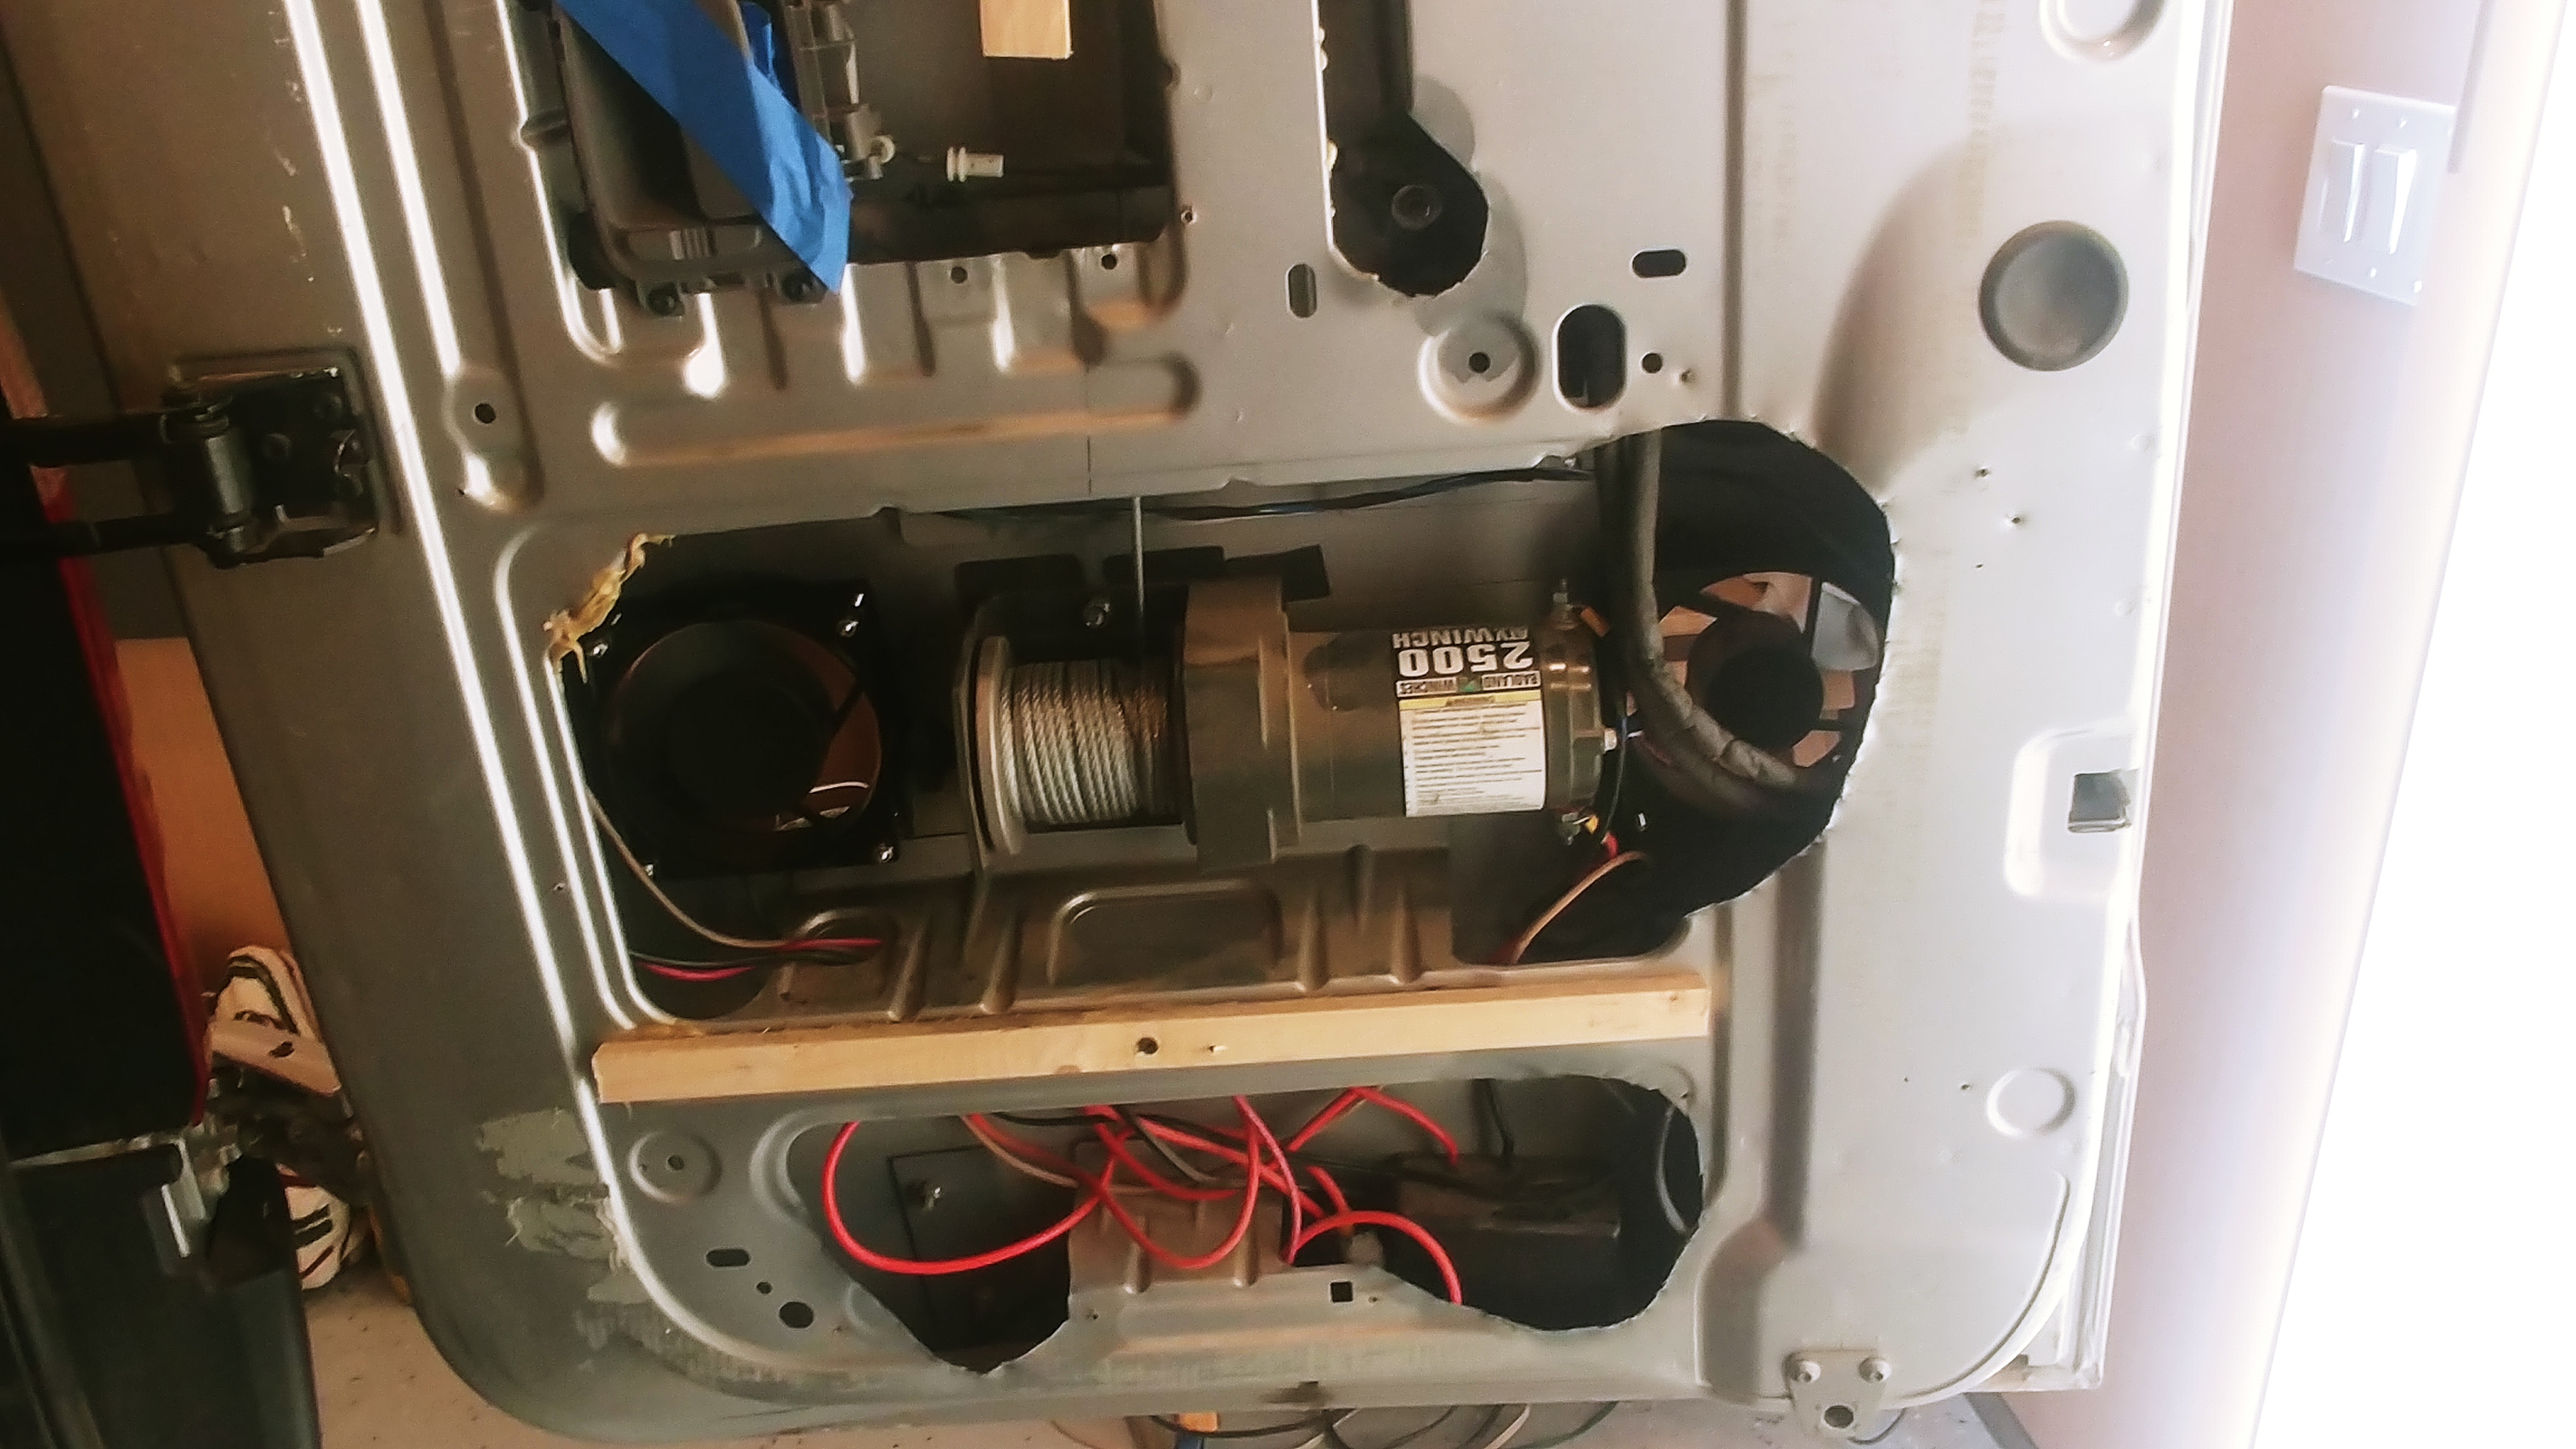
You can see the two fans mounted in the door on each side of the winch motor. I used 110v AC fans, since they come in high-output 110CFM models for just $13, and anytime I’m running the air, there’s 110v for it anyway. The fans only draw 18watts.
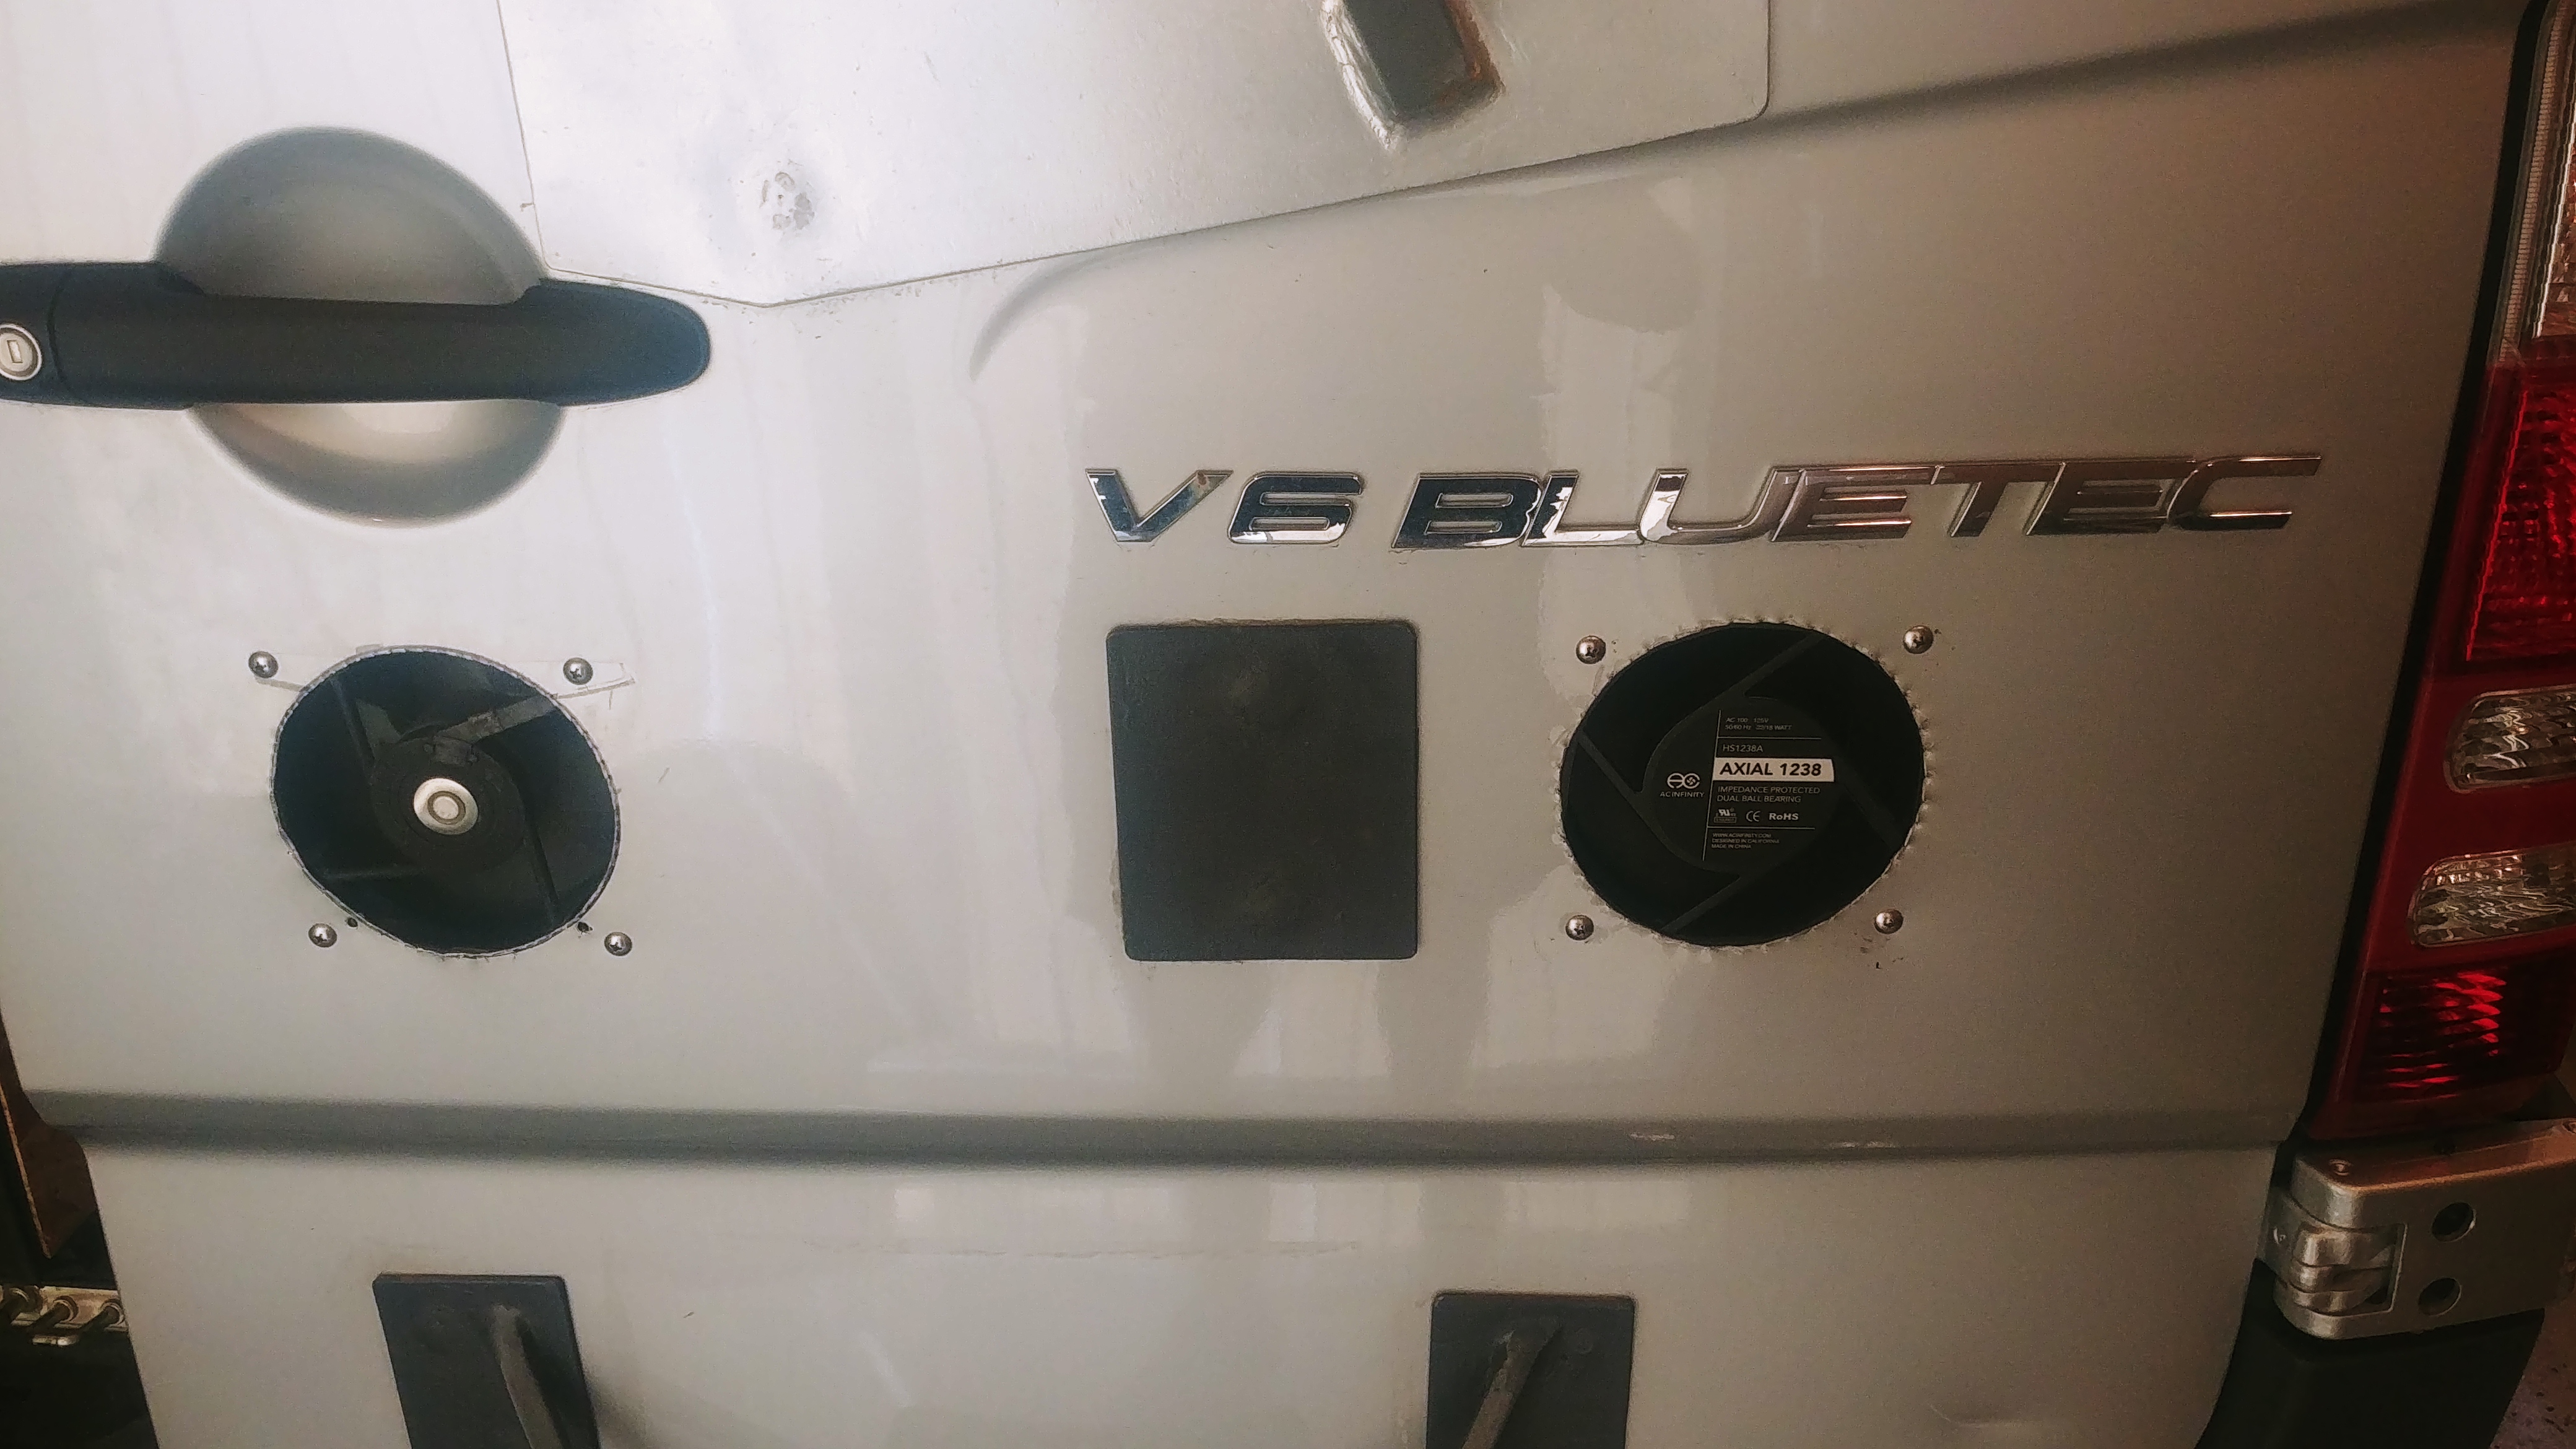
Here are the fans from the outside. I will make a solid door that hinges down to close them off when not used, instead of a louvered vented grill. All grills slow the air down to some degree, and so for top performance, no grill at all is best. But you can find some grills with very wide open louvers that will let most all of the air thru, and would still keep the rain out. But I do not plan on using this AC much, because we always travel to cool destinations (pun intended), and so I’m going to make a solid door and I will have to go out and open it, and later close it whenever I want to use the AC.
When the door shuts hard, it travels past where it ends up being when closed, so you have to keep your plywood box about a quarter inch away from the doors’ resting place or else the slamming of the door will break the box from it’s mounts. So you need good weather-stipping type gasketing material at the back so that it will give a lot, but then still seal. I used standard exterior utility door gaskets that fit into a 1/8″ slot cut into the edge of the wood box with a table saw blade. This works well, is very durable, and can easily be sourced and replaced (just pushes in with its hard nylon barbed edge) at any time should it get damaged at all.
It works well, we have used it for several hours in high heat (we live in AZ!) and the unit put out very cool air continuously. The air coming out of the back door booster fans is quite warm! And you can open the doors all you want! In our case, it will be a ‘garage’ separated completely from the rest of the coach with a bulkhead wall at 1.5′ in from the back doors which will be the only way to access our extra junk. And having the doors open will not change much of anything about the cooling strategy, it will just mean that the hot air will not go into, and then need to get out of the lower part of the right-hand door, until the door is closed again. This 5,000btu unit works well for us and our 24 ft camper, but we have a super-insulated rig with just two, dual pane windows. If your rig is larger, less insulated, or has more windows that are single pane, you may want to use a 6, 8, 10, or 12btu unit. Or a mini-split, but is any case, it will be MUCH more efficient than an RV Roof AC! – and,…you’ll have all that extra roof real estate to generate a lot more power to run it!