Cabinets
The cabinets will be one of the last things to be built, after all of the infrastructure projects are completed. Although here are the two exceptions, the two wall cabinets which needed to be built early for use on short trips before the van is complete, and also to have the look and structural design decided on early to have it settled.
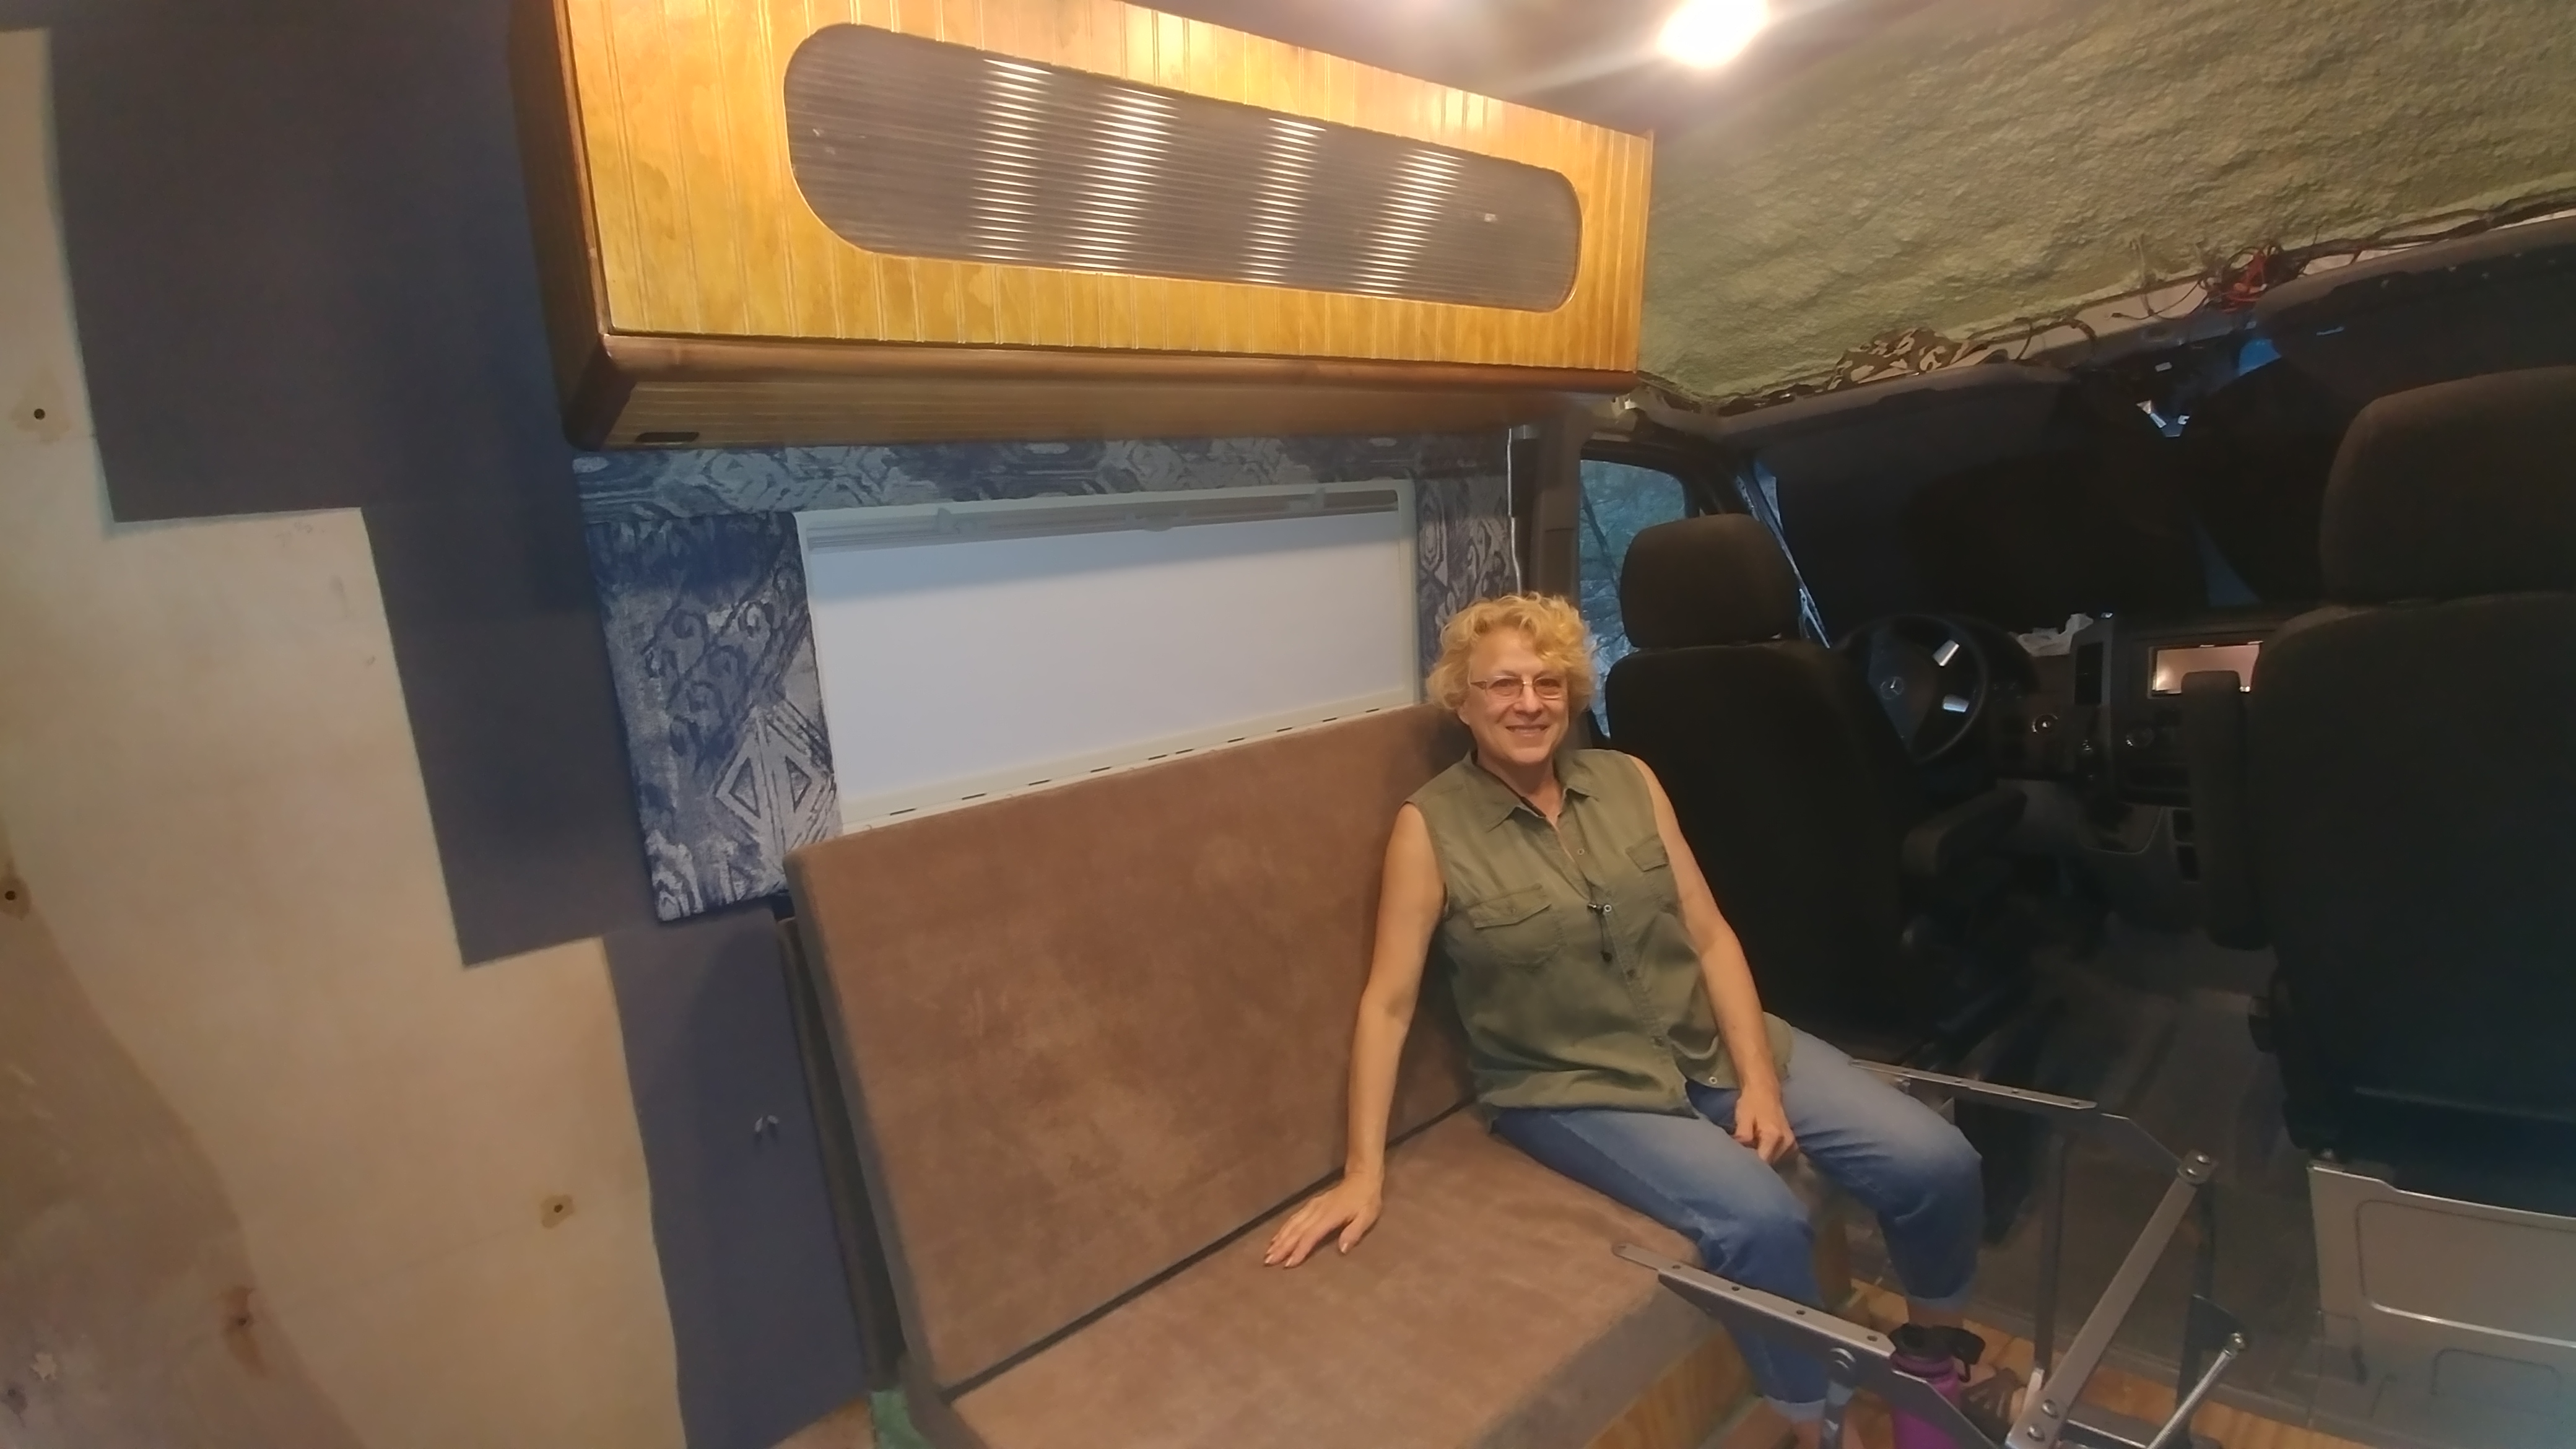
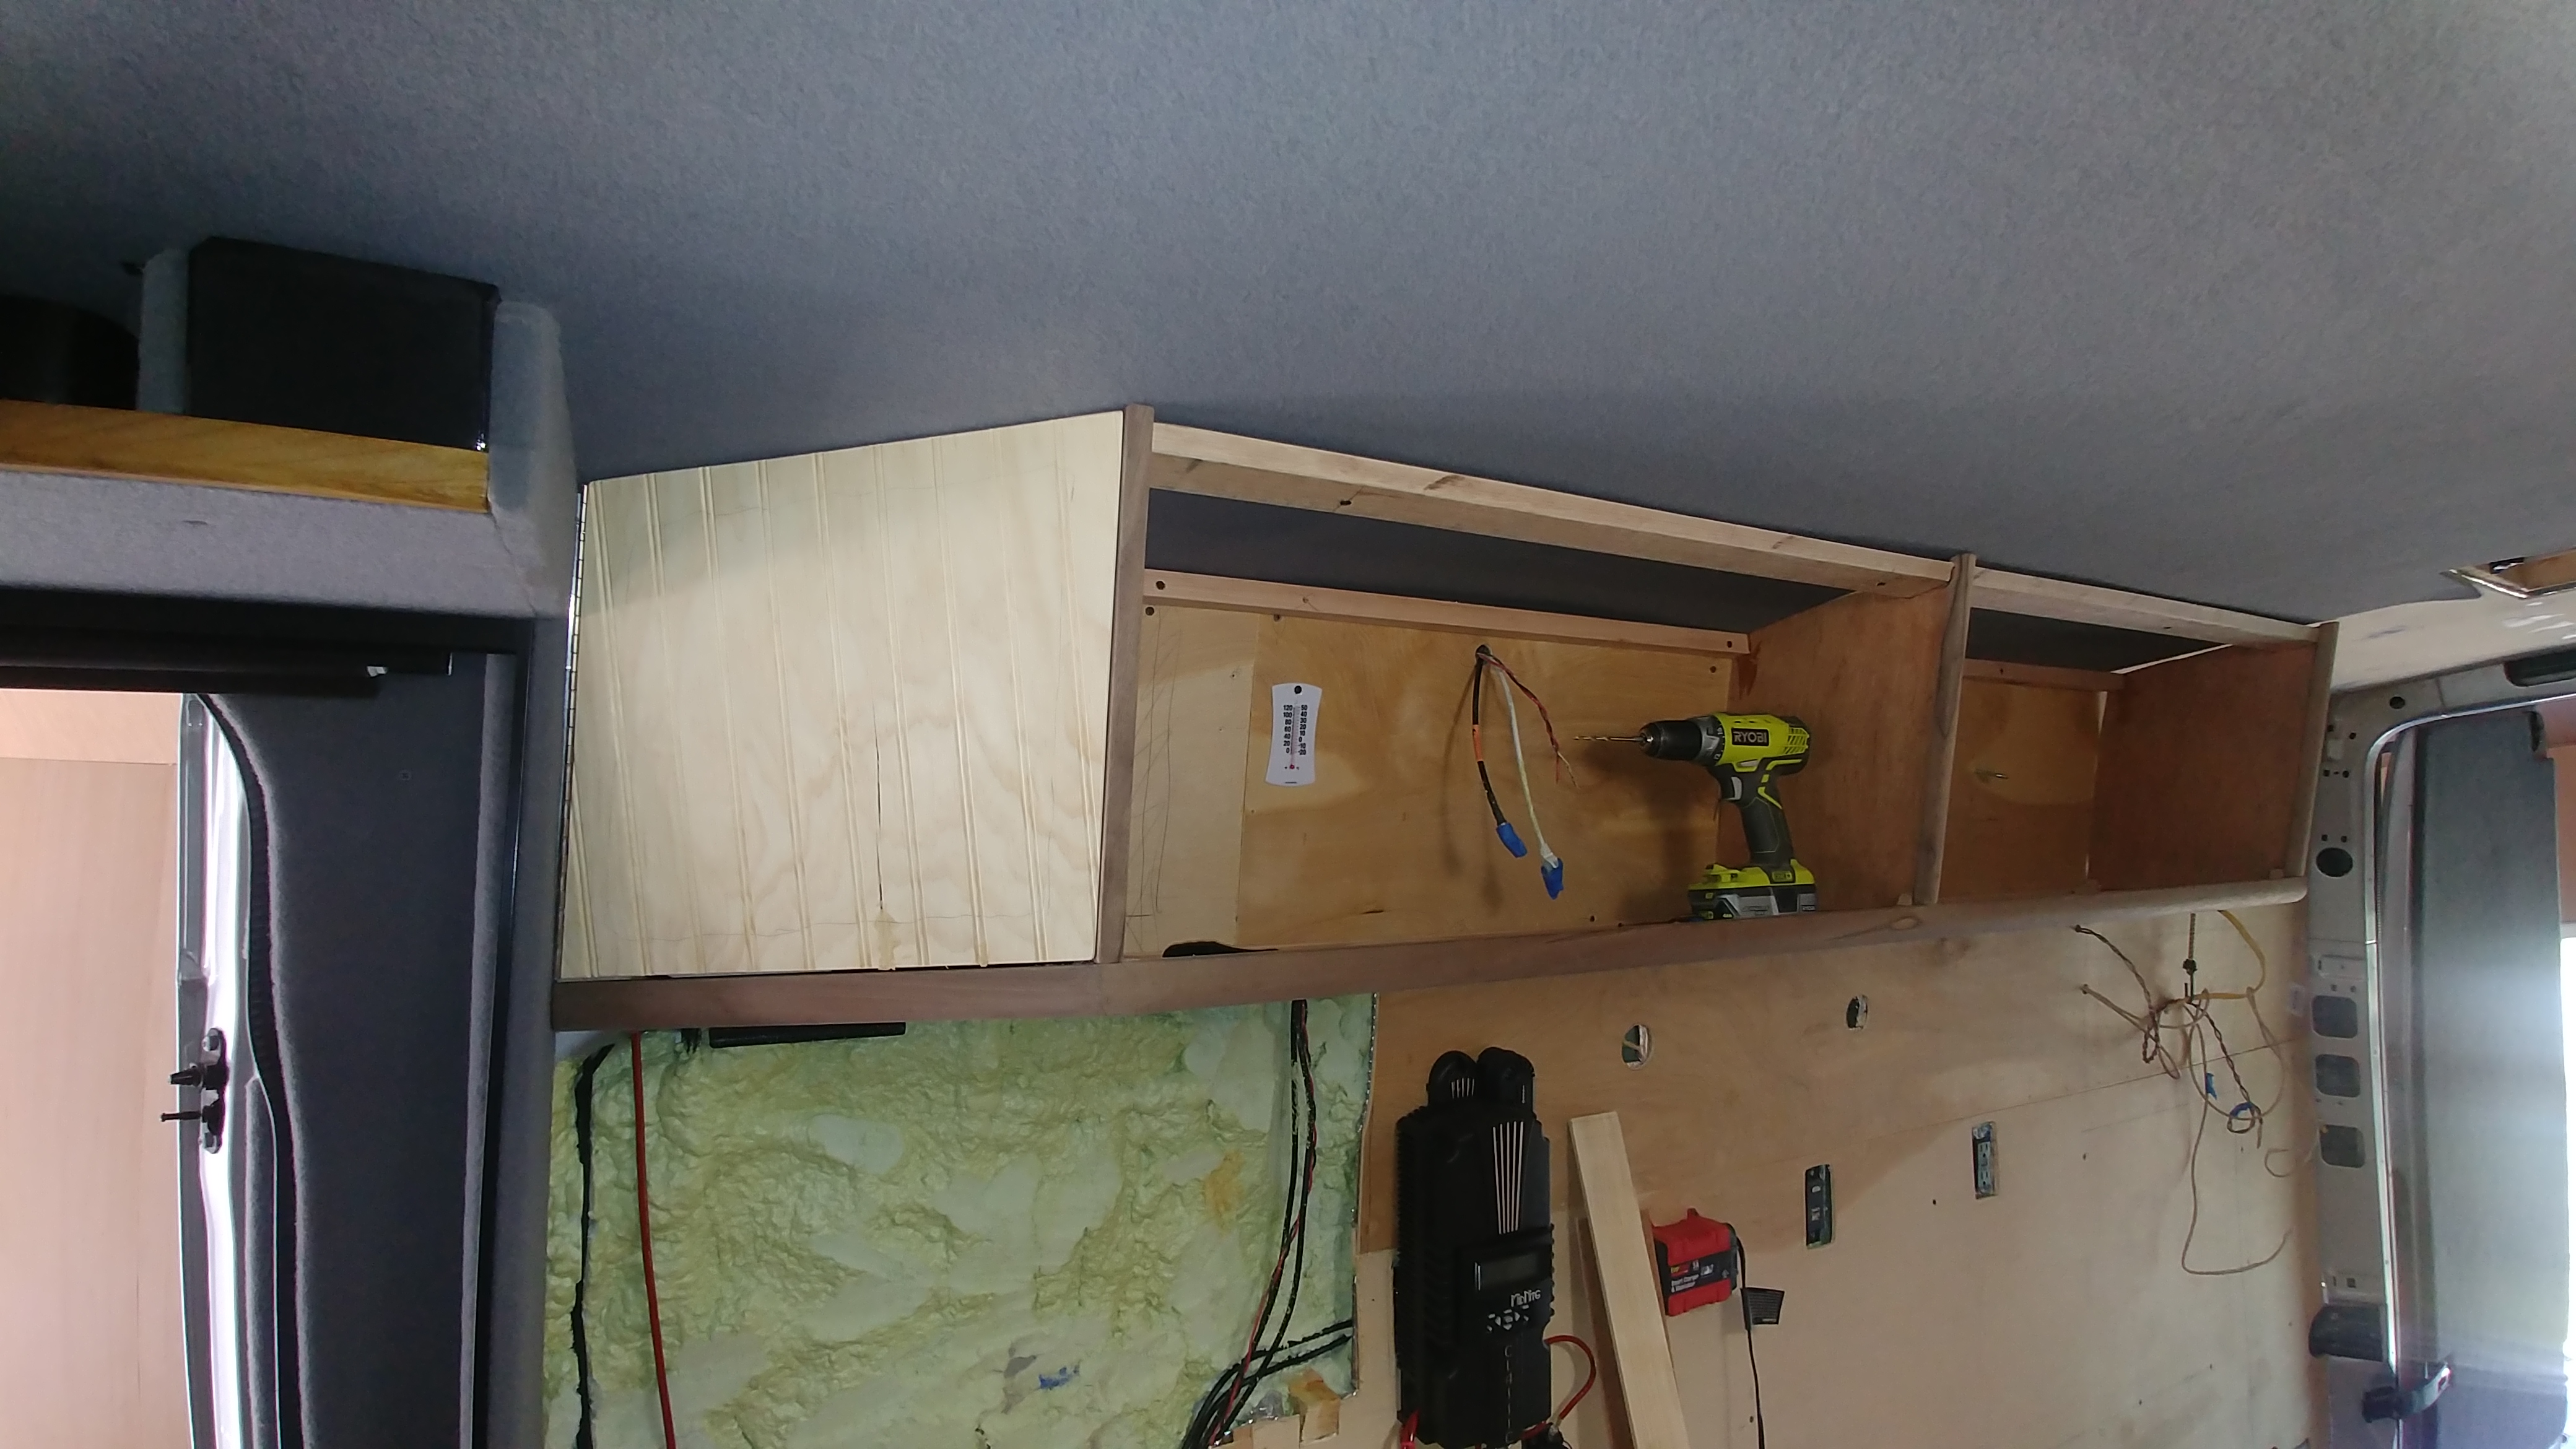
The cabinets will be custom made from birch bead board and solid walnut frames for high strength and low weight. Stained with golden oak Minwax stain, and coated with polyurethane semi-gloss for light, bright authentic wood aesthetic and good durability. Some units will have corrugated clear acrylic windows with oval end patterns like this one. This 5′ wall cabinet and door has no center support as it is designed to hold the bedding that will be rolled up, instead of folded, for quick and easy deployment.
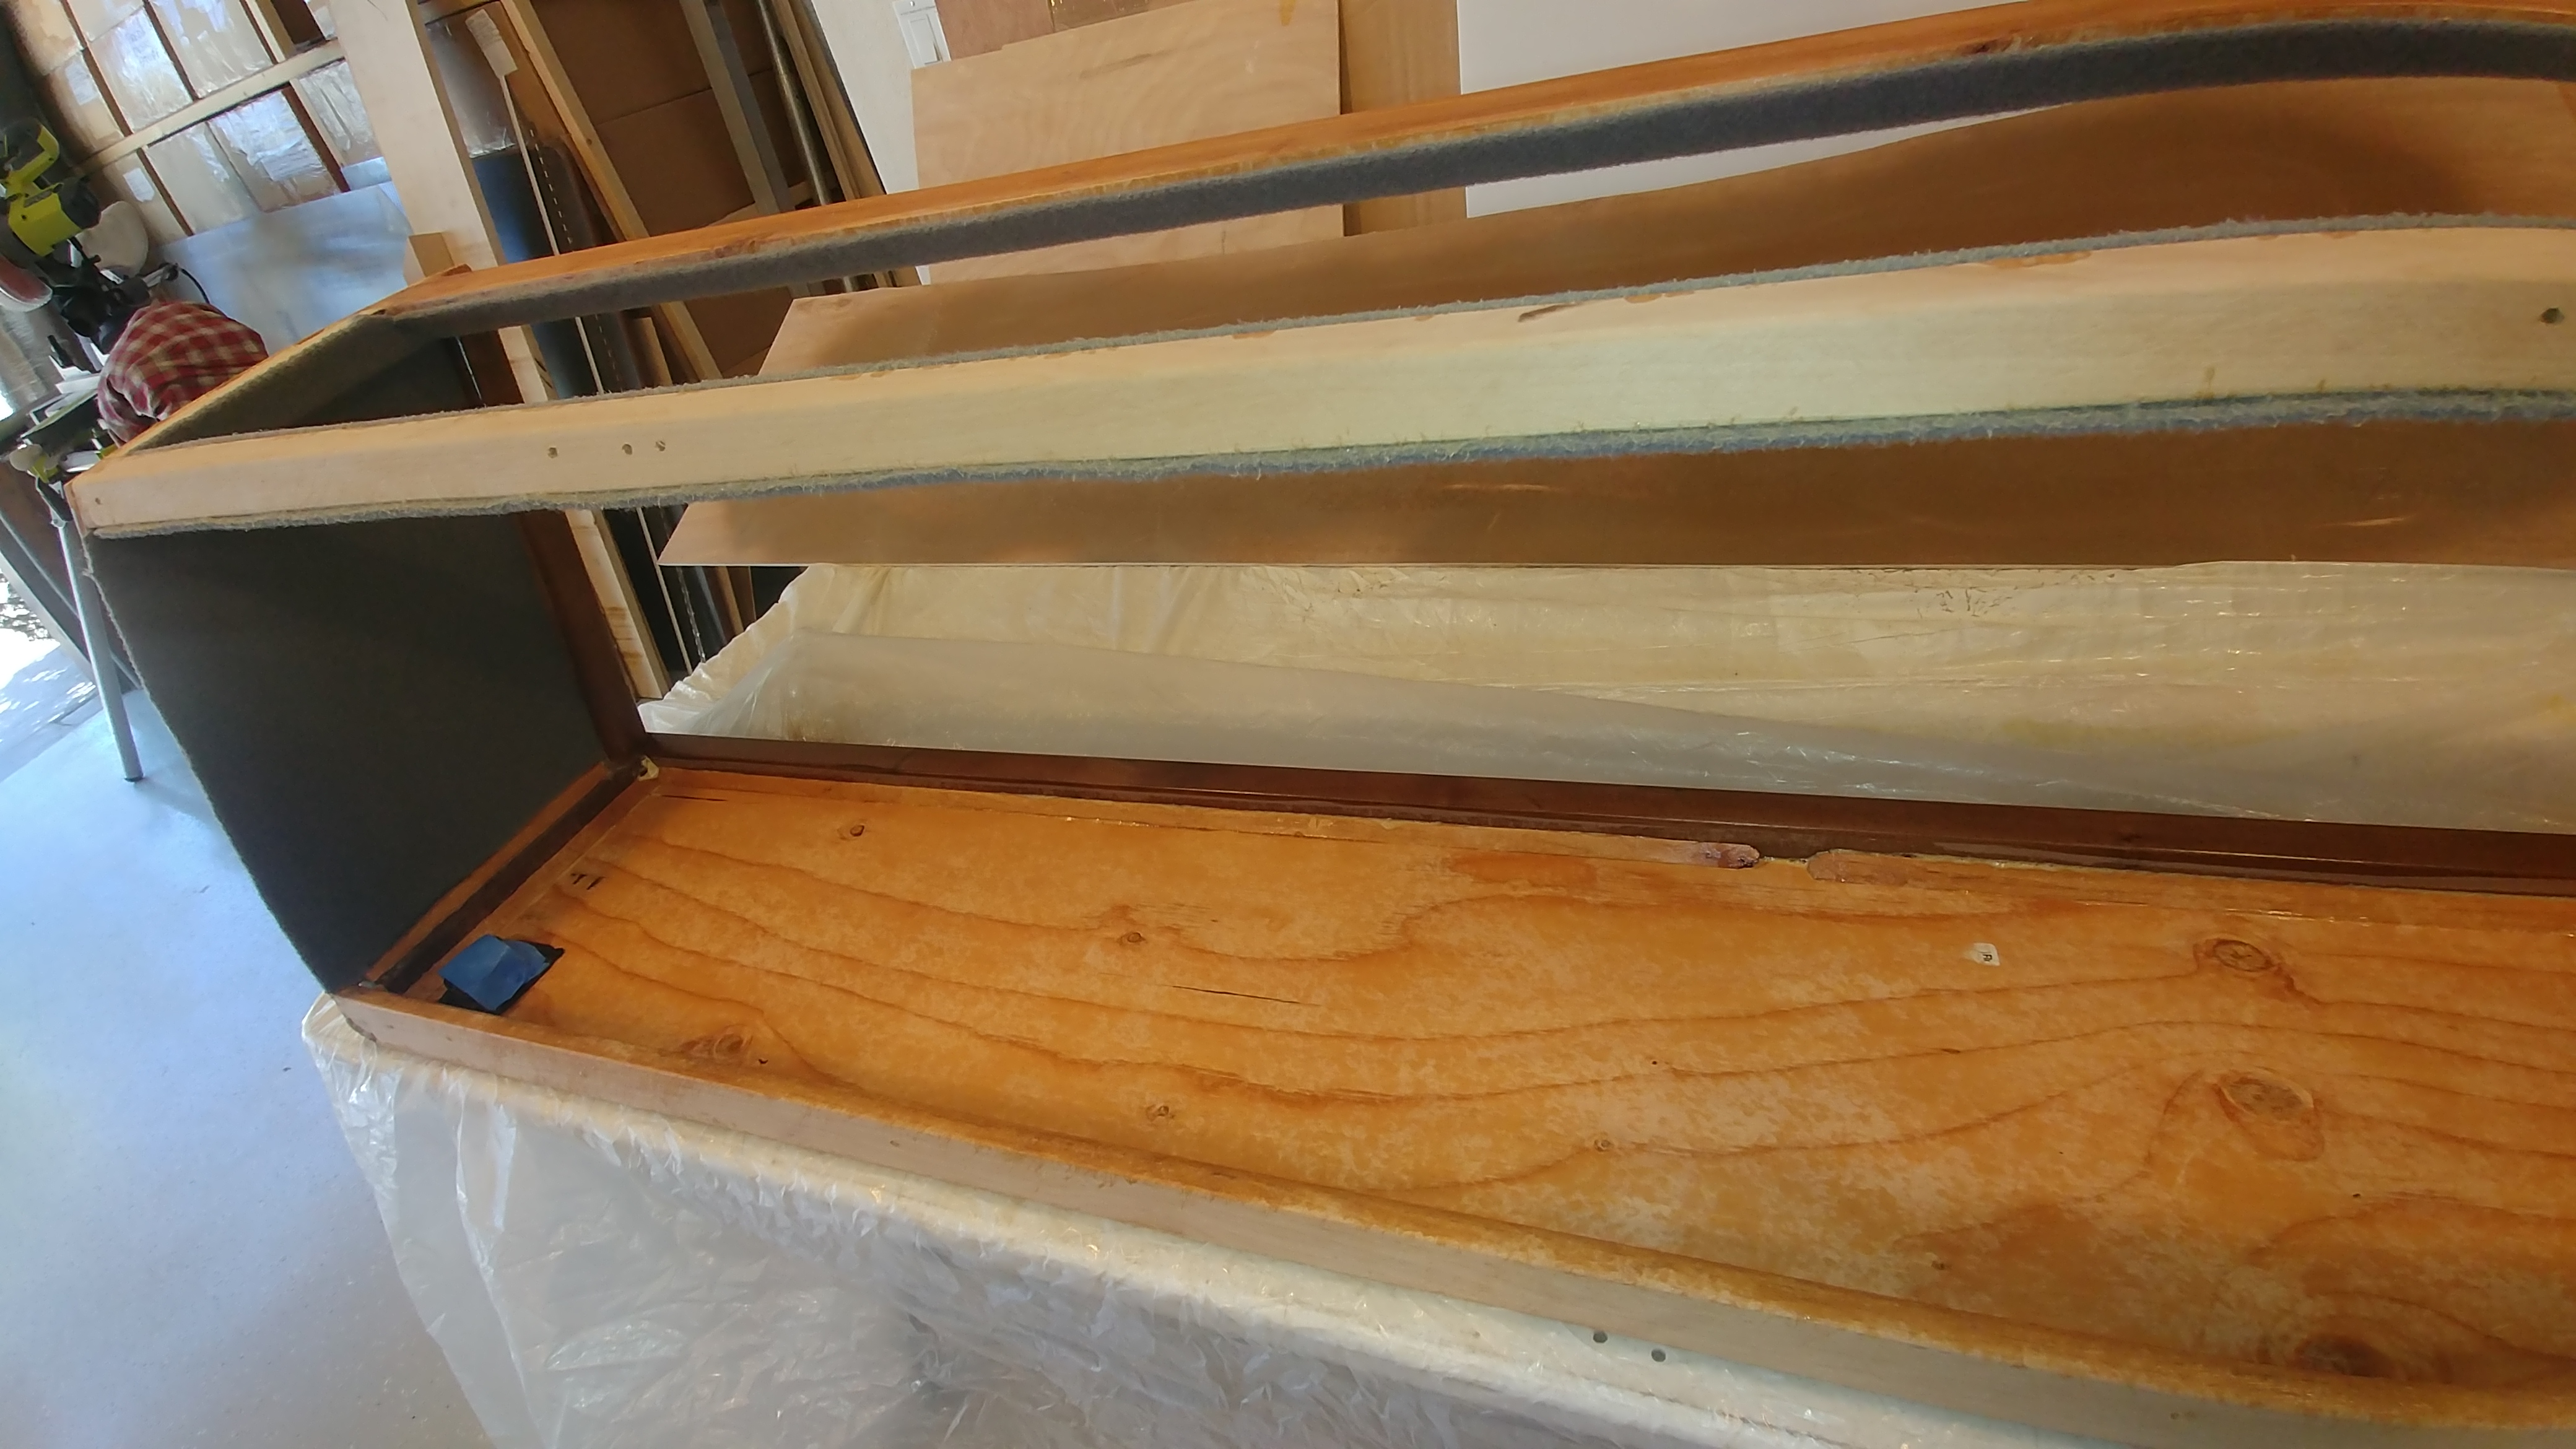
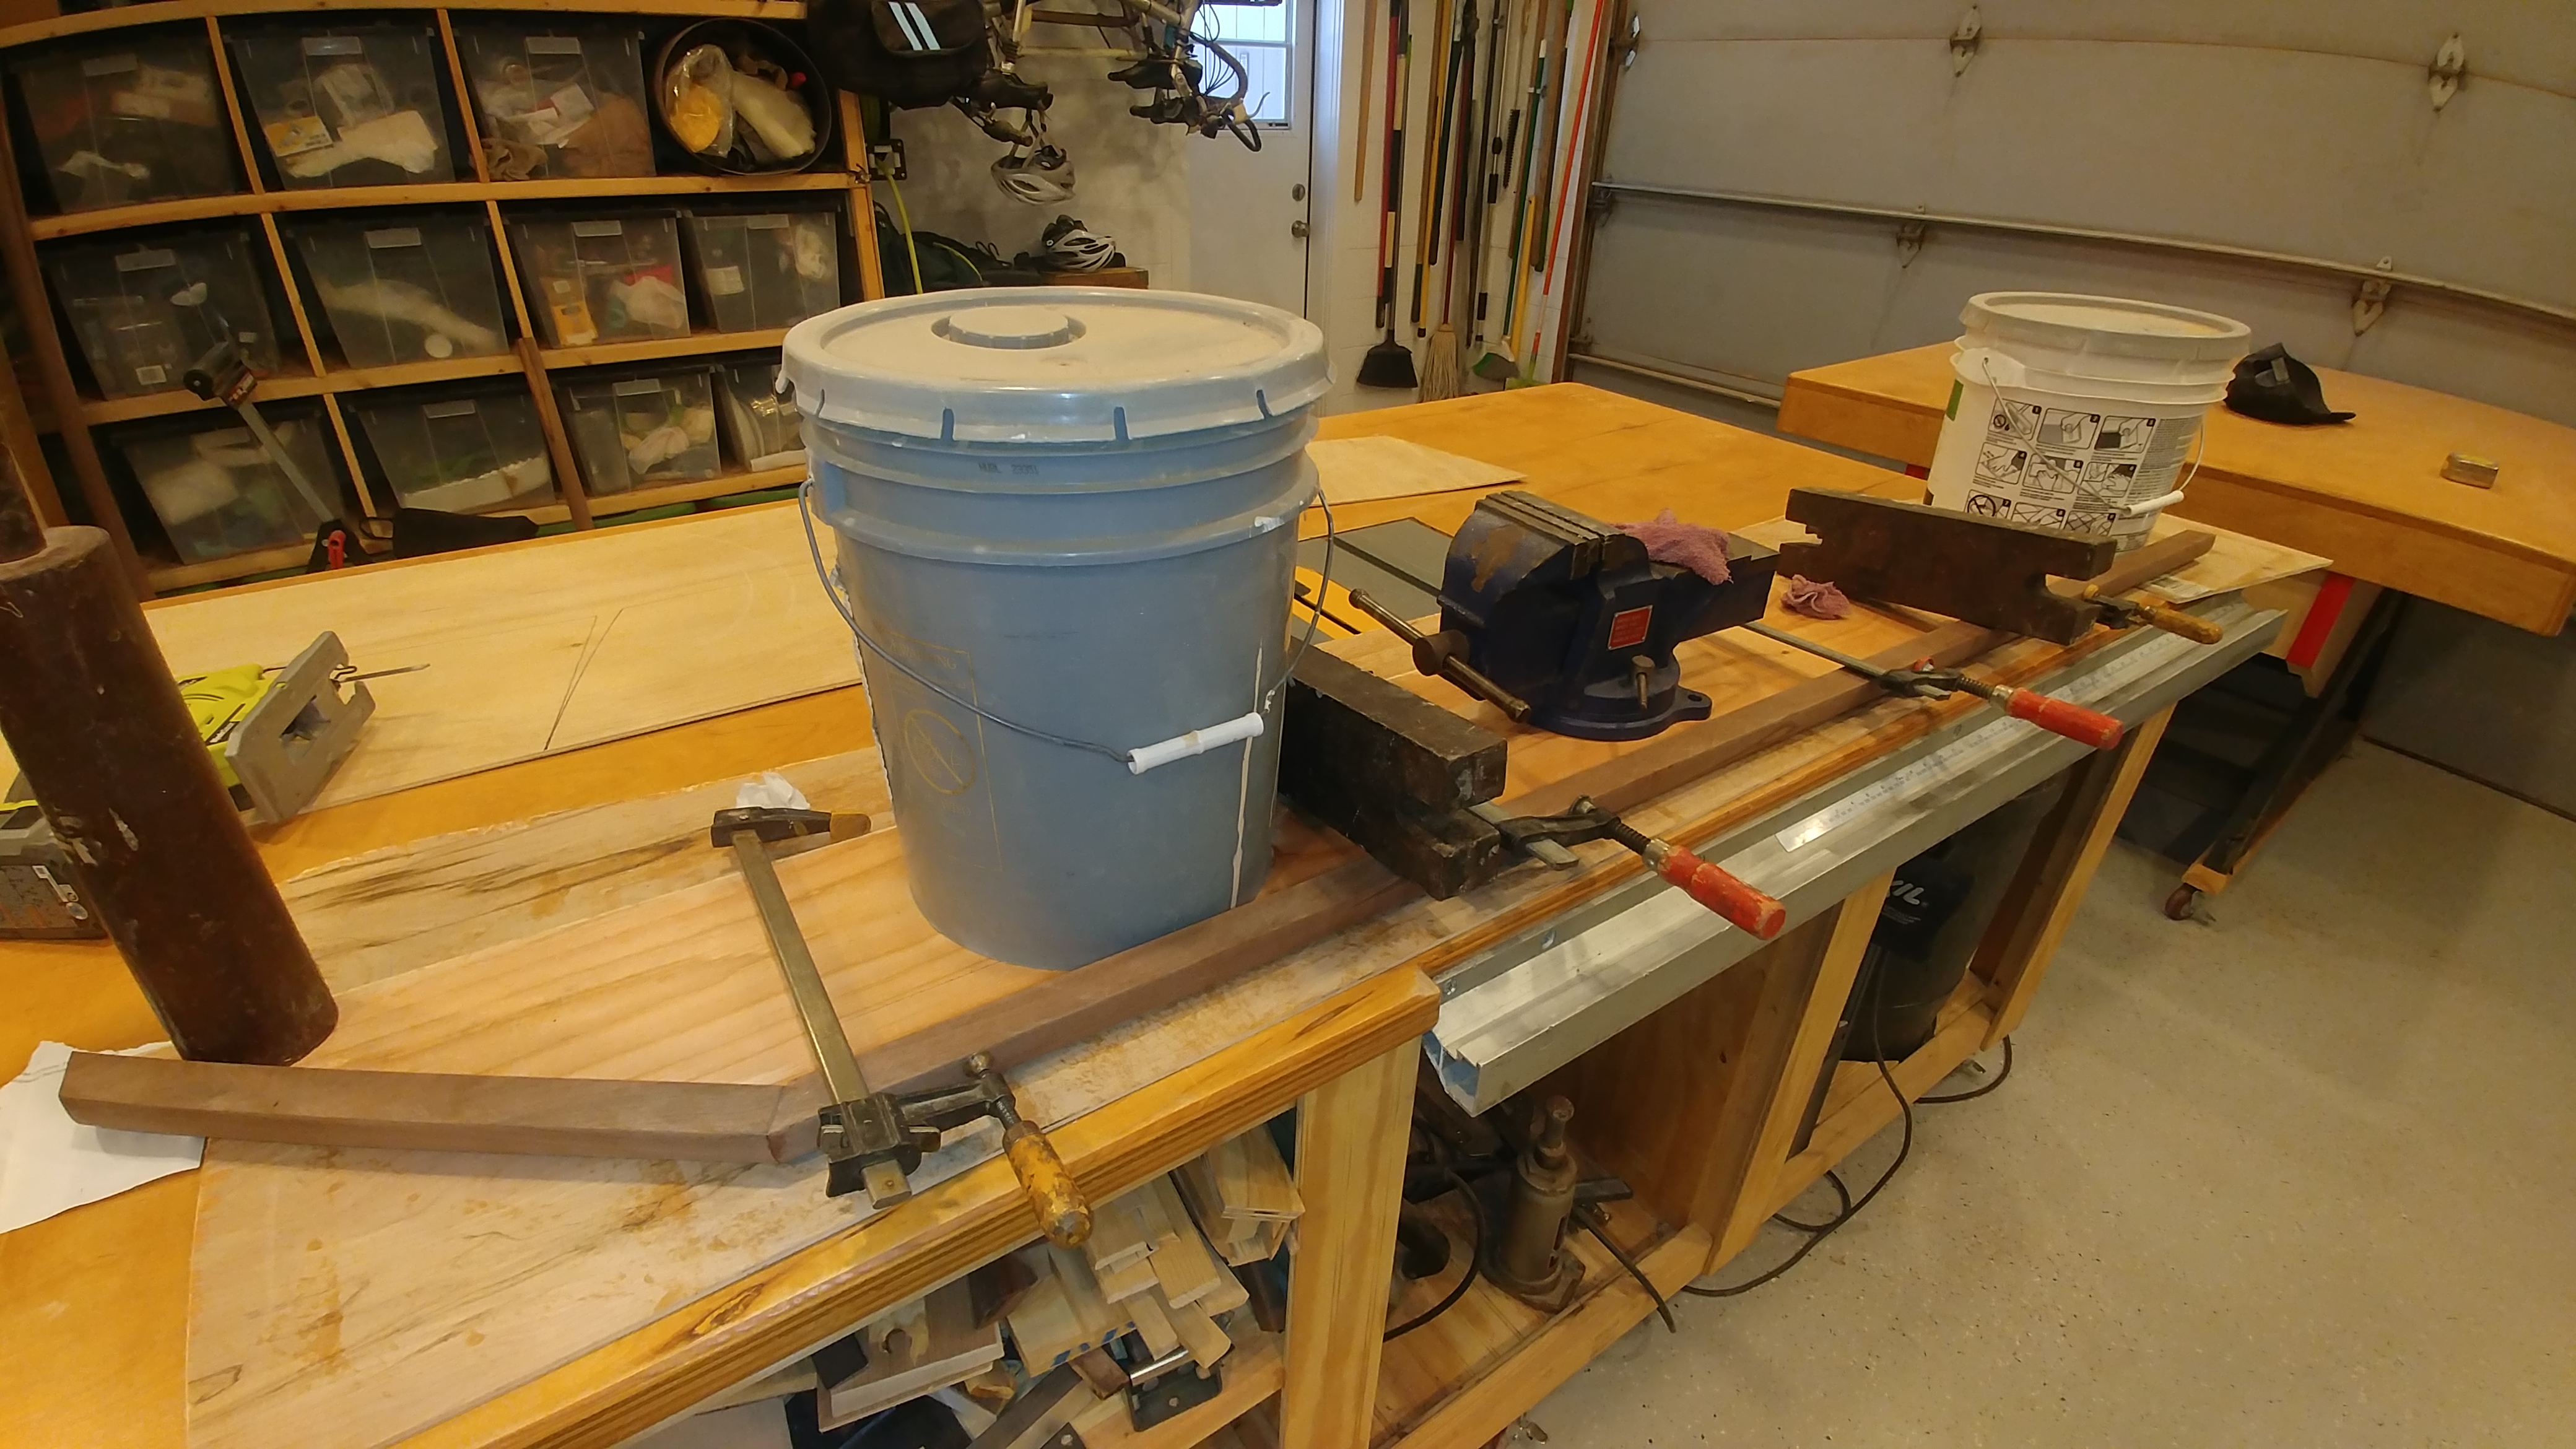
The 3/8″ plywood beadboard is strong enough on it’s own for large panels, but needs to have a stronger framework around it to mount securely to the walls and hold possible heavy weights of gear. Here you see the hardwood struts and support framework which gets fastened to the walls into the internal wall “studs” of metal and wooden firring strips that were all planned out initially. Notice no additional wall segments are used where there will be the walls themselves, in order to not duplicate and create unnecesary additional weight.
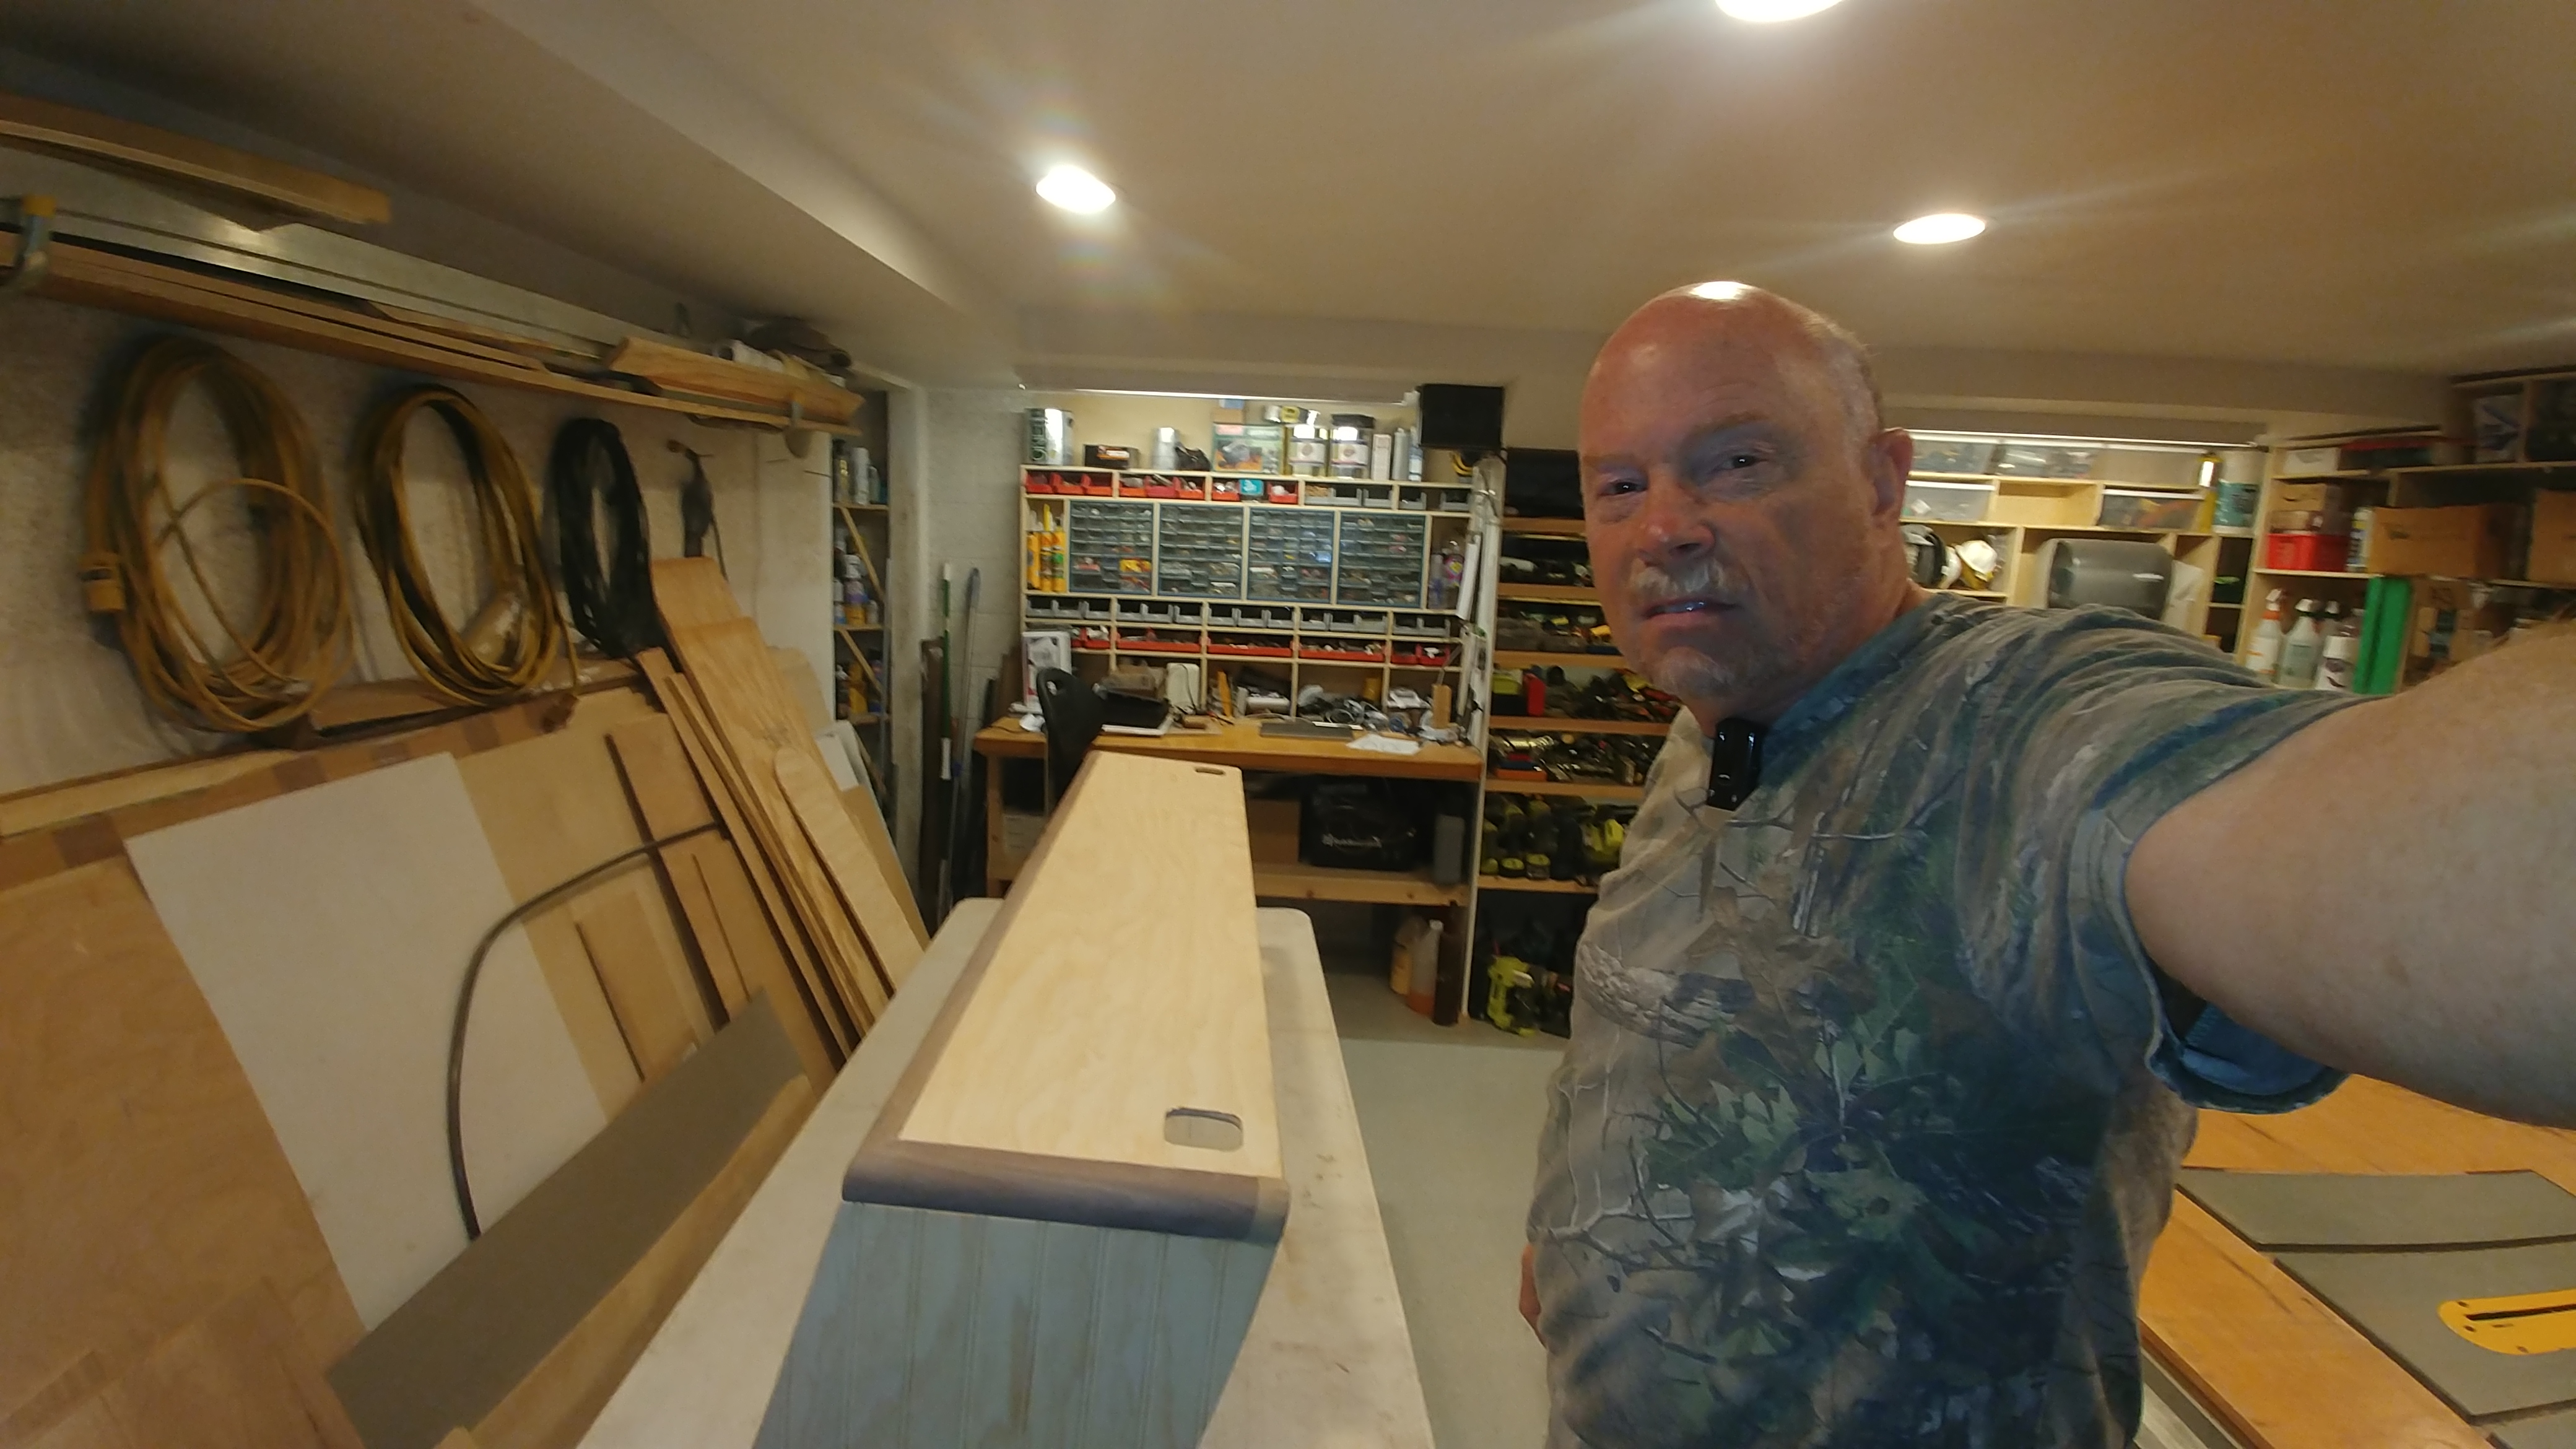
The cabinets are built in the shop using templates carefully created that match the compound angles of the van. 1 1/4″ radiused solid walnut face supports add a designer touch of real wood color, and with the wide radius, they hurt your head a lot less if you smack into them. Ask me how I know. This cabinet also houses the tiny surround speakers for the home theater system that you can see in the photo, on the upper face (which will be the lower when mounted on the wall).
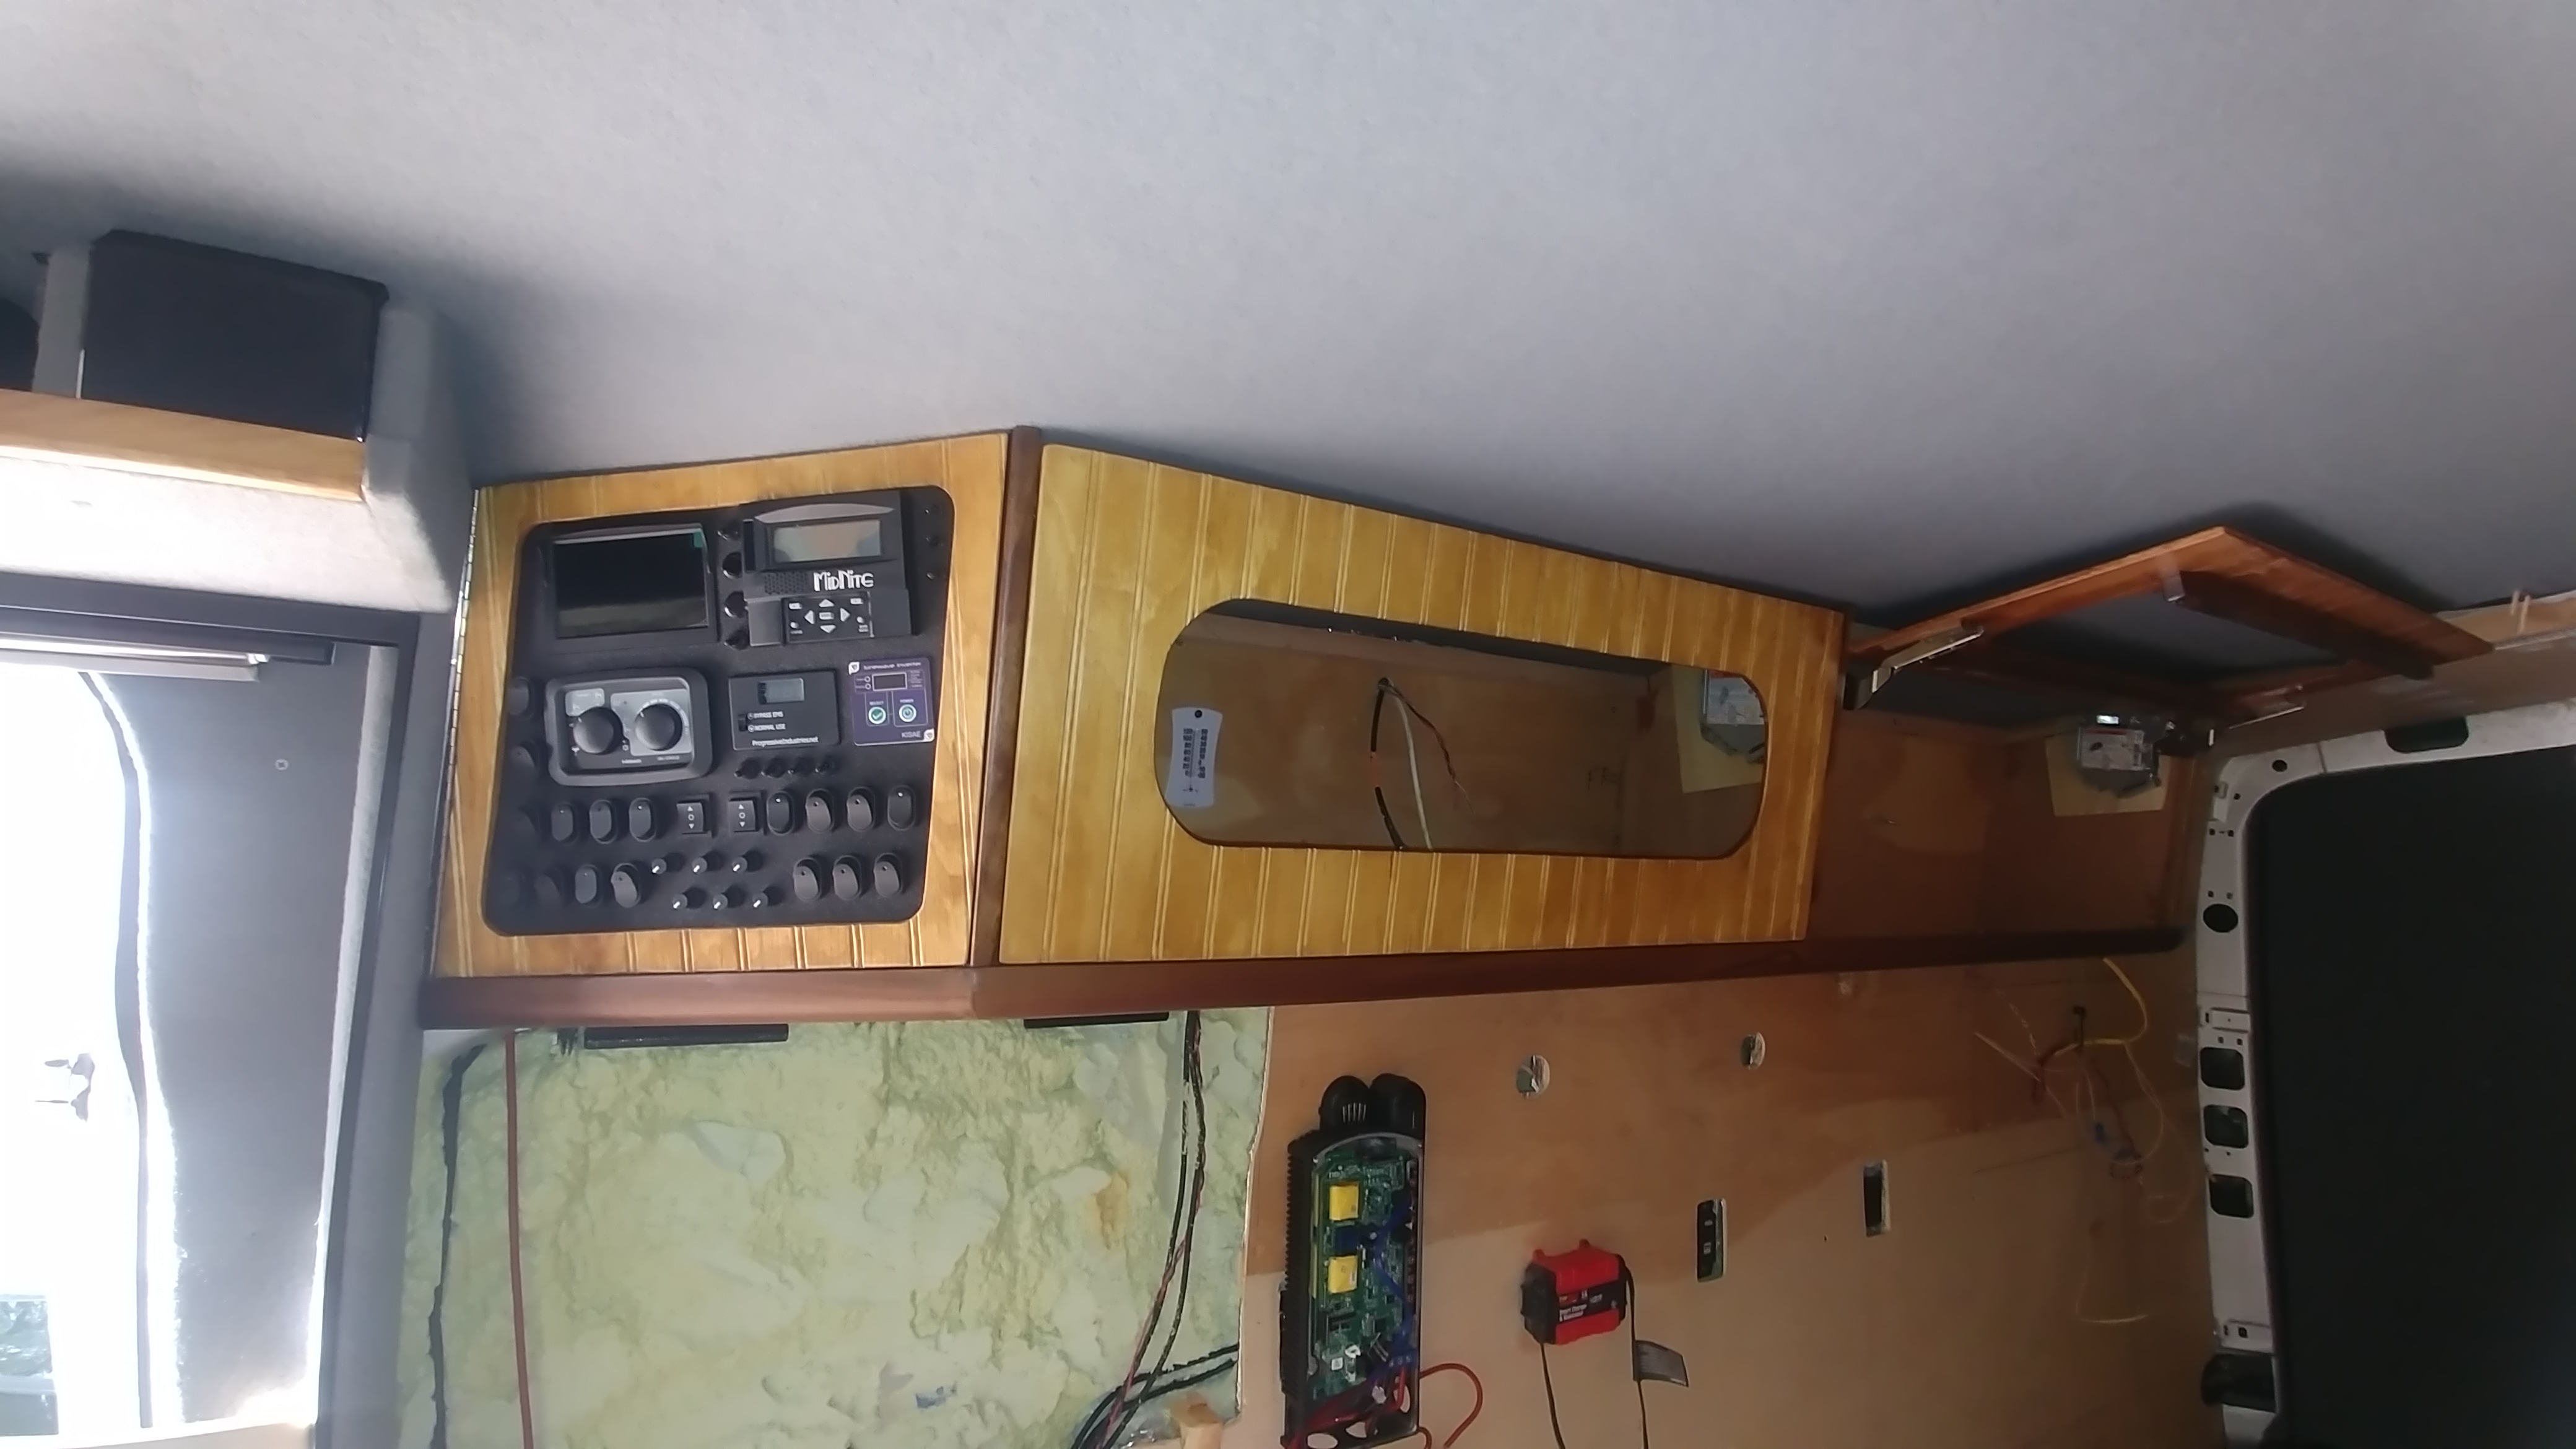
Mock up of upper galley wall cabinet to design size, shape, etc. Original plan was have a 45 degree angle on the left hand end of both the base cabinet and wall cabinet to aid entry and create a little bit more space in the center of the van, since the center hallway, and everything, really, in a van camper is so crowded. But when I tried to have the upper cabinet be 45 degrees also, there wasn’t enough room for all of the controls and switches needed, and so it ended up being about 40 degrees. The base cabinet (and wardrobe accross from it) may still be at 45 though, as it doesn’t look out of place, and you really don’t notice they’re different.
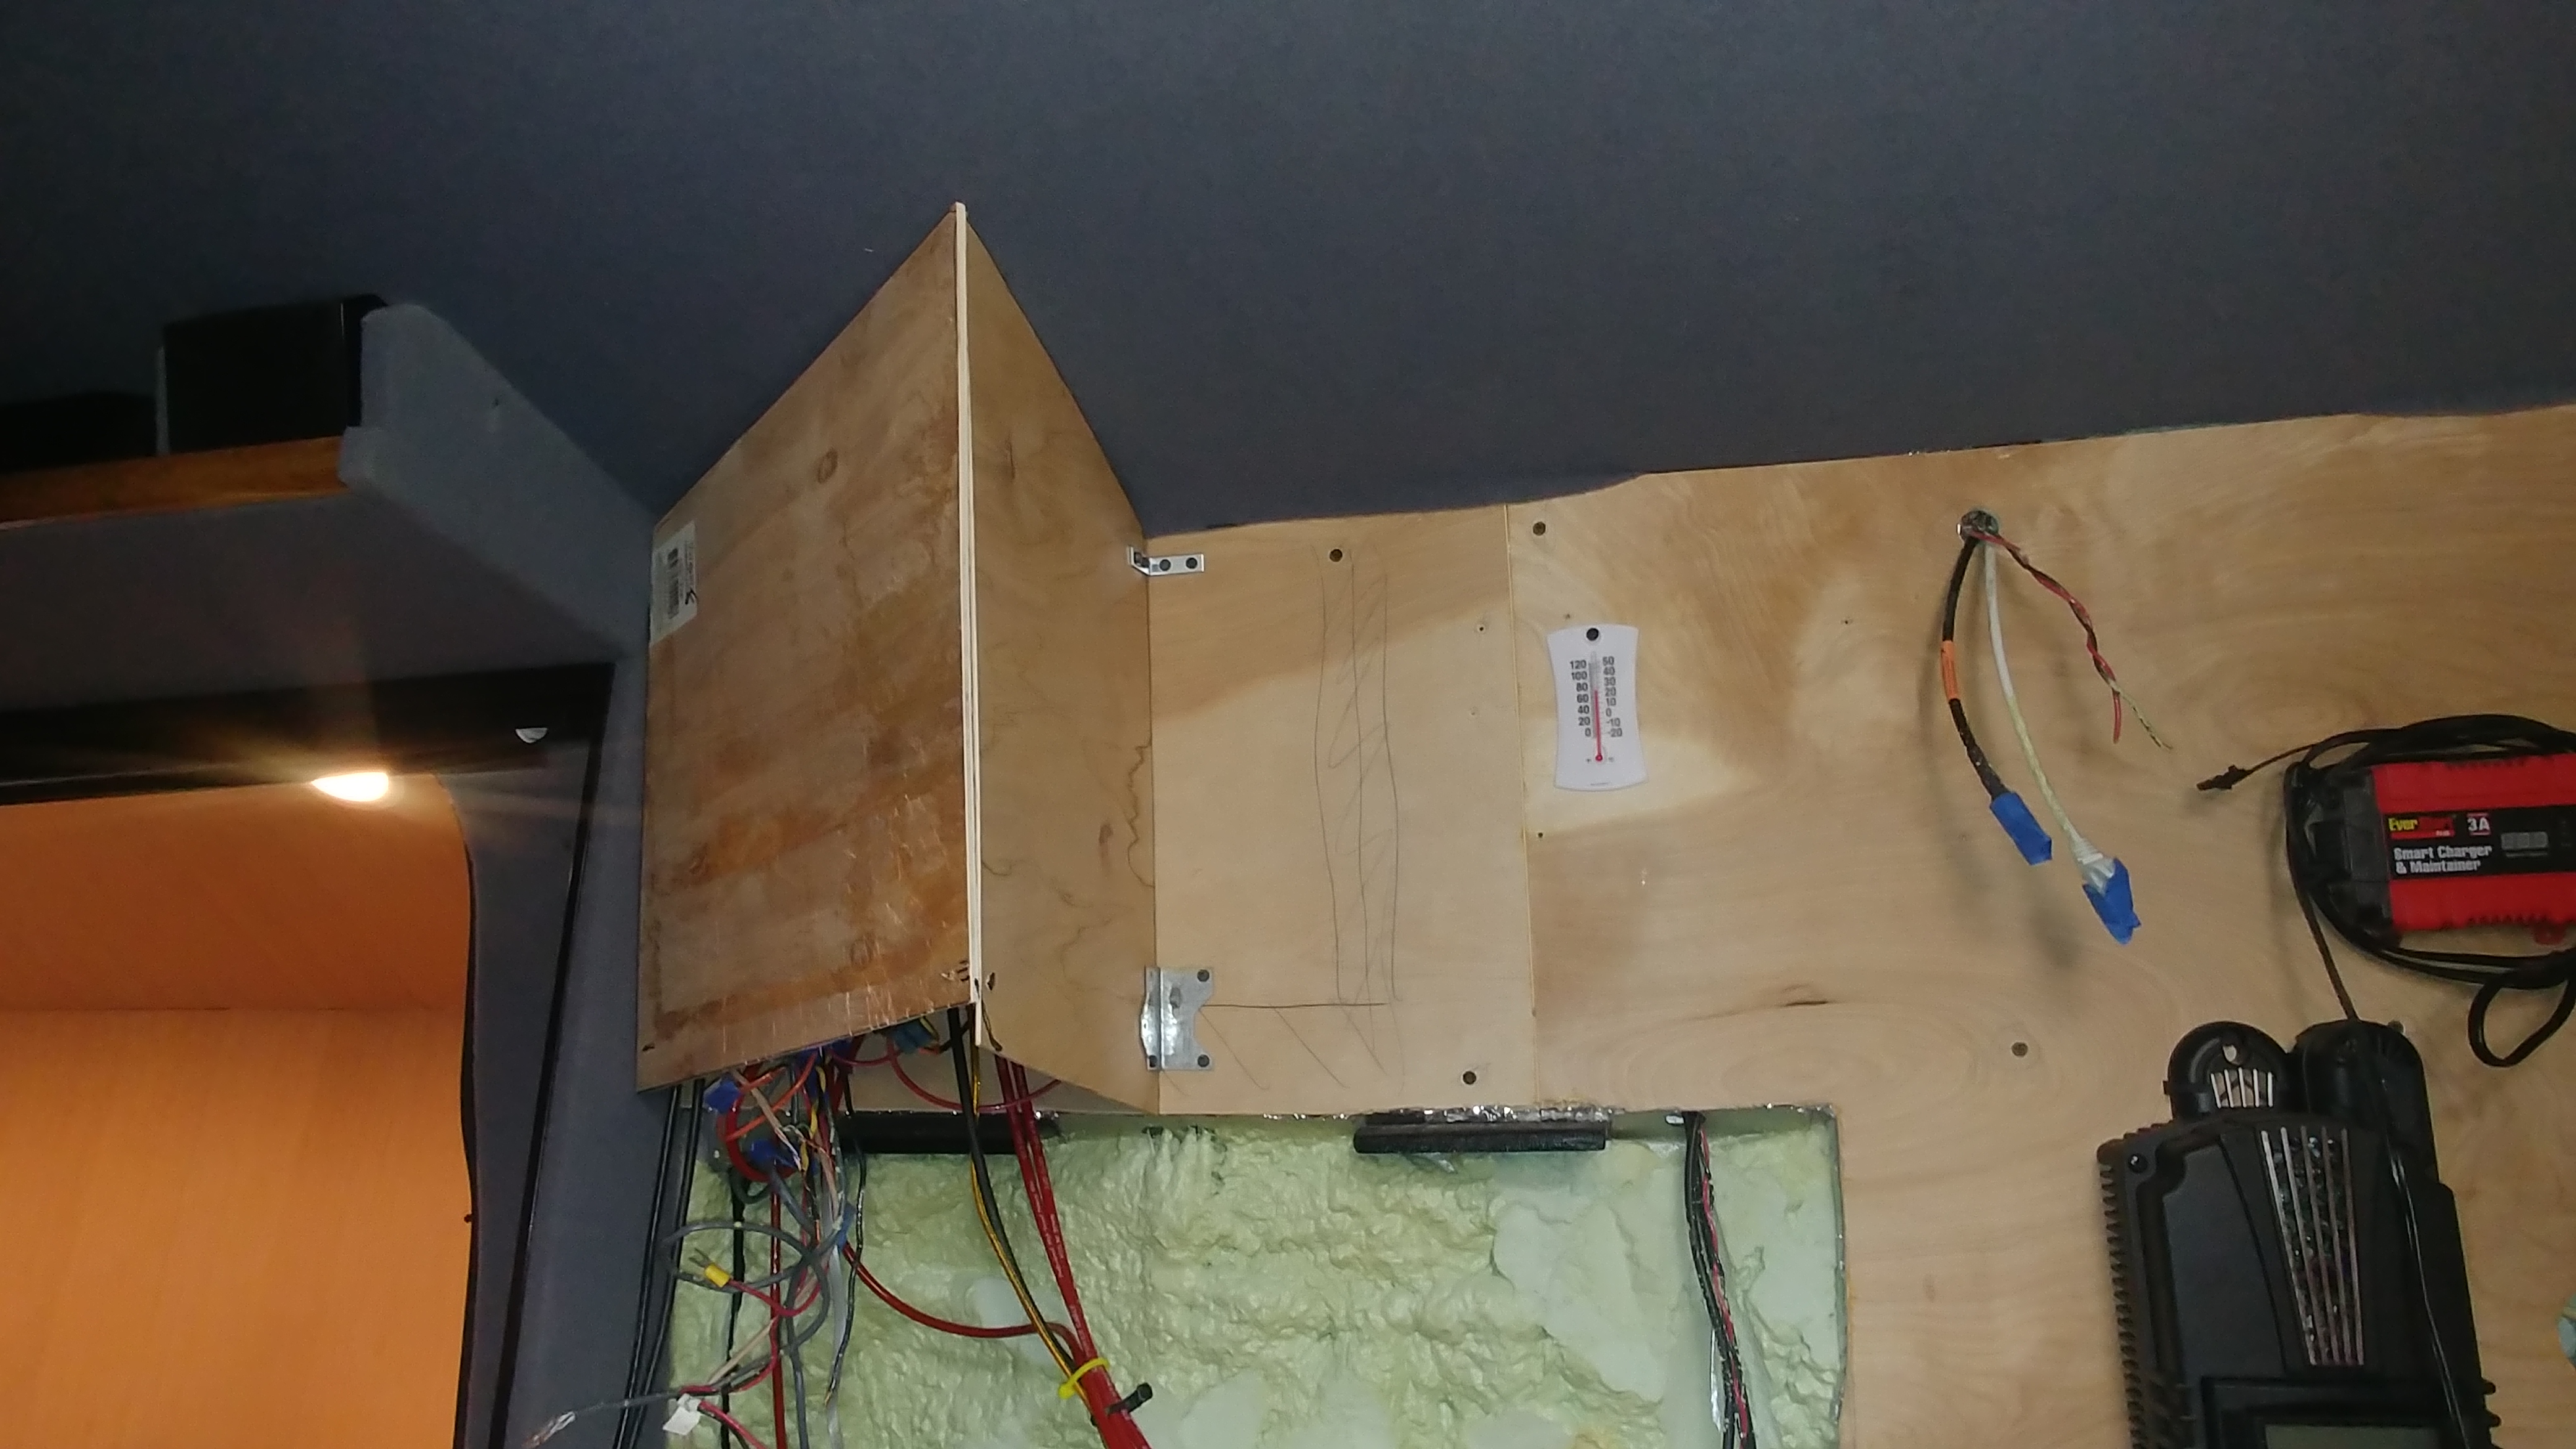
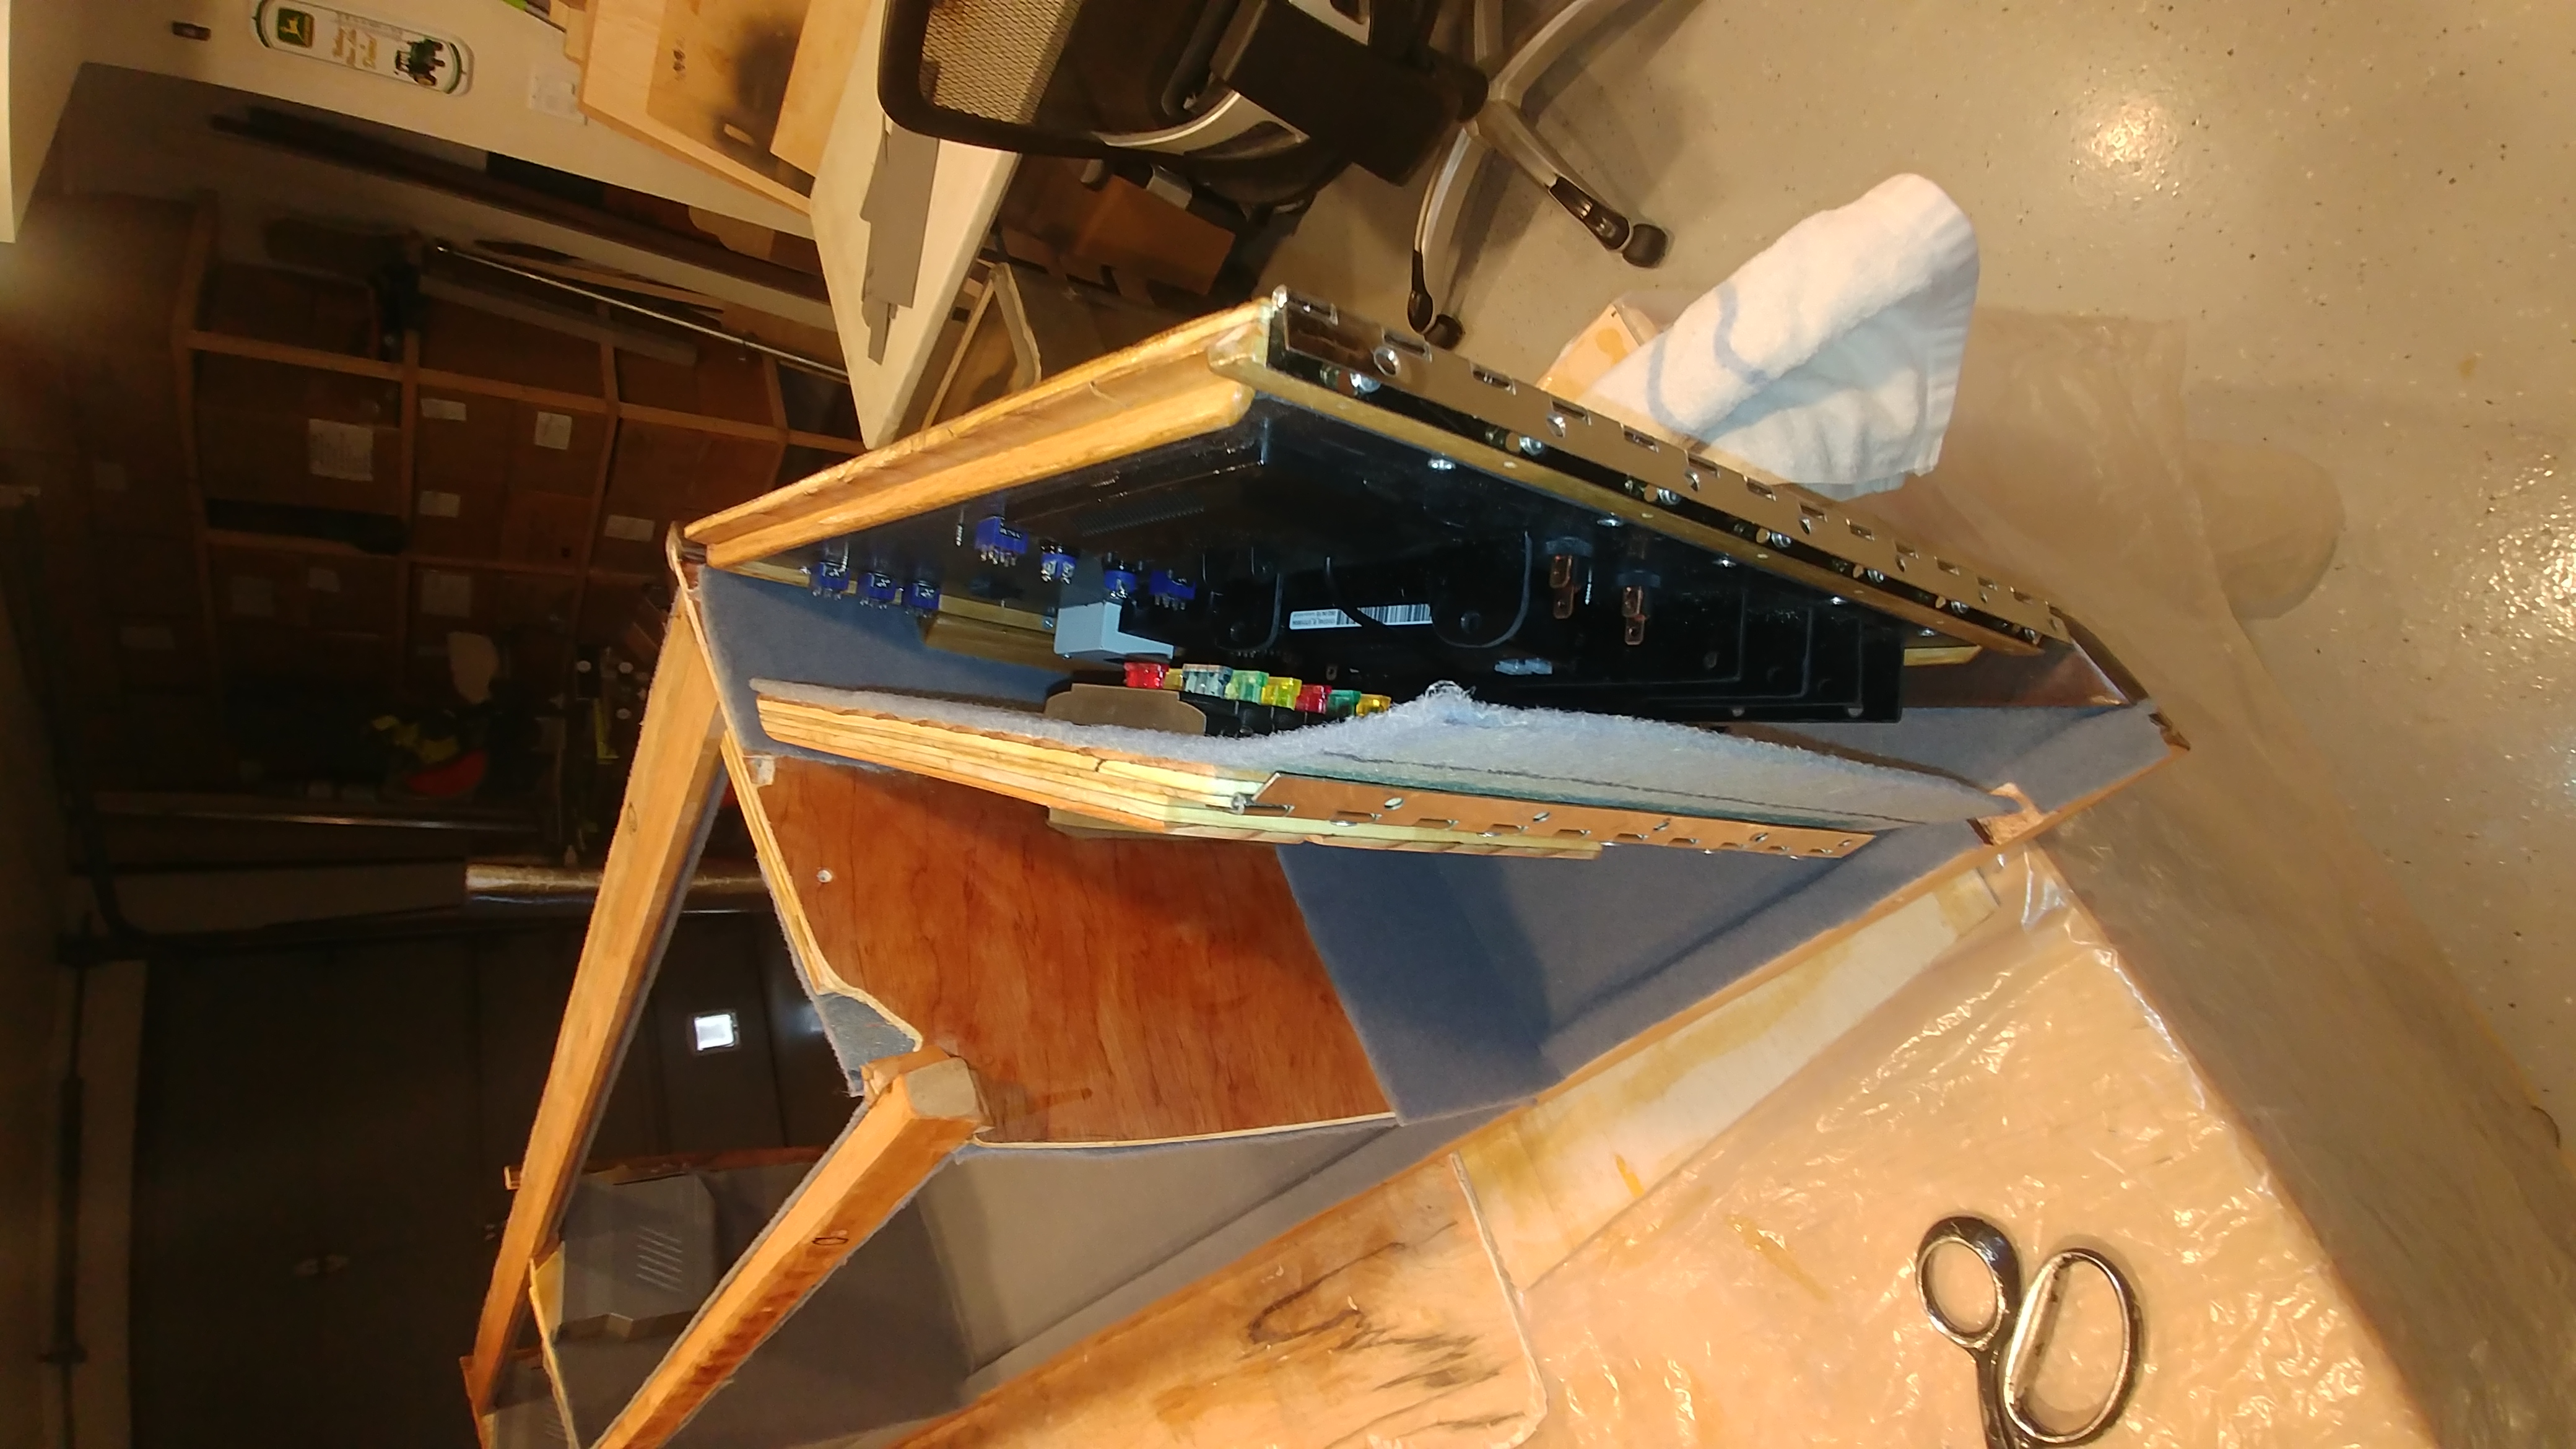
This is the start of the wall cabinet above the galley that houses the master control panel on the slanted end. The solid walnut front frame piece is made first which determines the exact angle. Then it’s glued onto the bottom piece of 3/8″ ply beadboard. All the weights and clamps are needed to ensure that everything stays straight while it all glues tightly together. Remember, polyurethane glue is your friend. Whether it’s Gorrila glue (clear) or Loctite 3x Premium construction adhesive, it will make the two pieces of wood ONE!
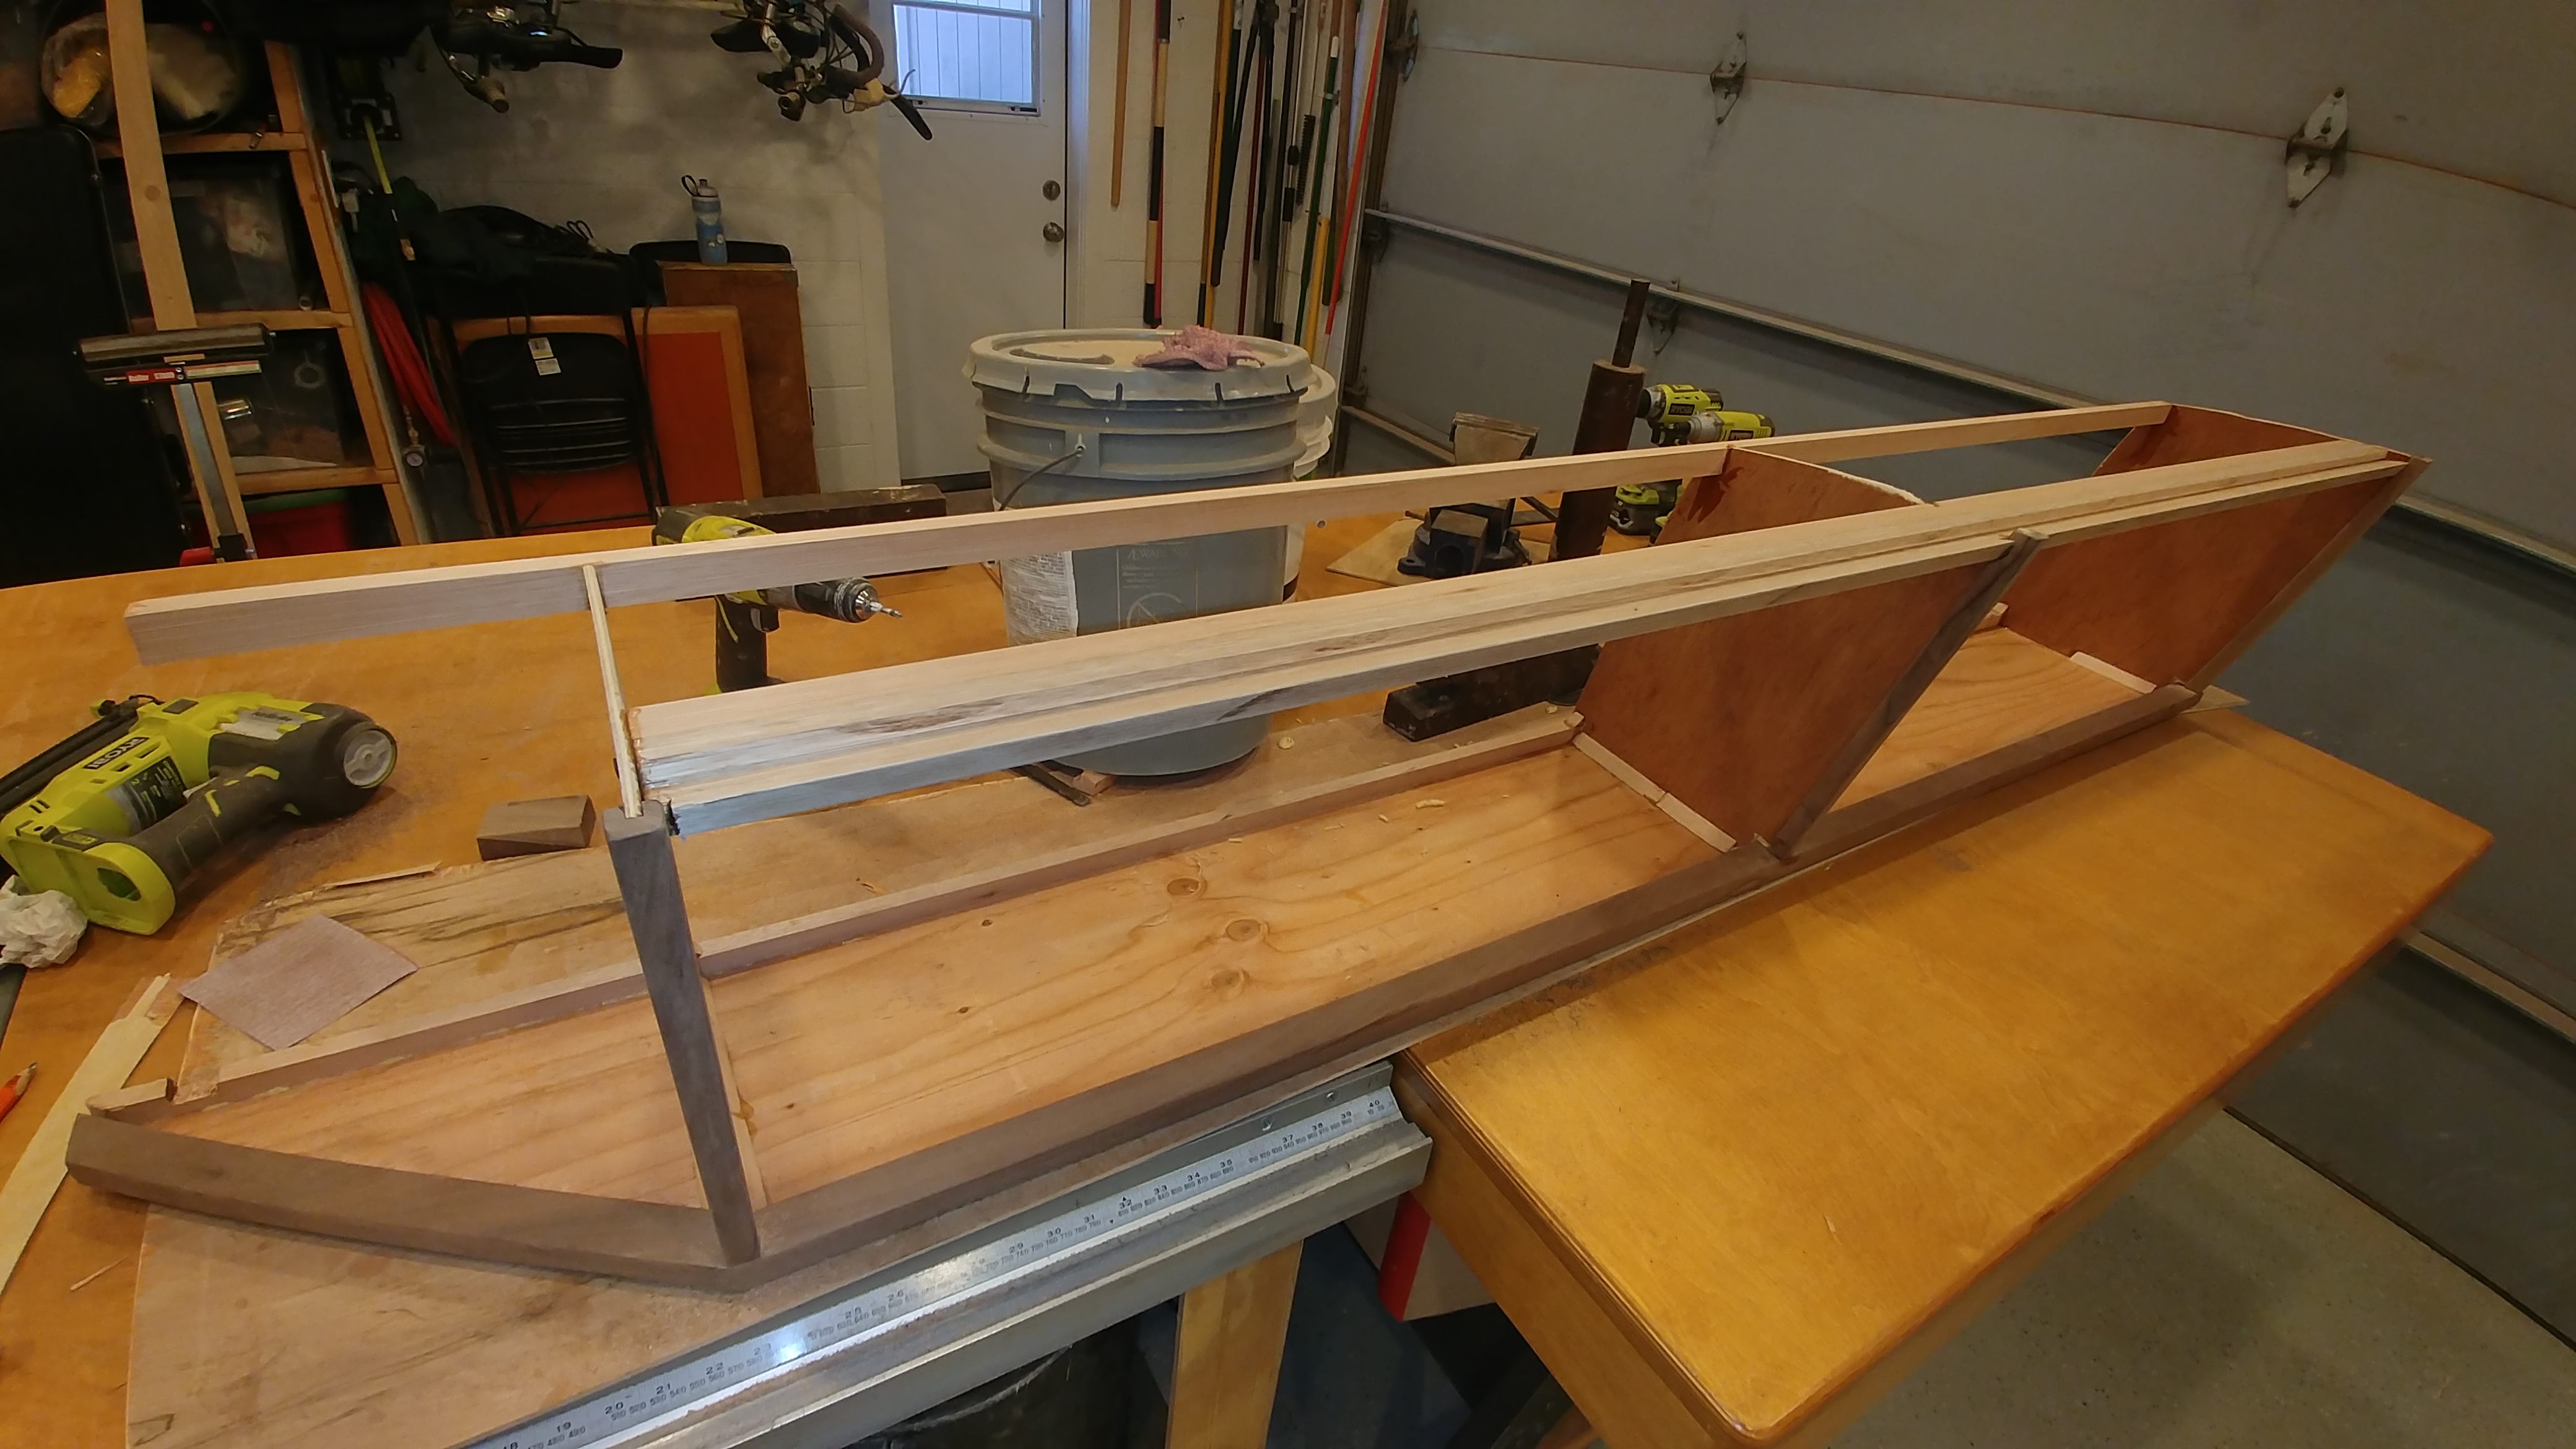
Next are the wall dividers with front edge trim/frame pieces of walnut, and then the larger cross member frame struts of hardwood that will be screwed to the ceiling and walls. All has to be completely straight so that the doors will fit perfectly. You can also see little angled pieces of hardwood glued to the tops and botoms of the 3/16″ dividers. The whole design is about achieving low weight and high strength. (and maximum storage space) The dado cut on the front edge of the top strut is for RGBW indirect ceiling lights.
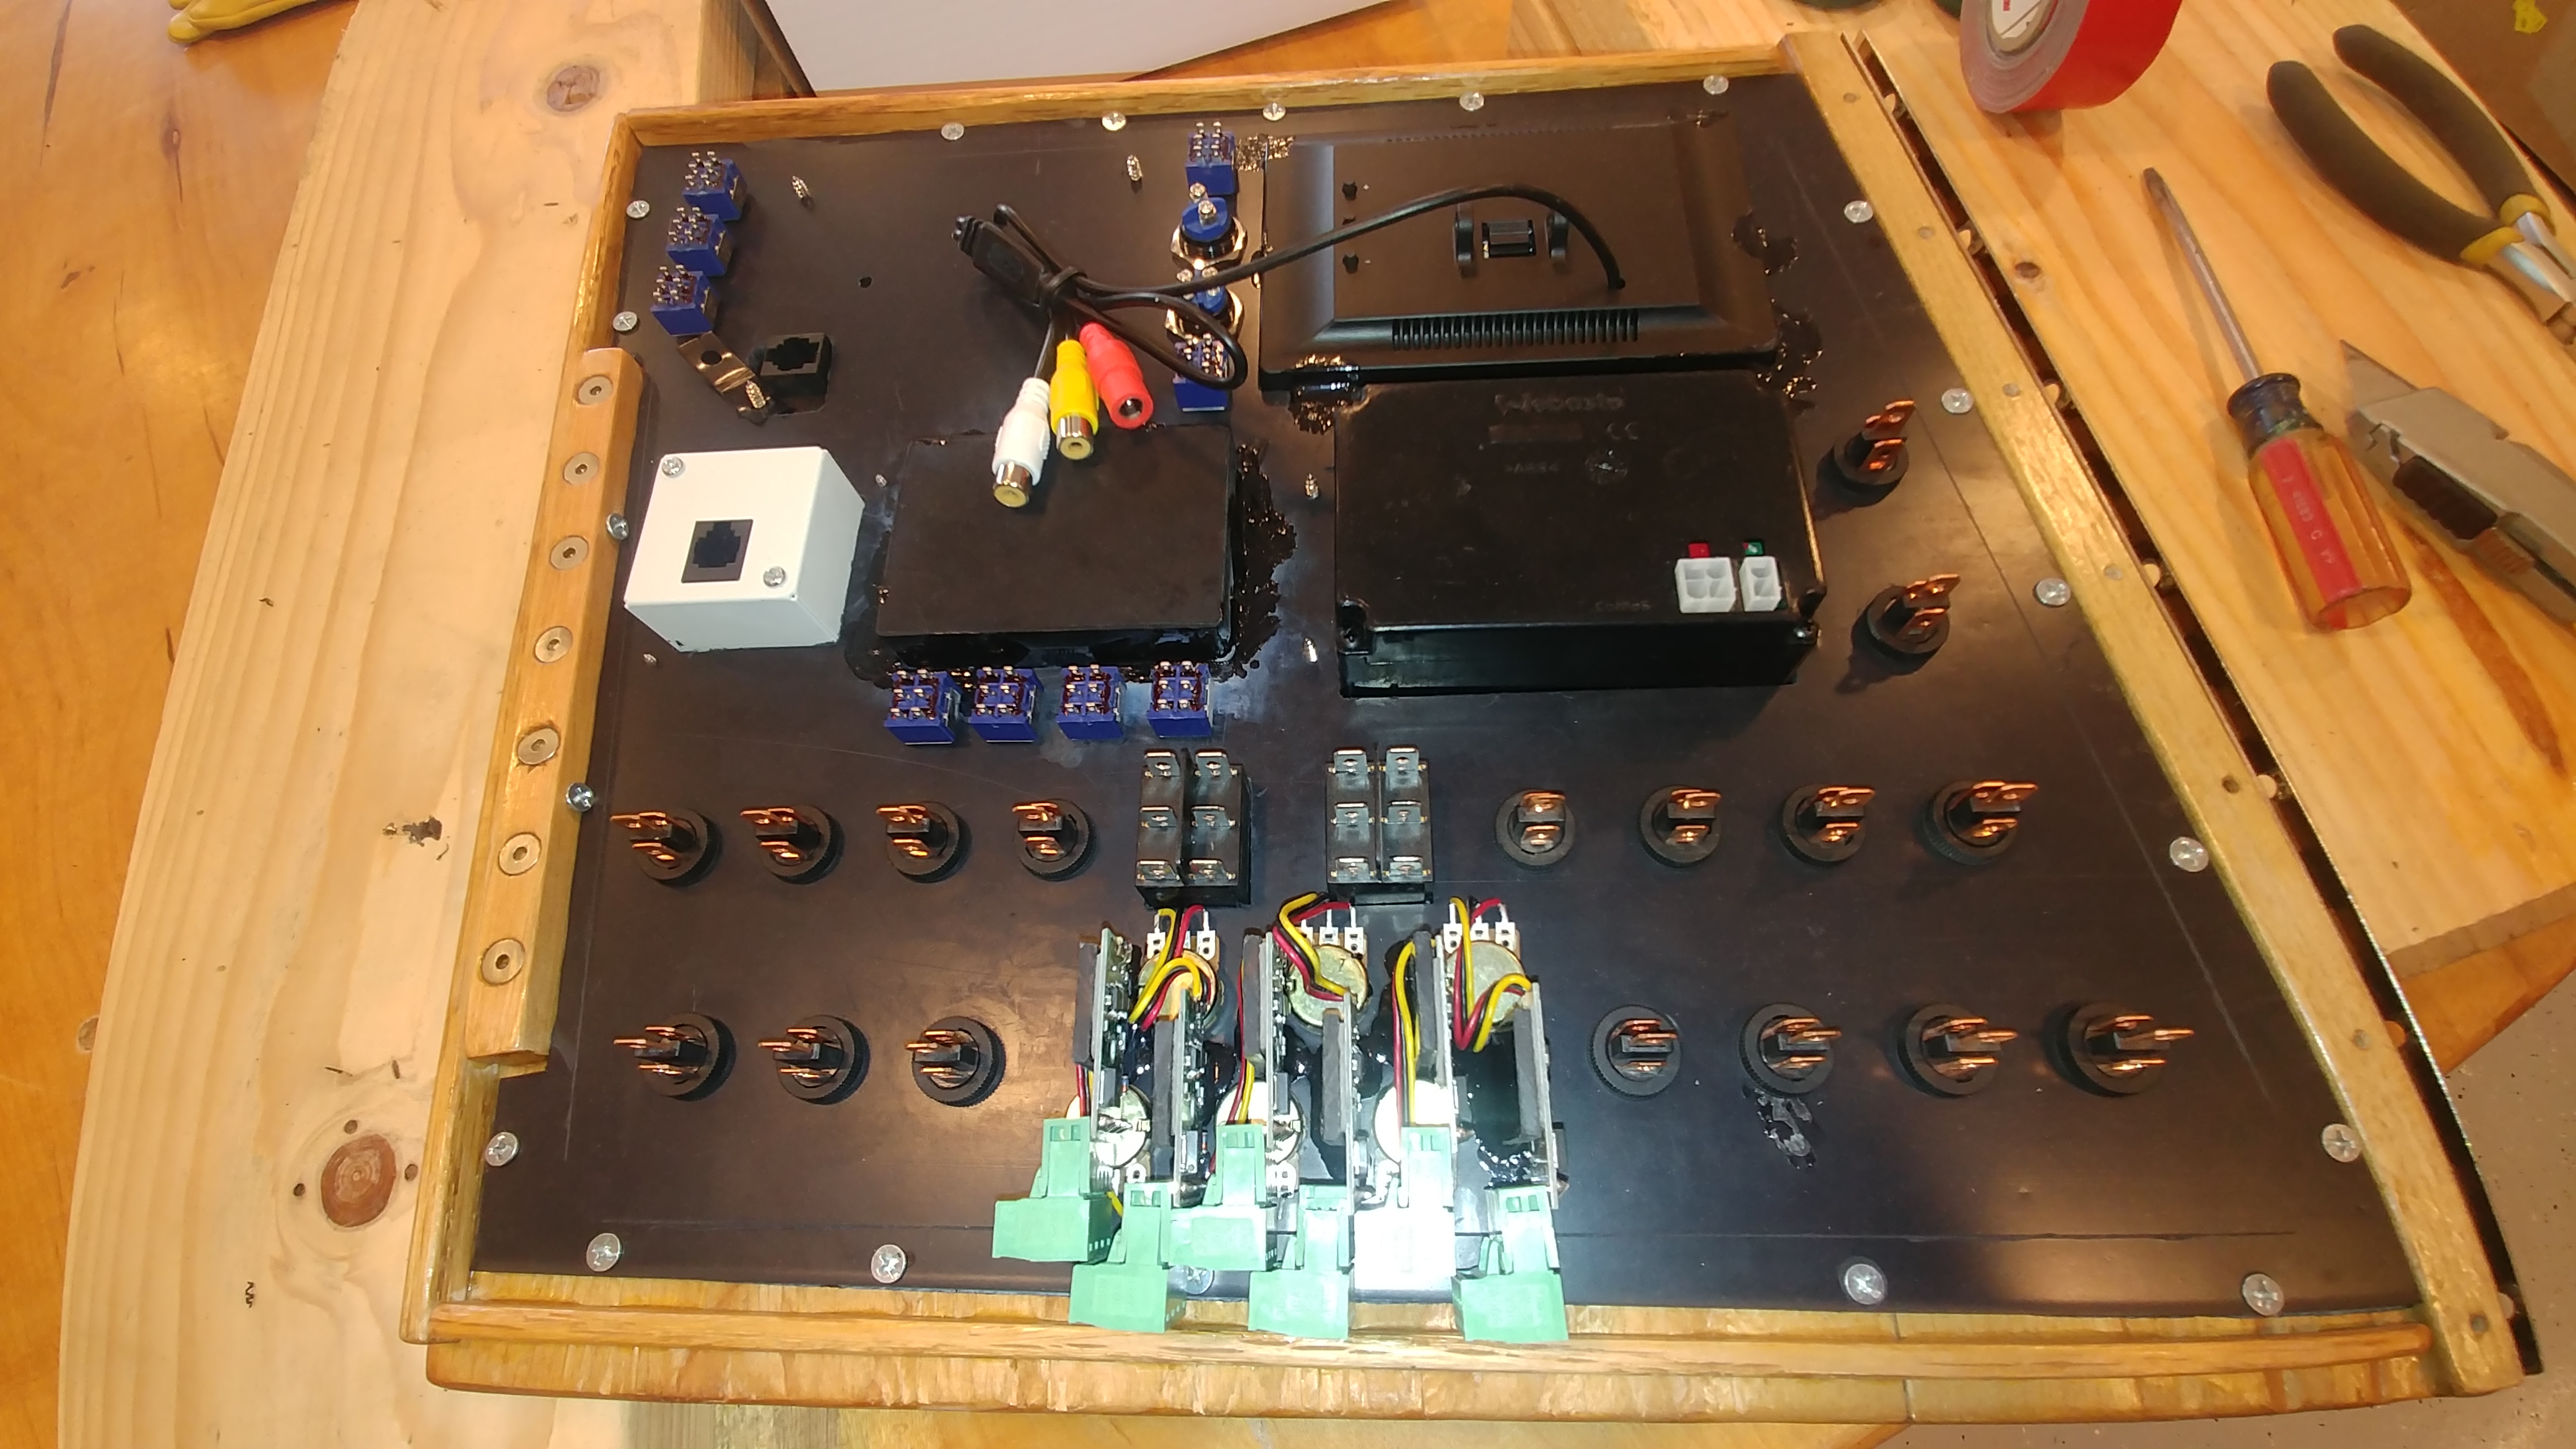
A test-fit mount-up allows for the Master Control Switch Panel to be measured (all four edges were different lengths!) and cut. And then the process of designing the hinged mount and latch mechanism began, which took some work. In addition, there is another panel just behind the switch panel, which contains the fuse blocks, and it also is hinged and latched, because behind it will be all the wires coming out of the wall, and all wiring must be done in-place, once the two panels are installed.
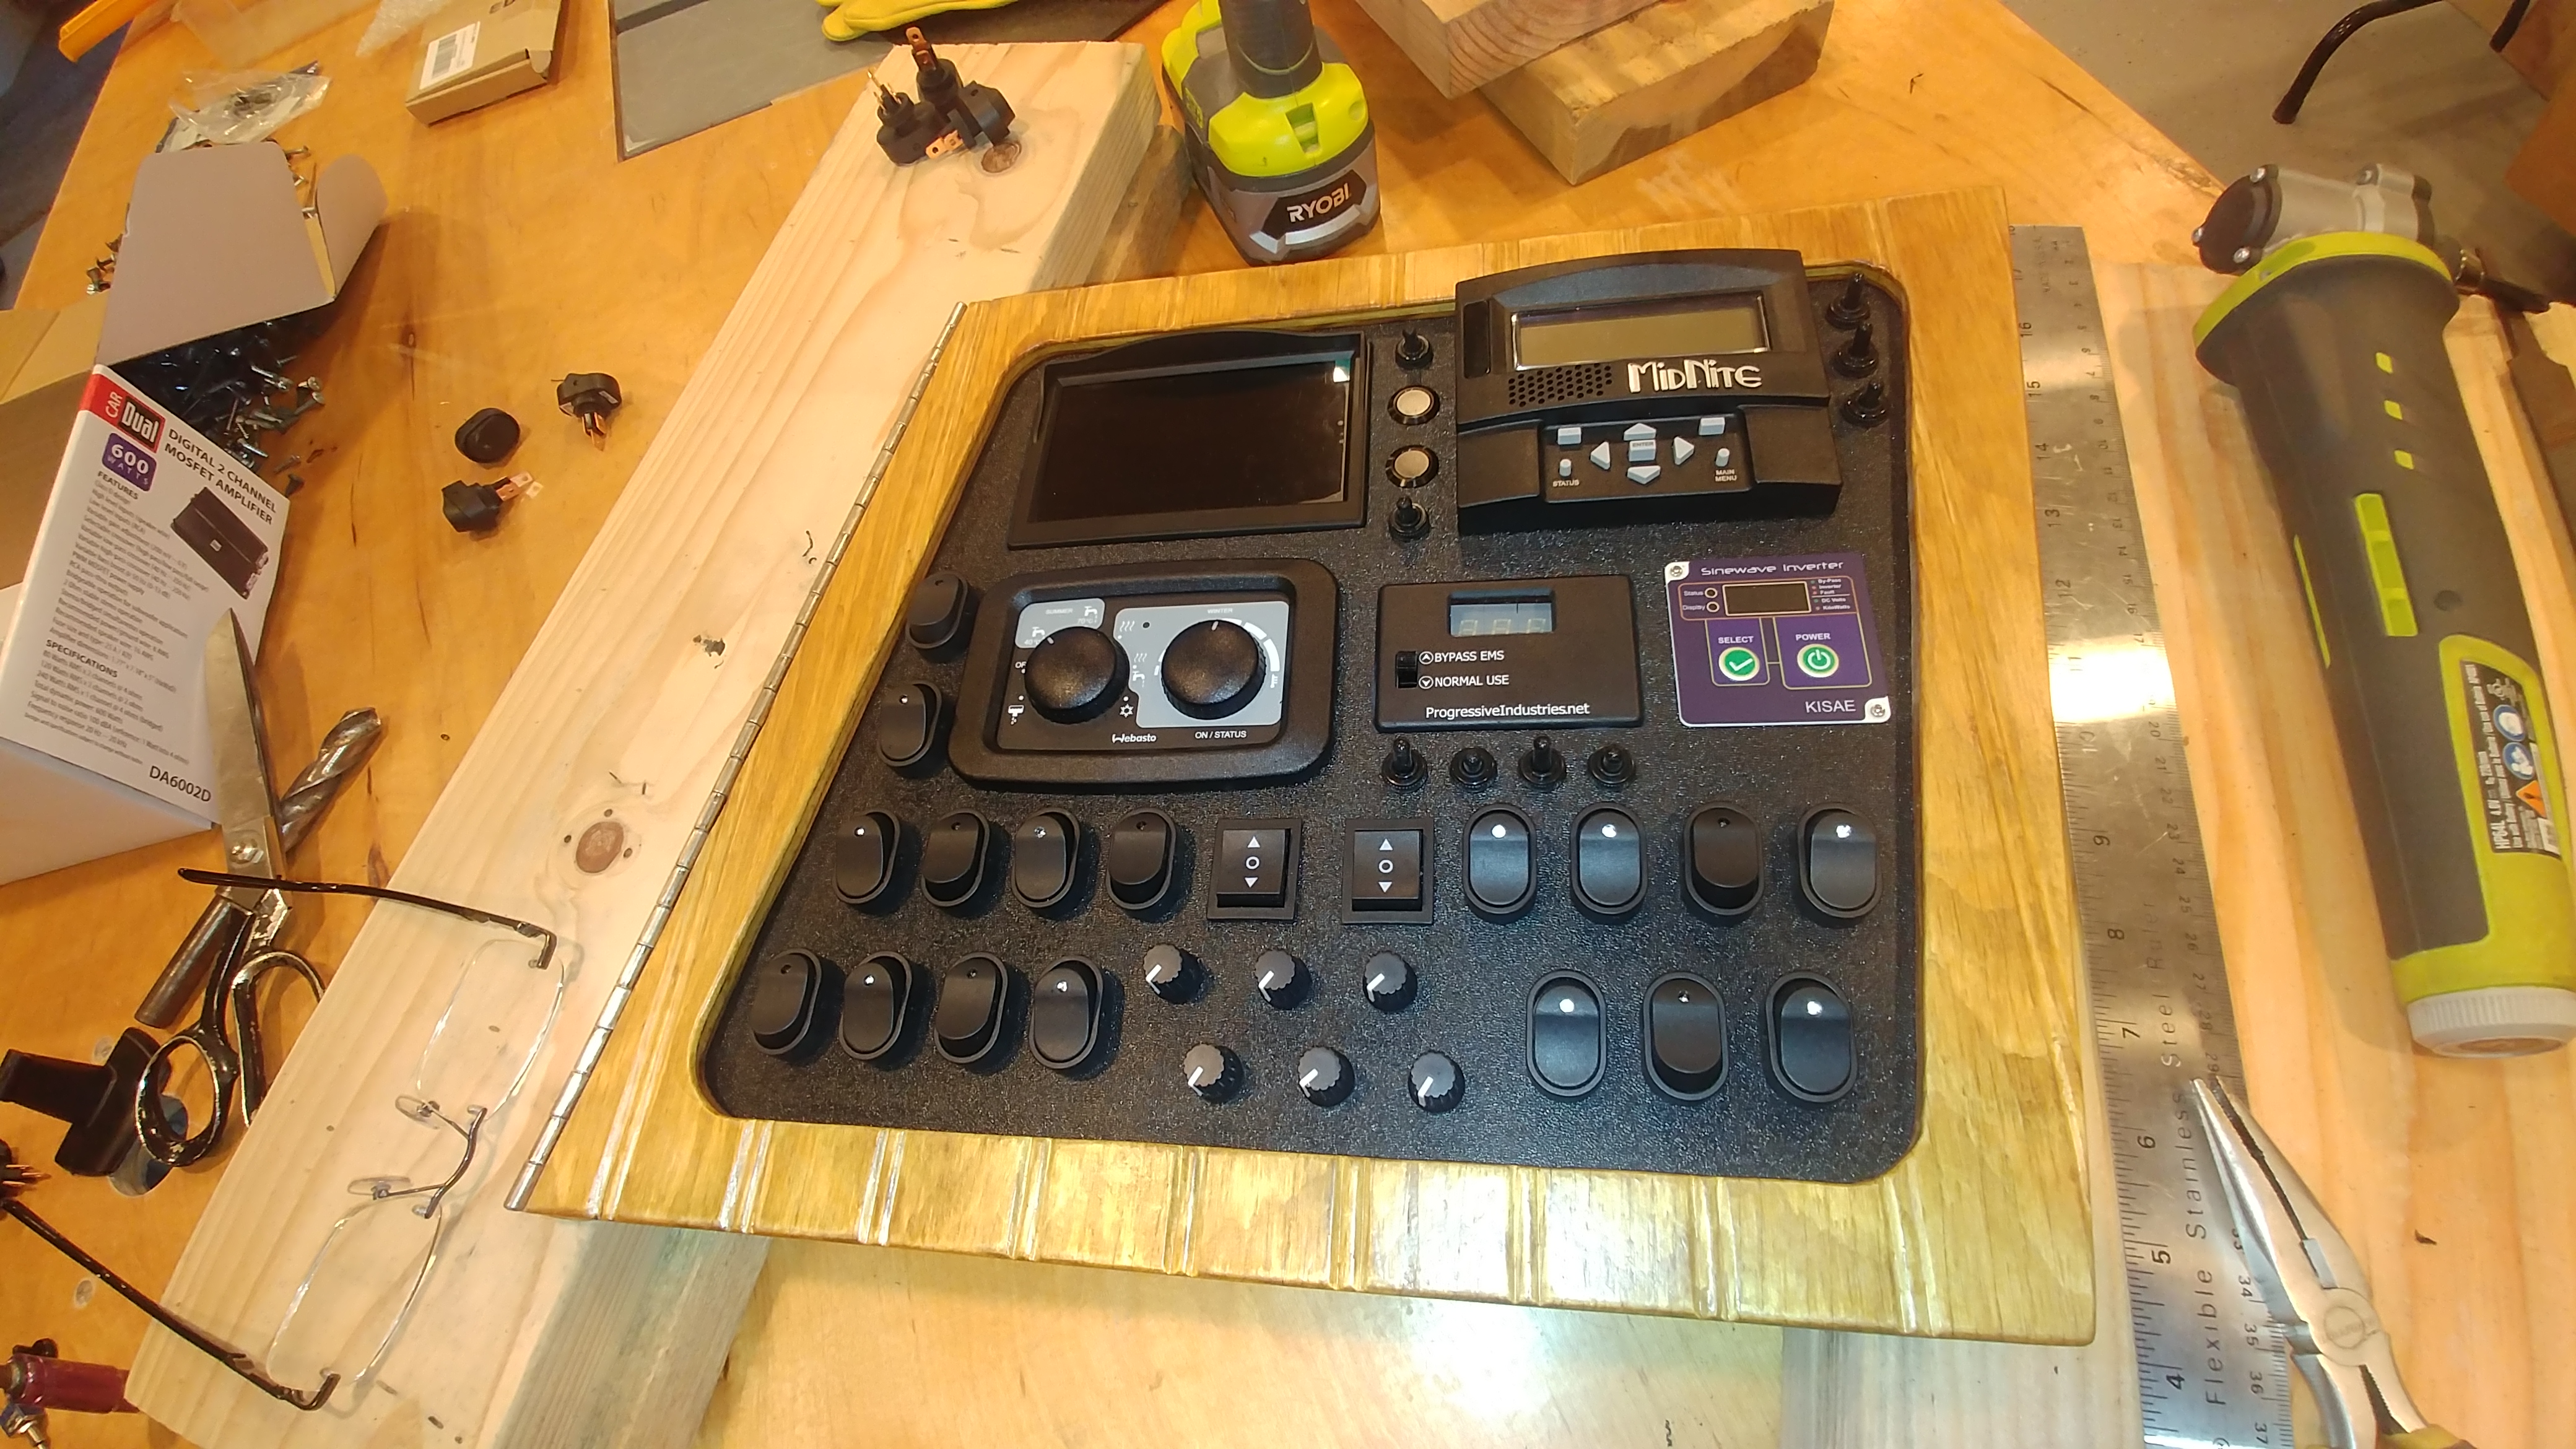
You pretty much have to buy all of your components already, in order to know what size controls they have, to determine what size master switch panel you’re gonna need. Right down to the number of switches and dimmers. For example, the video display screen in the upper left that will display the Battery Management System (“BMS”) for the lithium battery bank, barely fits in this switch panel, and this was after changing it out to a smaller one than the one that came with the BMS. Thank goodness it was just a universal LCD video screen (420 lines, composite input) and it didn’t matter if I used a different one.
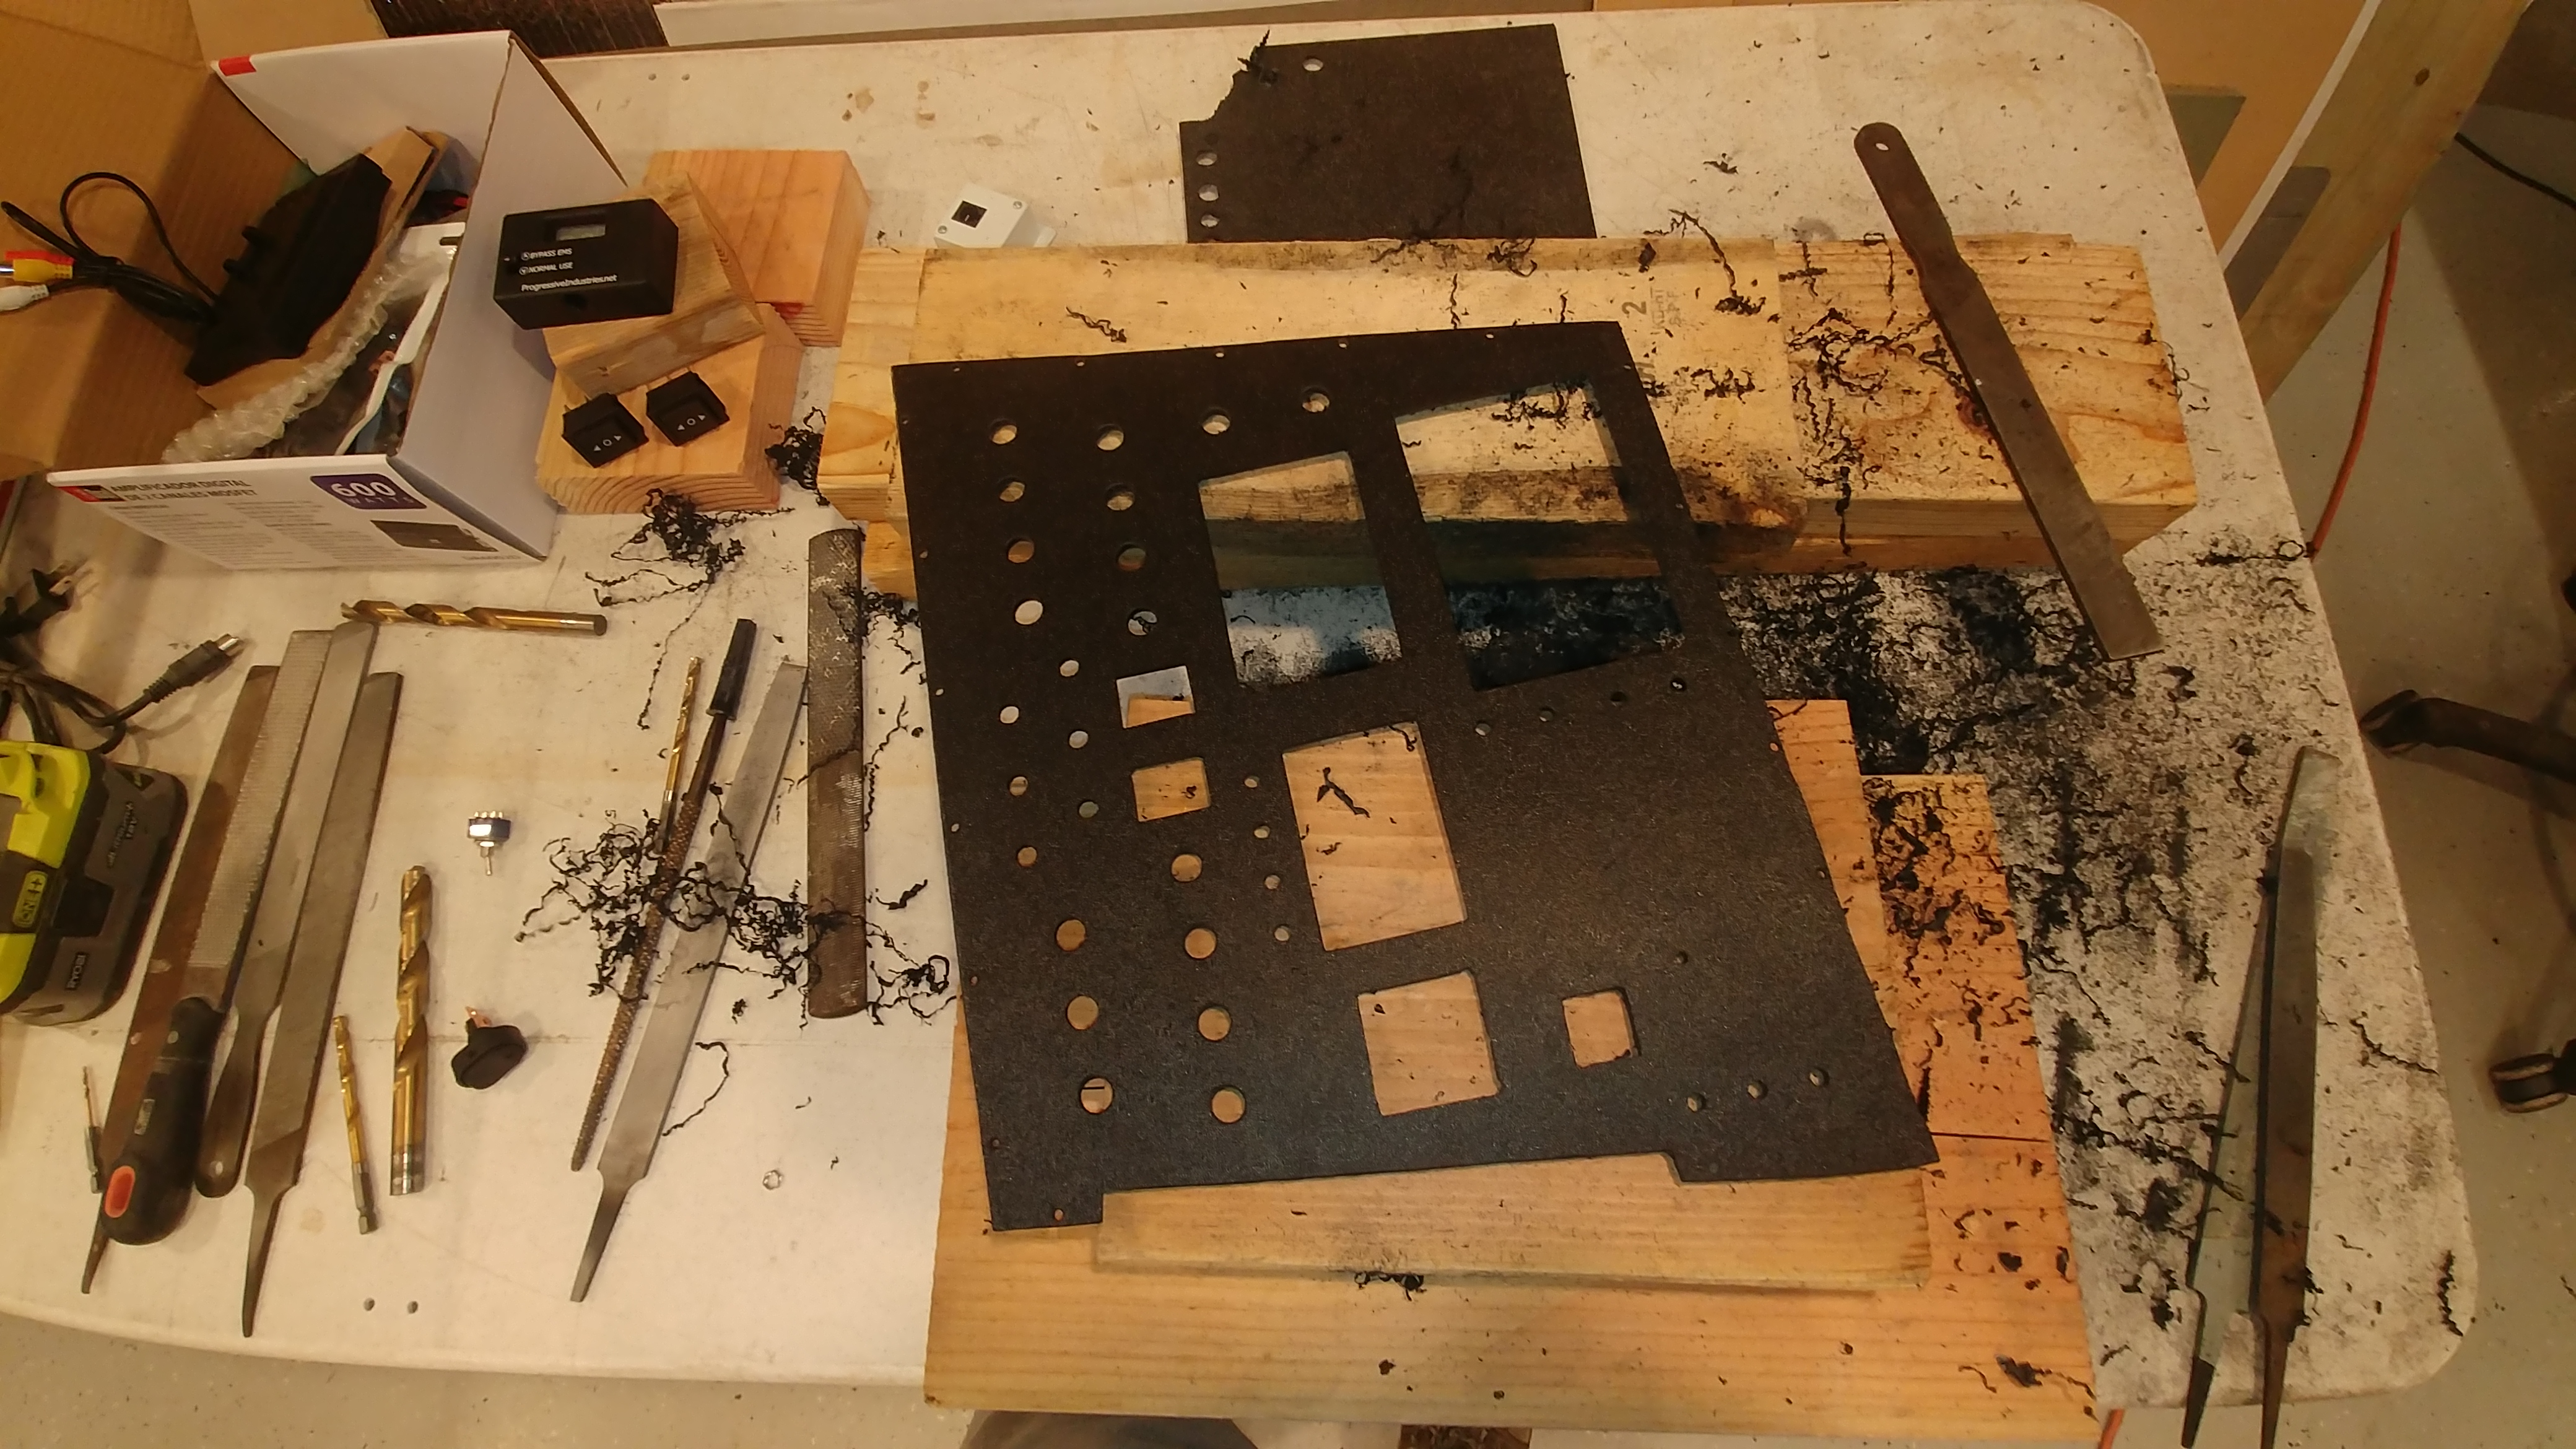
The switch panel consists of a 3/16″ piece of textured ABS plastic and the wooden frame of beadboard to match the cabinets. I stiffened and strengthened the frame by adding some small pieces of wood on edge around the perimeter. Each opening in the plastic needed to be cut very carefully and filed perfectly for the various controller components to fit into place neatly. And then dabs of glue from behind held them. The only one I didn’t recess is the Midnight Solar controller because of the way it’s face snaps on/off. So, unfortunately, it looks a bit out place compared to the others.
At the bottom you see the six dimmer controls for the lighting, and their circut boards all crammed together in order to barely fit. This is where working with ABS plastic really shines. I just glued little square pieces of ABS plastic to the panel with ABS glue, to make perfectly strong stand-offs to mount the dimmer circuit boards on, keeping everything compact.
This is the way the Switch and Fuse panels will sit together once they’re mounted to the wall. ‘Everything in a van is CRAMMED together, to leave enough room for STUFF! Also, the other great thing about this design, is that the cabinet can come down anytime for whatever reason (repairing some damage, etc.), while the Switch panel and Fuse panel stay mounted on their hinges and fully wired. They just wouldn’t have anything to latch to while the cabinet is removed.
Another test-fit mounting to see how the doors fit, before taking it back down and covering with ozite fabric to reduce rattling of dishes, etc. These are Blum soft close hinges which, although expensive at $48 a pair (‘per door’), they work flawlessly and allow for minor adjustments of 3 parameters which help achieve perfect alignment of the doors!