Powered-tilt Solar Panels / Wifi Repeater Antenna
The new technology of higher performance solar panels, charge controllers, and lithium batteries, make it very possible to build an affordable, self-sustained off-grid electrical system. And unavoidably attractive to do so. – And so we did:
The idea is to fit as much solar on the roof as possible. Which is limited not only by how big the roof is, but by what dimensions the panels come in. I found two residential-type SunPower brand 325watt panels that were 41″x61″ which worked well if I put them end-for-end. The roof is about 51″ wide, but I wanted two awnings and those were each about 5″ deep, so, it all worked out allright. AND!….. I got them for free! It turn’s out that big home solar providers often have some warranty-replaced panels in the back of their warehouses that have only slight storm damage to their aluminum frames, and work perfectly, but they can’t sell them, and of course don’t want to destroy them. So,…just ask!
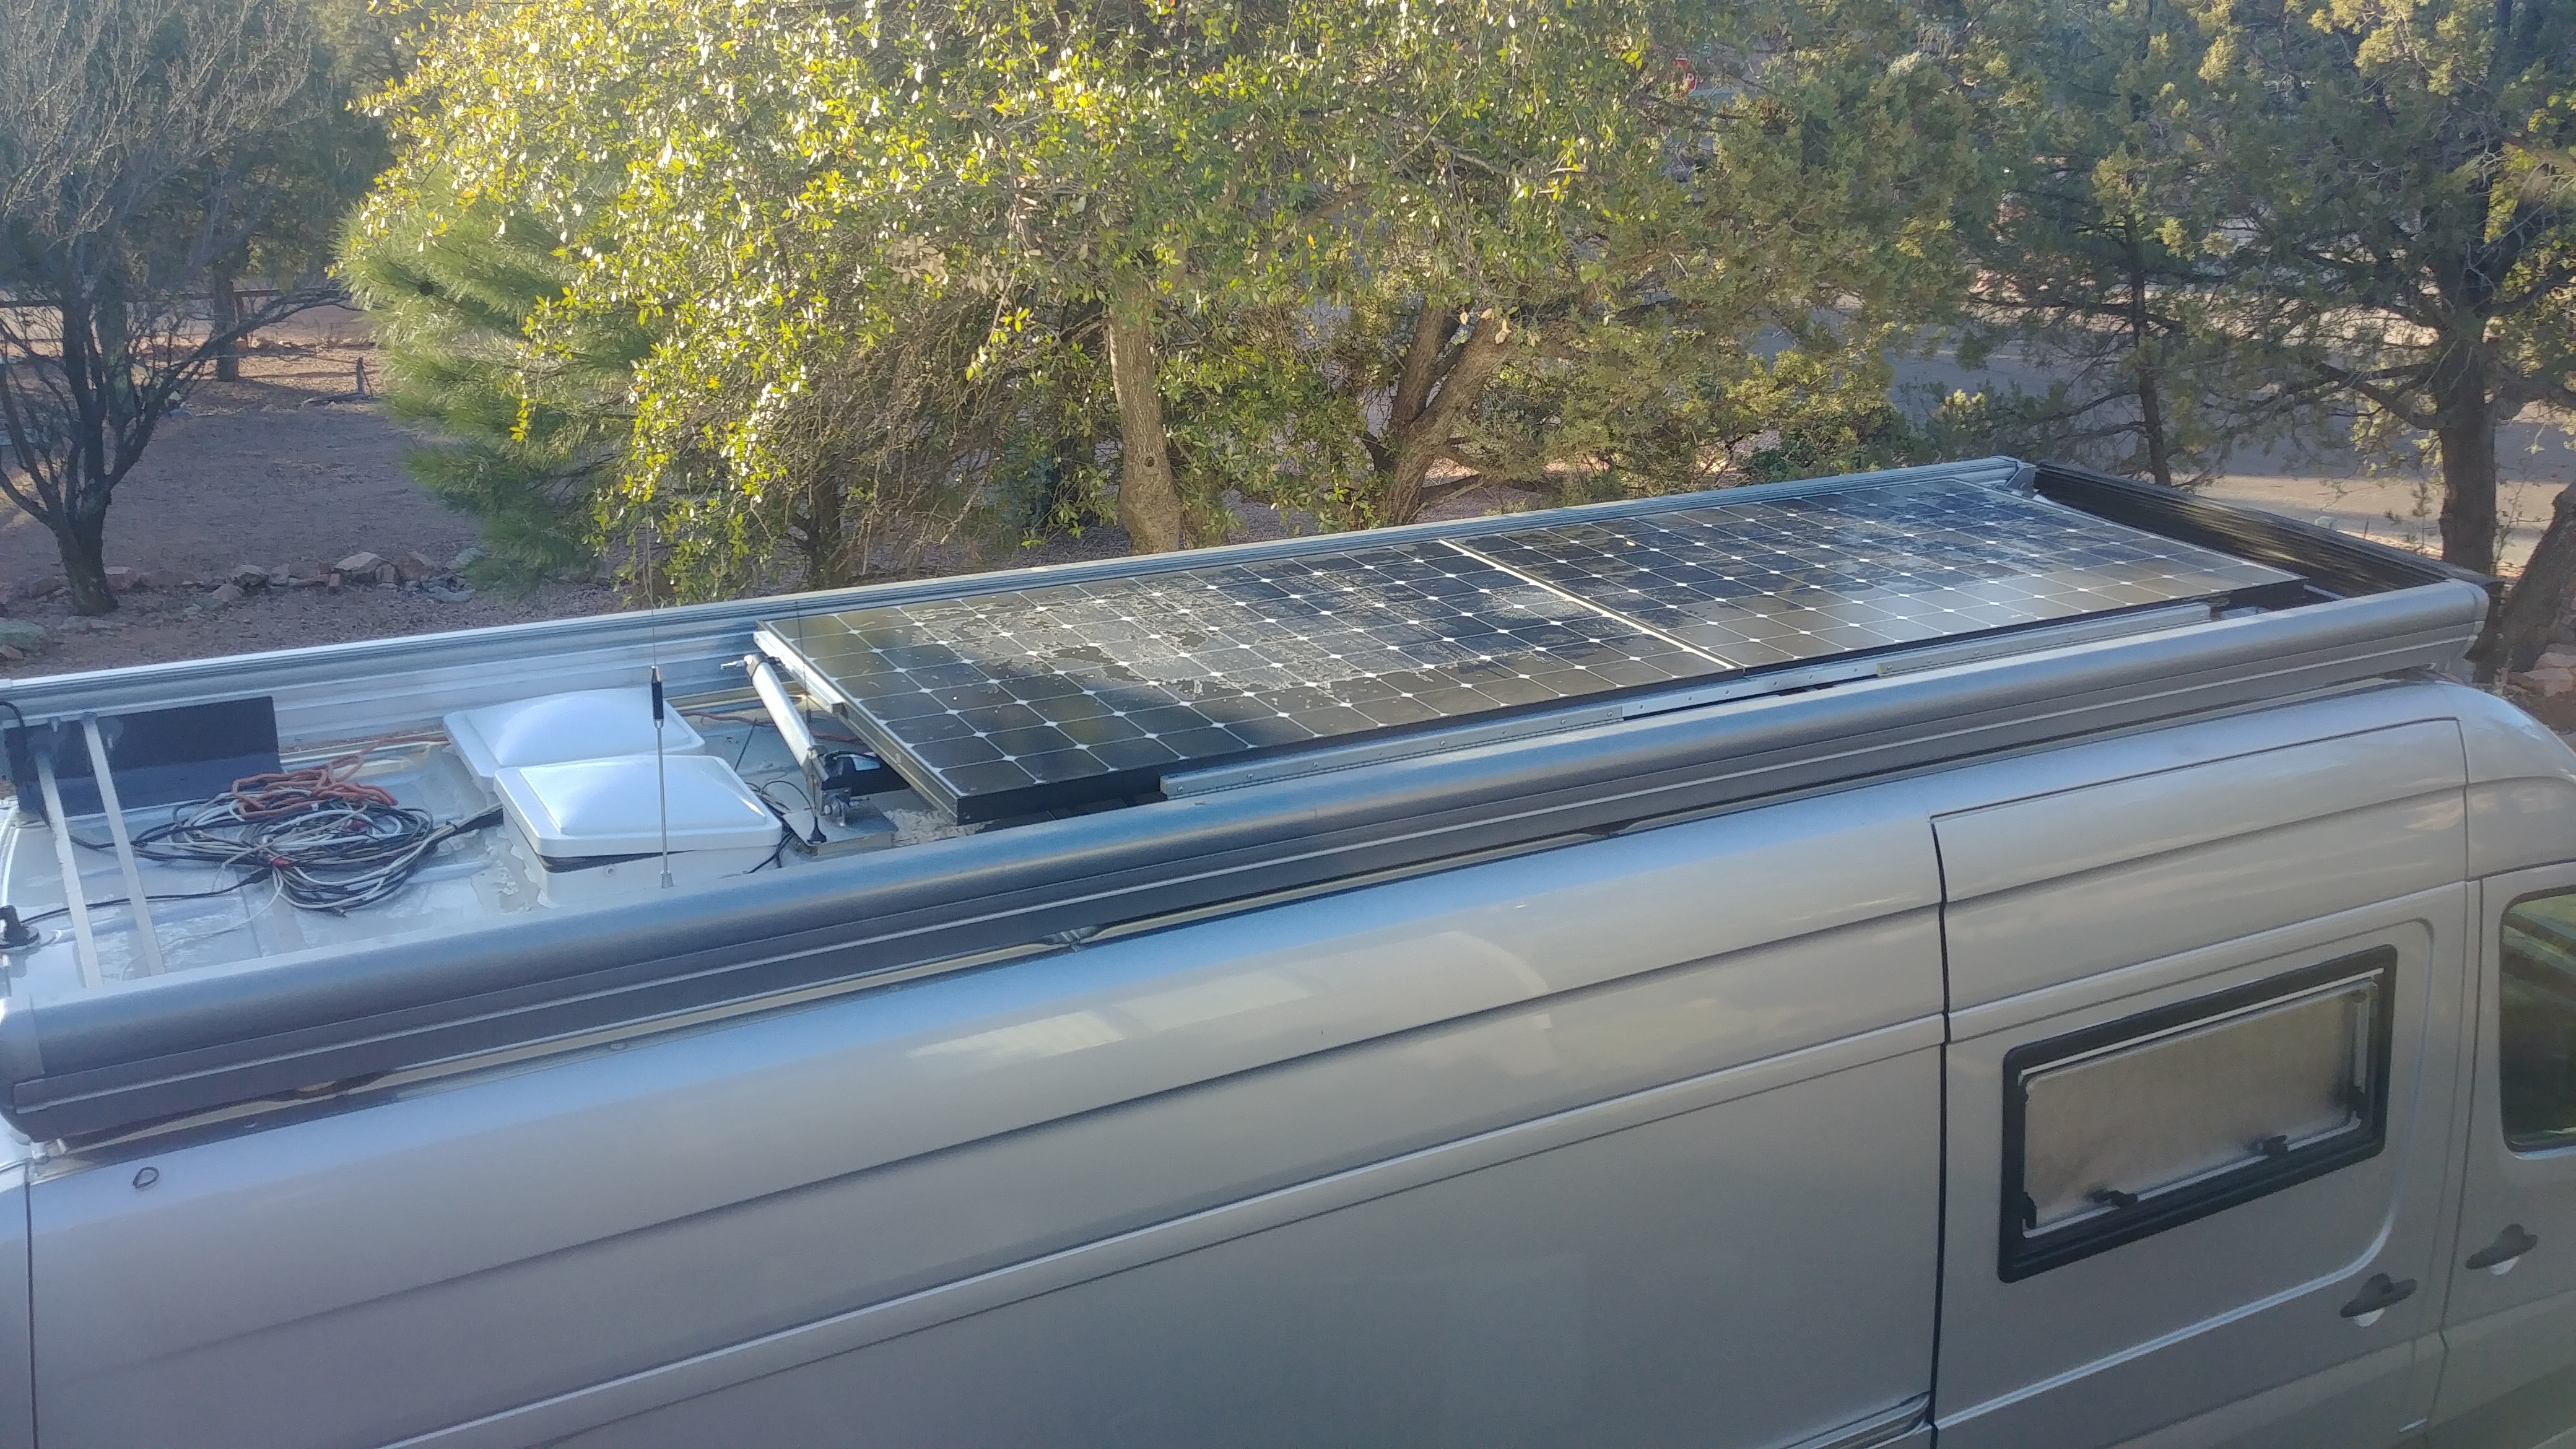
You can’t really fill the ENTIRE roof with solar, because you need some room for the roof exhaust vents and a few antennas (there’s eleven on this van)(AM/FM radio,…terrestrial TV,…an additional FM antenna to the Home Theater Receiver,…CB,…Police Scanner,…4G cellular signal repeater/amplifier,…two antennas that go to the Verizon Mifi box,…SiriusXM satelite radio,…DirecTV satelite TV dish,…and a motorized 7′ WIFI repeater/amplifier that is outlined below on this page.)
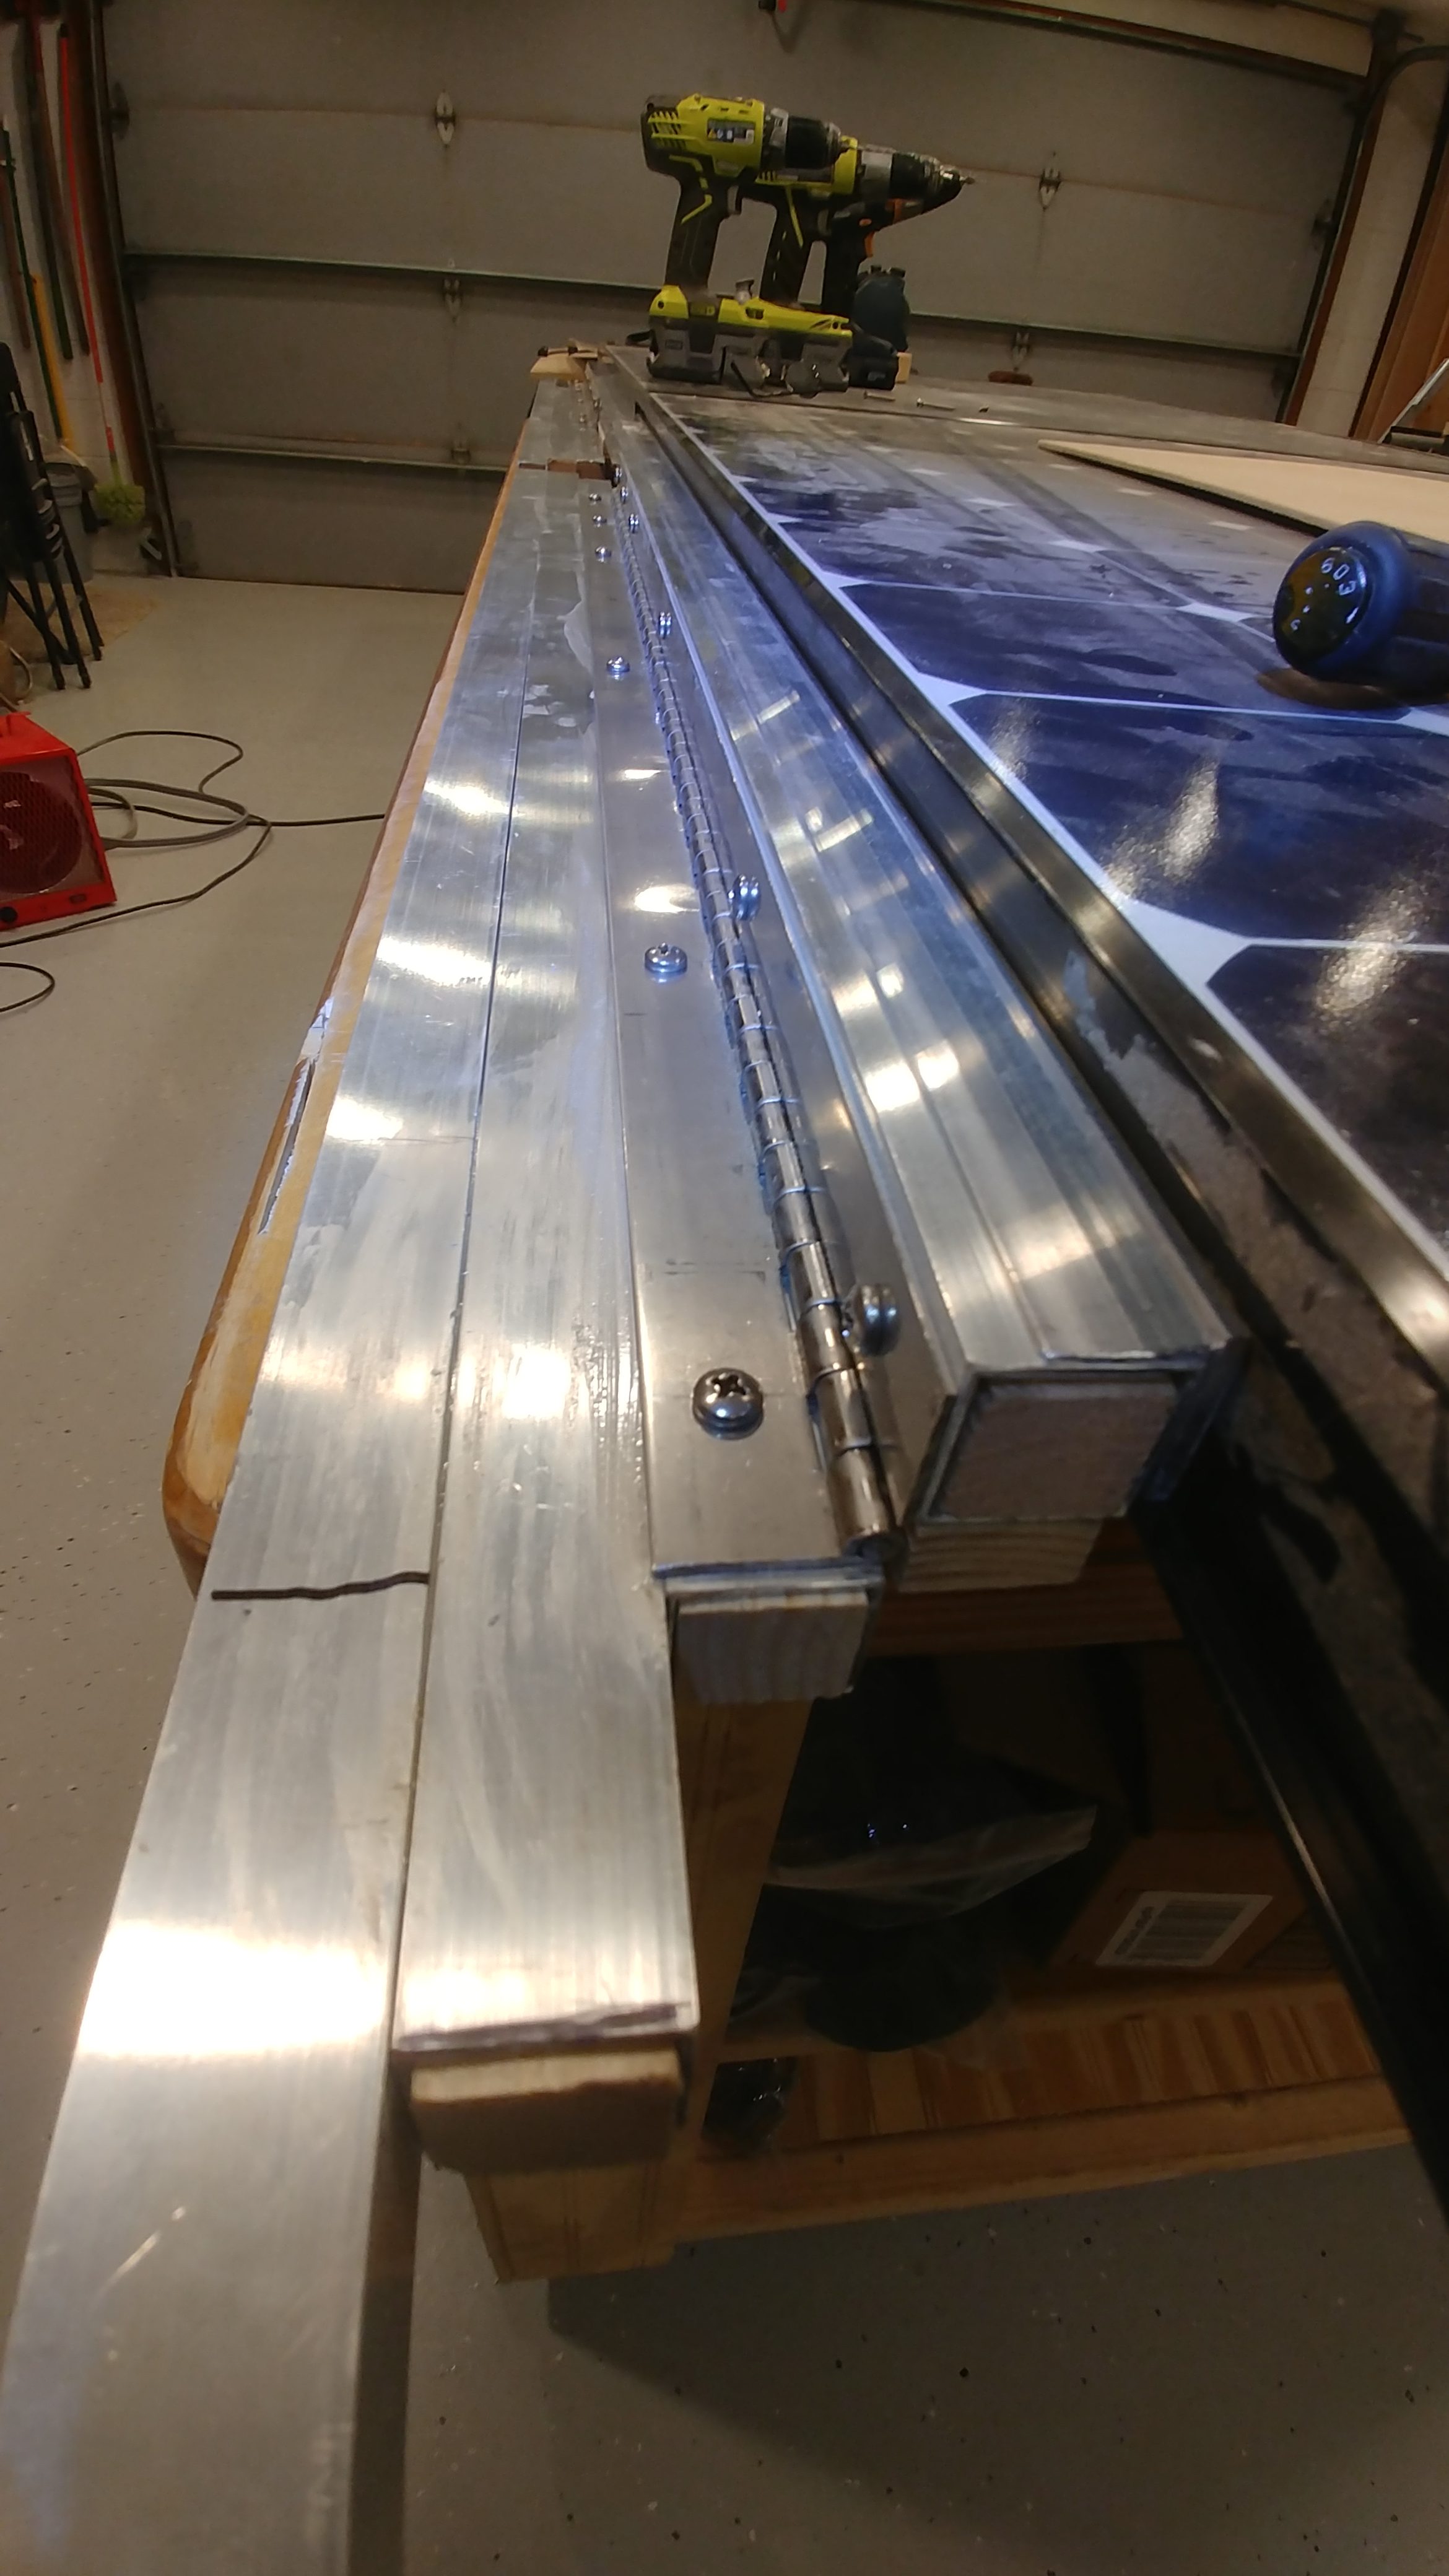
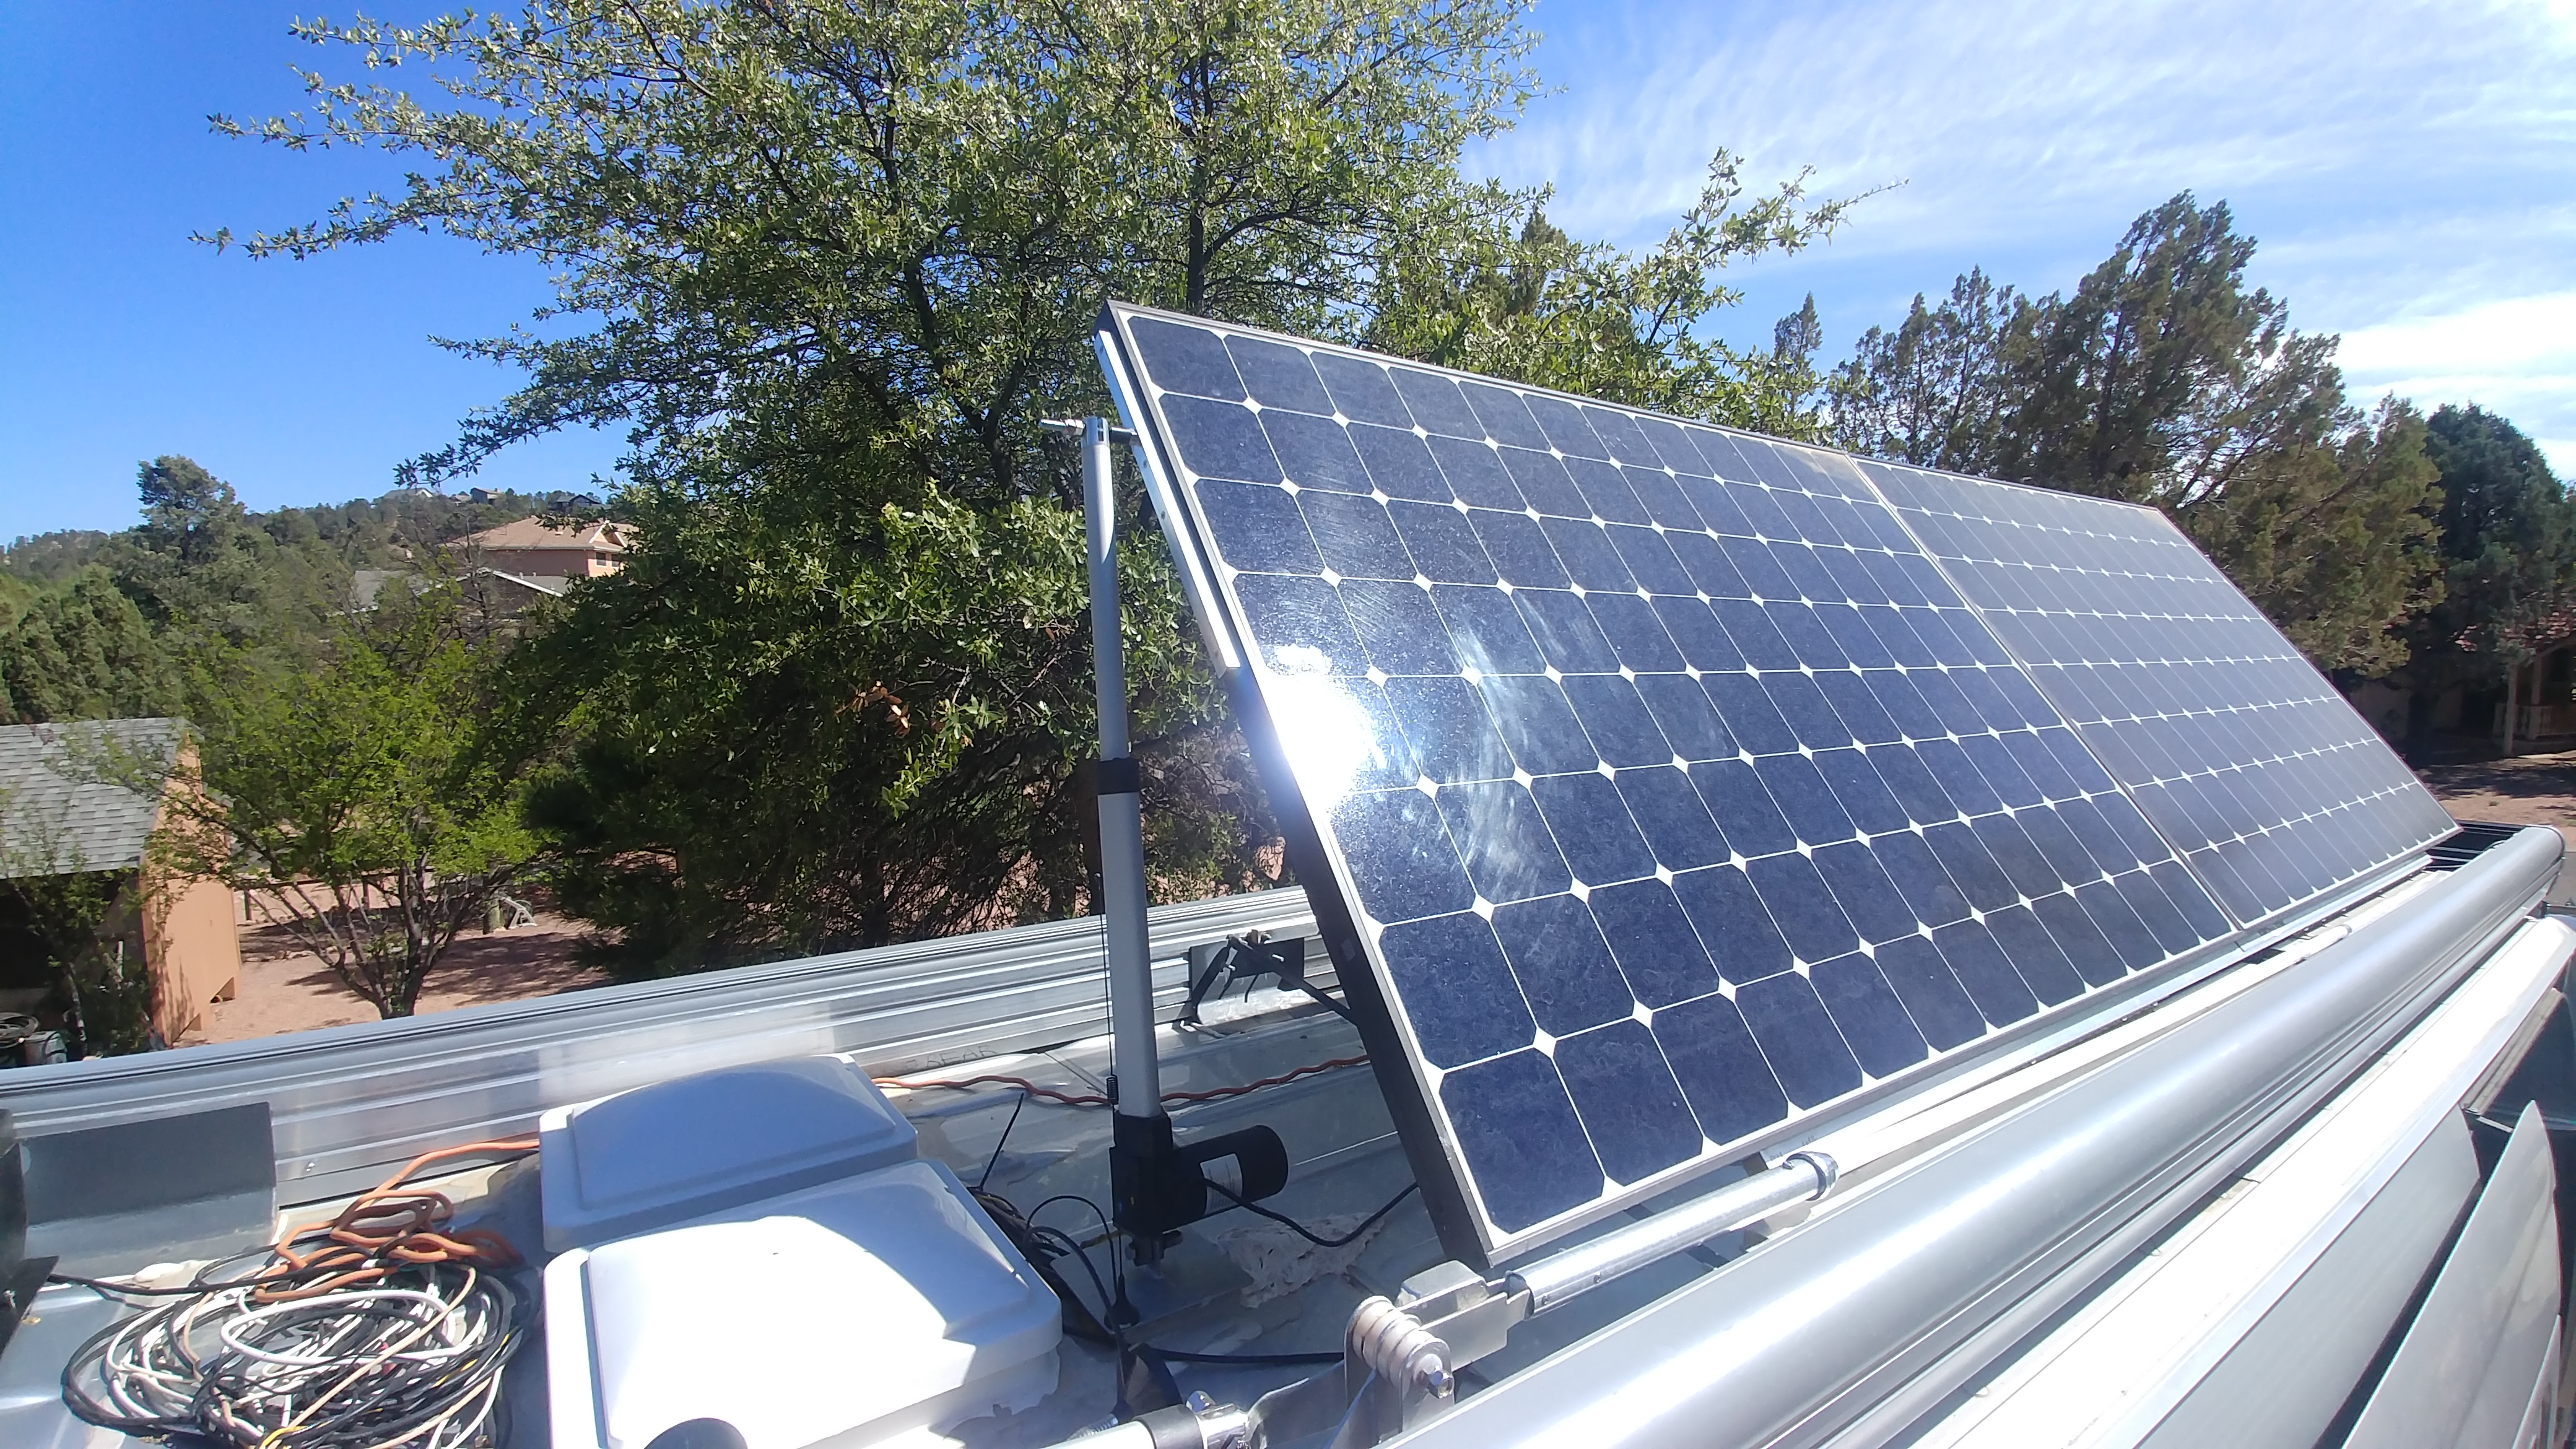
The other good way to make more electricity from a given amount of solar panel area, in addition to getting the highest efficiency panel you can find, is to have a way to tilt the panels up toward the sun, whenever the sun is low, like mornings, late afternoons, and all winter. This involves a stainless steel hinge on one edge of the panels, and lightweight aluminum tubing which is strong and doesn’t rust. All screws and bolts must be stainless steel, and adding tight fitting wooden inserts where bolts will be tightened keeps the tubing from trying to collapse or debilitate, possibly down the road due to vibration and stress. The ends of wood will be covered in SikaFlex sealer to keep the wood from rotting. I built the entire solar panel mount onto the awning mounts in order to not need any additional roof protrusions that could cause a roof leak. Then, you must decide if climbing up on your roof and unbolting one side, and putting sticks under them, are an adequate and acceptible way to tilt your panels sometimes for more production, or if motorizing is worth all the expense and hassle. For me, I found that it was, for a few reasons: A- I like to tinker and enjoy the design challenge. B- I decided it would be terrific if I could store some aluminum anti-gravity type chairs and a (custom, lightweight) cornhole game up there, and the motor would make that WAY more convenient. And, C- I already had the advantage of having two 8″ tall awnings and the solar panels were going to be 8″ off the roof, which made for enough distance to allow for an adequate angle of the linear actuators to not only lift, but hold-down with enough force to keep them from leaving the van dramatically at peak speeds/wind conditions.
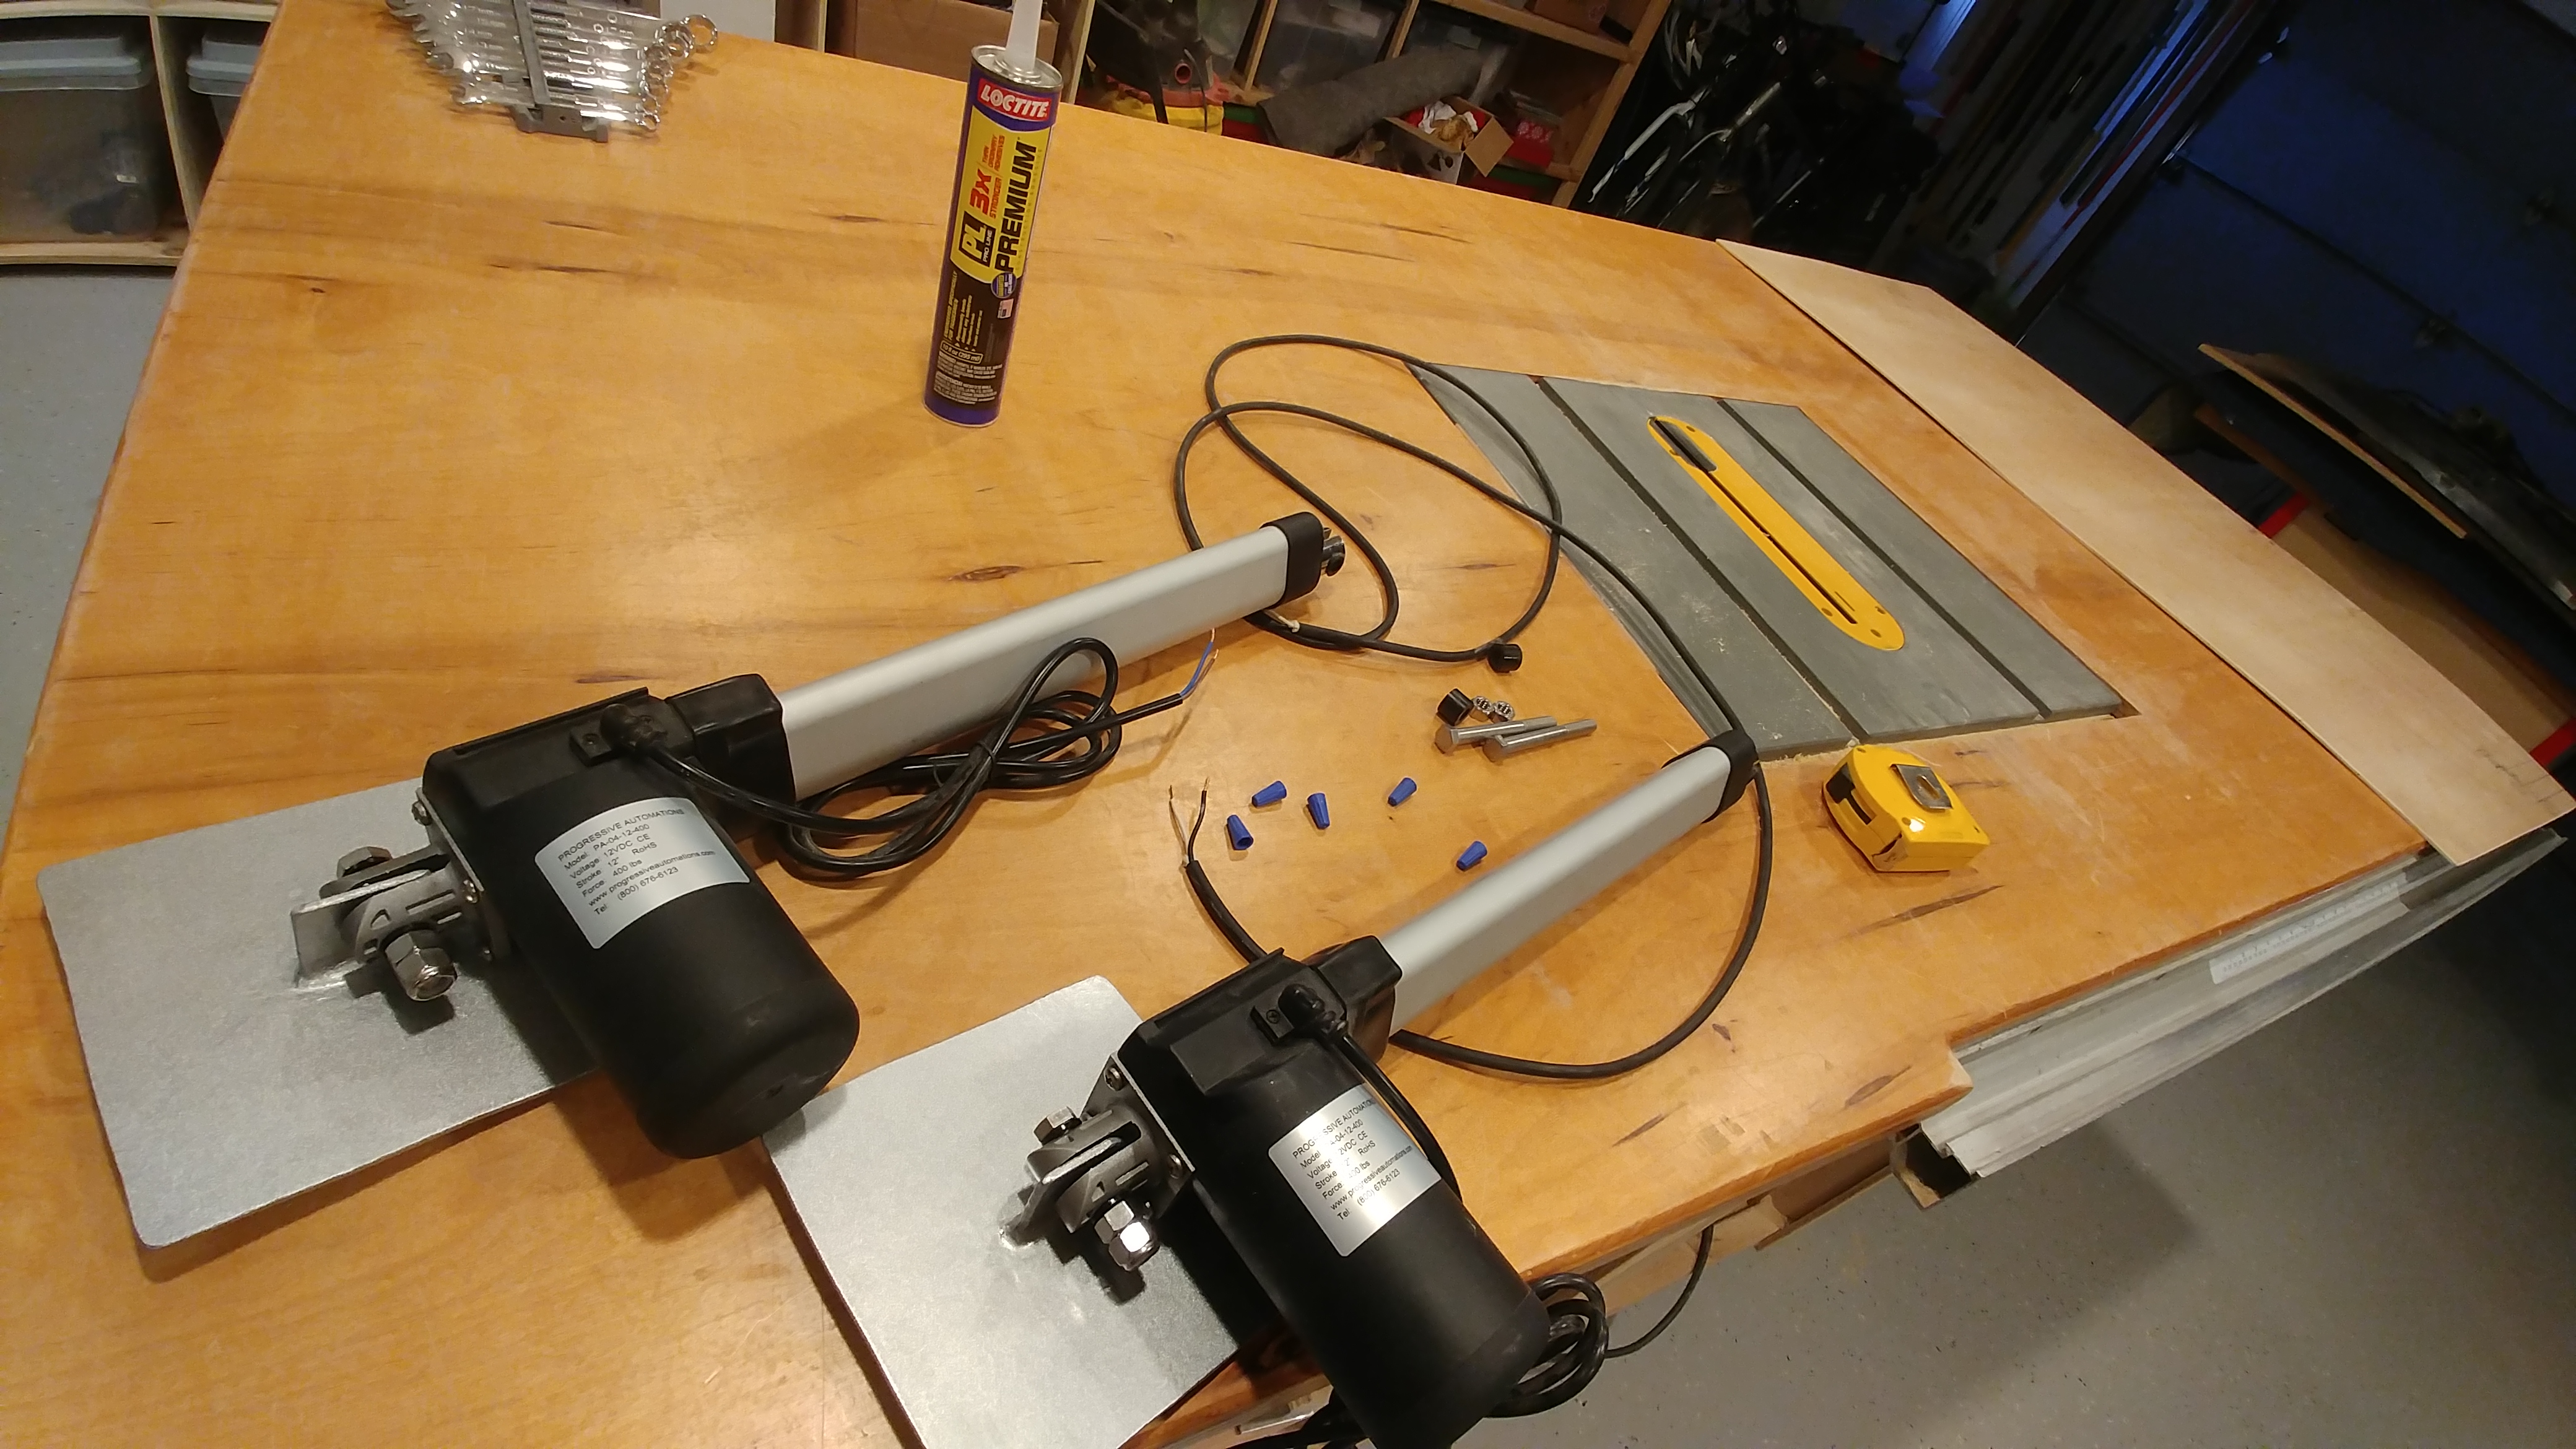
These are the linear actuator motors that I used. They were $150 each because I chose the highest possible waterproof rating that states surviving “high pressurized water jets”, as I didn’t want to have to ever have them fail. They hook up to a simple momentary rocker switch, thru an additional safety power off switch. You’ll notice that I don’t have a roof AC. That is in order to have more solar. I do have a custom made “basement air” configuration using a window AC that is detailed in it’s own section. It works even without being plugged into shore power or a generator because it is more efficient than an RV roof AC, and… I don’t have a roof AC,…in order to have more solar. And because of my “best possible” insulation, also detailed seperately.
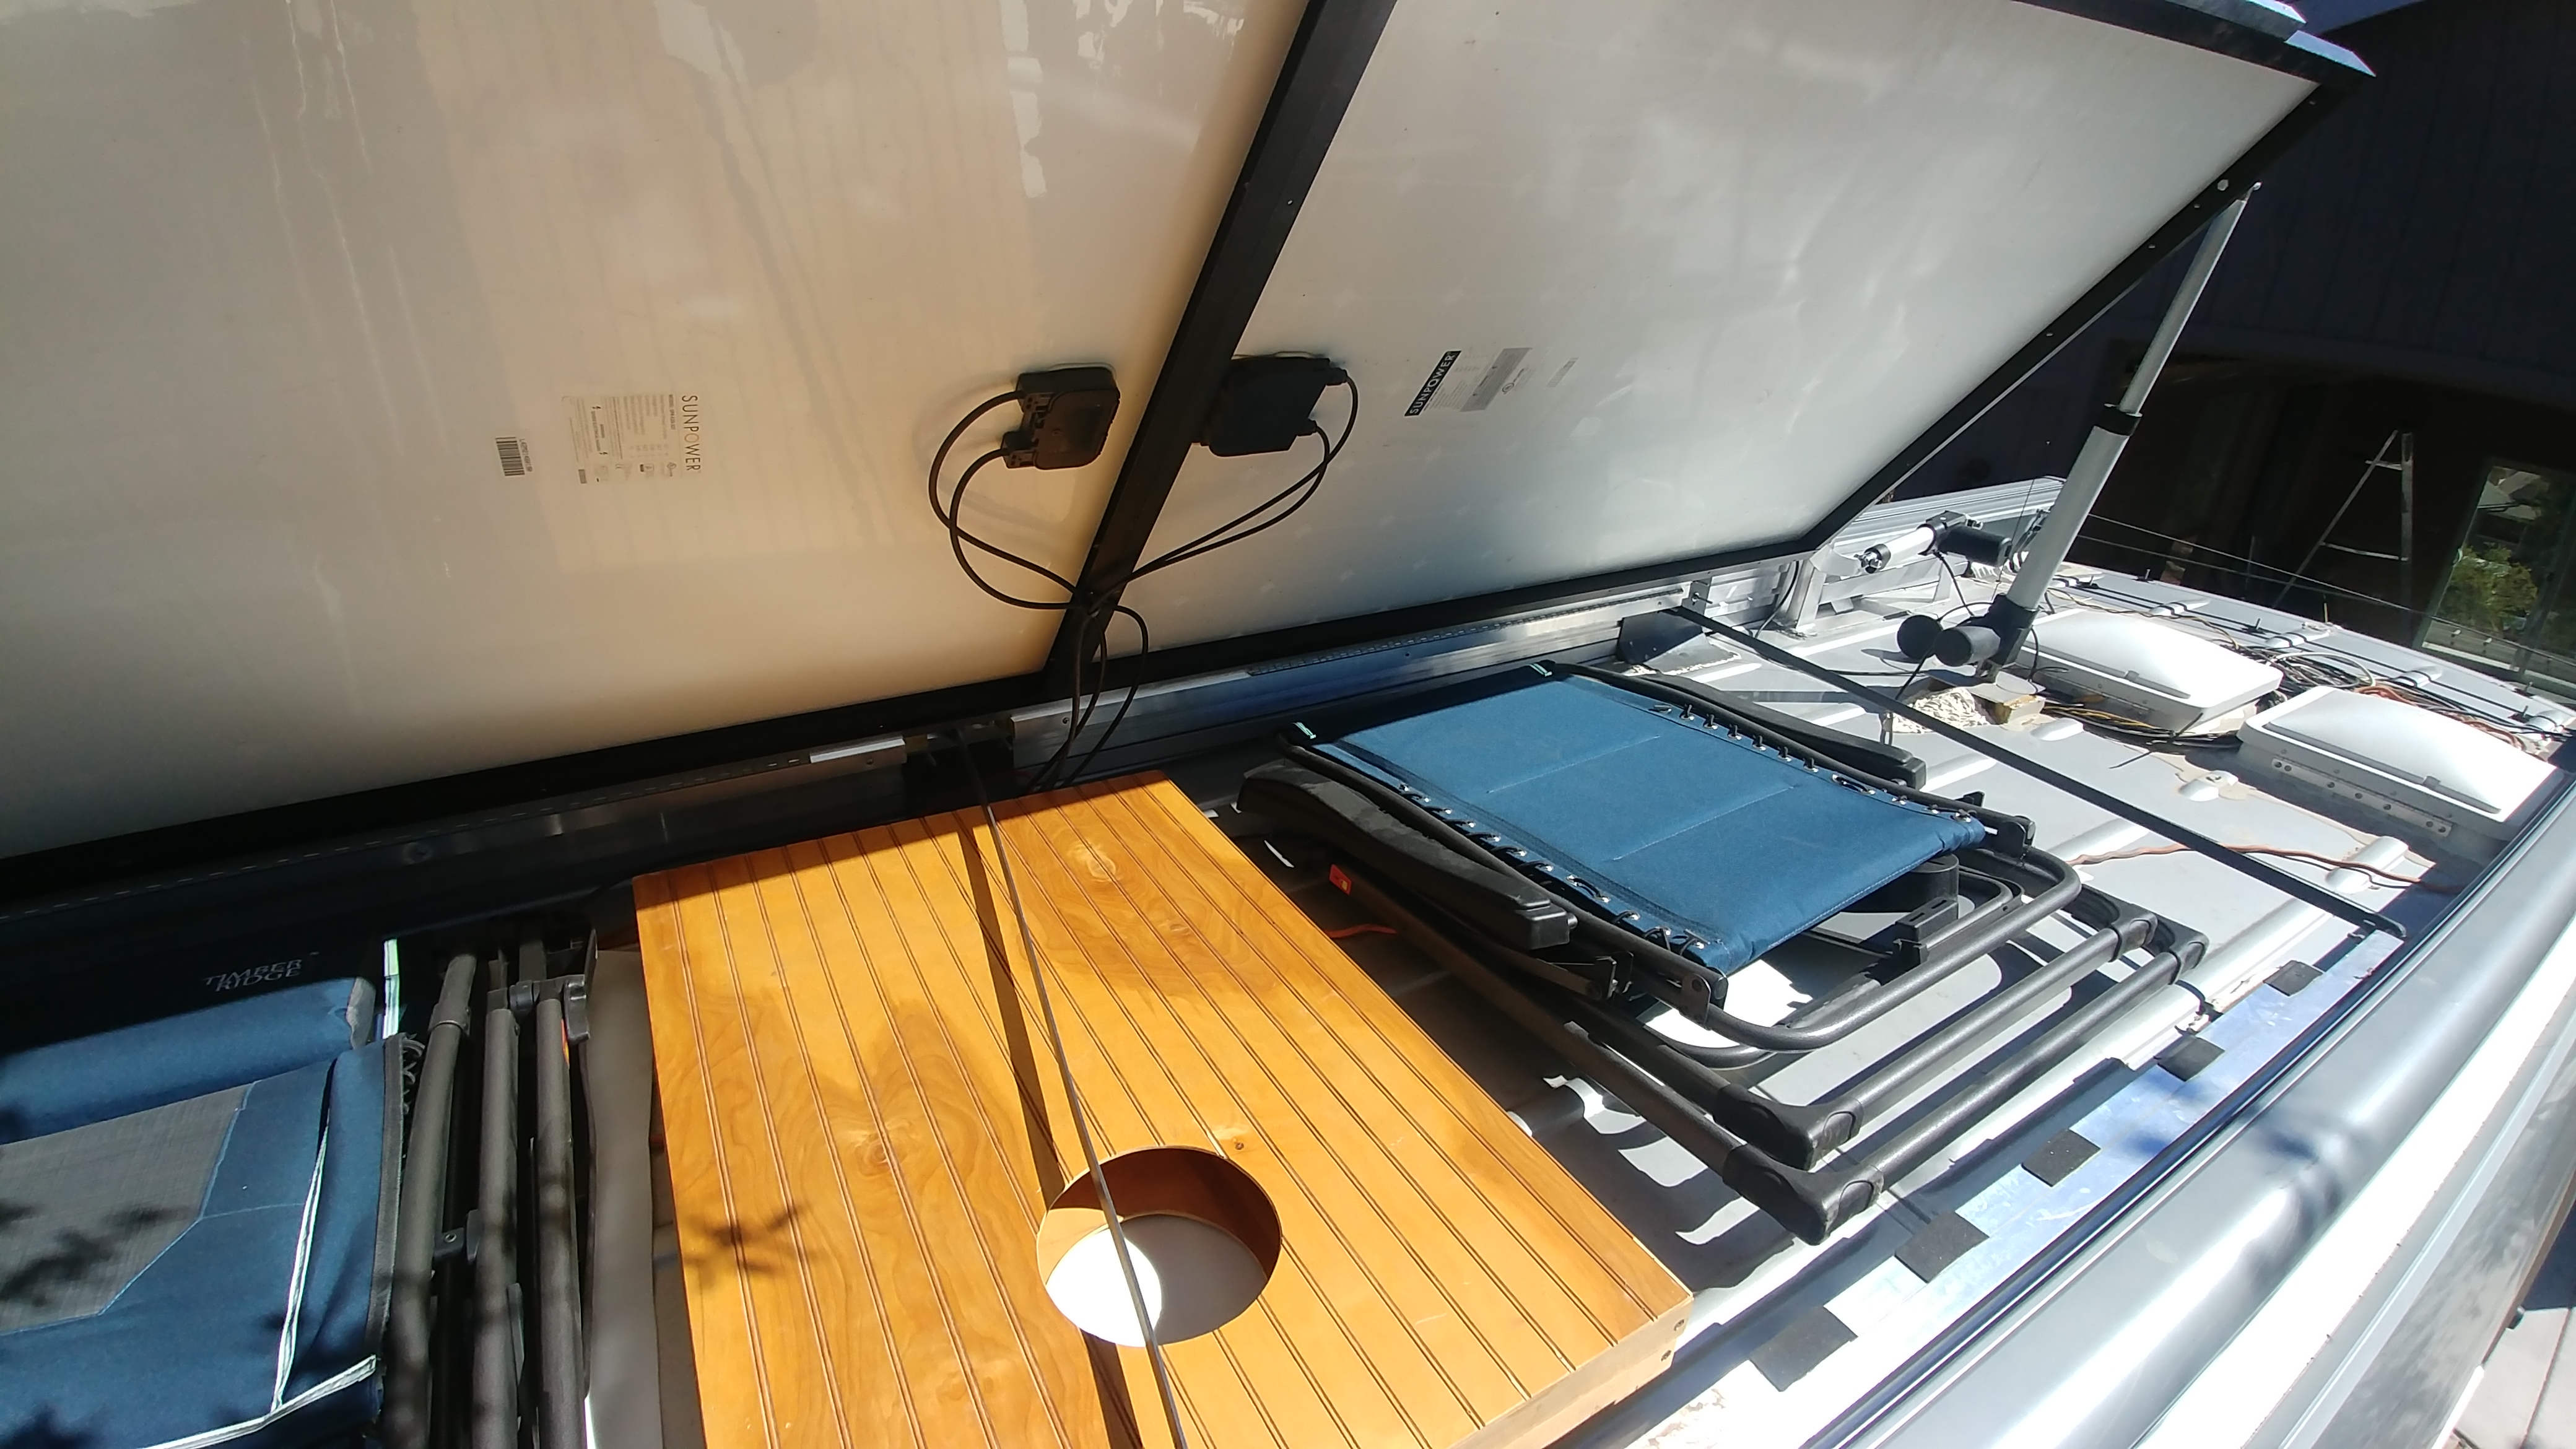
Here you see the back side of the panels when up. The two lounge chairs and the cornhole game stay in place quite well just sitting on a piece of closed cell foam padding. They get no sun, but a little wetness in a driving rain strom, but are each pretty much water resistant. The cornhole game is not regulation size of 2’x4′, nor made from 2×4’s. I made it ultralight for this use, and it is just 1.5′ x 3′ and made with 1×2’s. It is coated with polyurethane varnish for weatherproofing. You can imagine how easy it is for me to grab these down with my telescoping ladder. There is also enough room for us to sit on chairs up there, if we ever go to some event that makes that worthwhile. Since the entire ceiling was spray foamed, the roof is very rigid to walk on.
This video shows how the panels raise (or lower) fully in just about 10 seconds. The linear actuators only extend/retract with 12″ of travel, but that is enough for them to raise the panels to a little over 45 degrees of tilt. When the sun is low, as in the mornings, late afternoons, or all winter, there is a huge difference in power production with the panels up (up to 40%!), if the van is facing the right way. In addition to making it immensely easier to access the stuff stored on the roof with my telescoping ladder, another handy aspect of the motors is simple cleaning of the panels with my pole-mounted car washing brush when they are tilted up.
Many smaller highways around the country are beautiful, but have no cell service, or if they do, it’s minimal voice, with no 4G. But when you come to a RV campground on those roads, they advertise “Free Wifi!” (usually thru DSL telephone lines, or Hughes Satelite) ‘Terrific!, you say, and pull in, and check in. Then they hand you the little map that shows that you’re in space 243! WAY in the back. “It’s quiet back there!” they say. And you think “Terrific!” So, you drive back there, set up camp, and then get ready to surf the web, or stream a movie! But then you find out what they meant about it being quiet…. NO WIFI SIGNAL! So you hike up to the office and say “where’s the wifi??” And they show you on your phone, but you explain you didn’t see it in your site. And they say “Oh, well, the router’s here on the office, so the signal’s not as strong back there,…..but it’s nice and quiet!” – “yeah, but,… uh,… I guess we’re gonna need to move up front here somewhere.” – “Sorry, all full, except in the back,……….and besides, it’s really nice and quiet back there.” ….”Grrrr”….

SO,…they make “WIFI REPEATER / AMPLIFIERS”, which are a great idea! Especially for RV’s with an all-metal shell! There’s a little box that looks like a standard home wifi router with two little antennas on it which mounts inside and re-broadcasts the wifi to your devices. And then you can choose either the 15 inch tall, or 7 foot tall roof antenna for it. Well, the 15″ one is too tall for the roof of my van already, and it has much less gain than the 7 foot tall one, and gain is what you want! In fact, the seven footer’ has 15db of gain, and says it can work for up to 5,000′ away! So I asked them “How can you use a 7′ antenna on an RV?” they said: “Oh, it’s easy, when you get into camp, you just run the cable out the window, and strap it onto your mirror!” – So I made this motor lift. Which you can see deployed in the photo above.
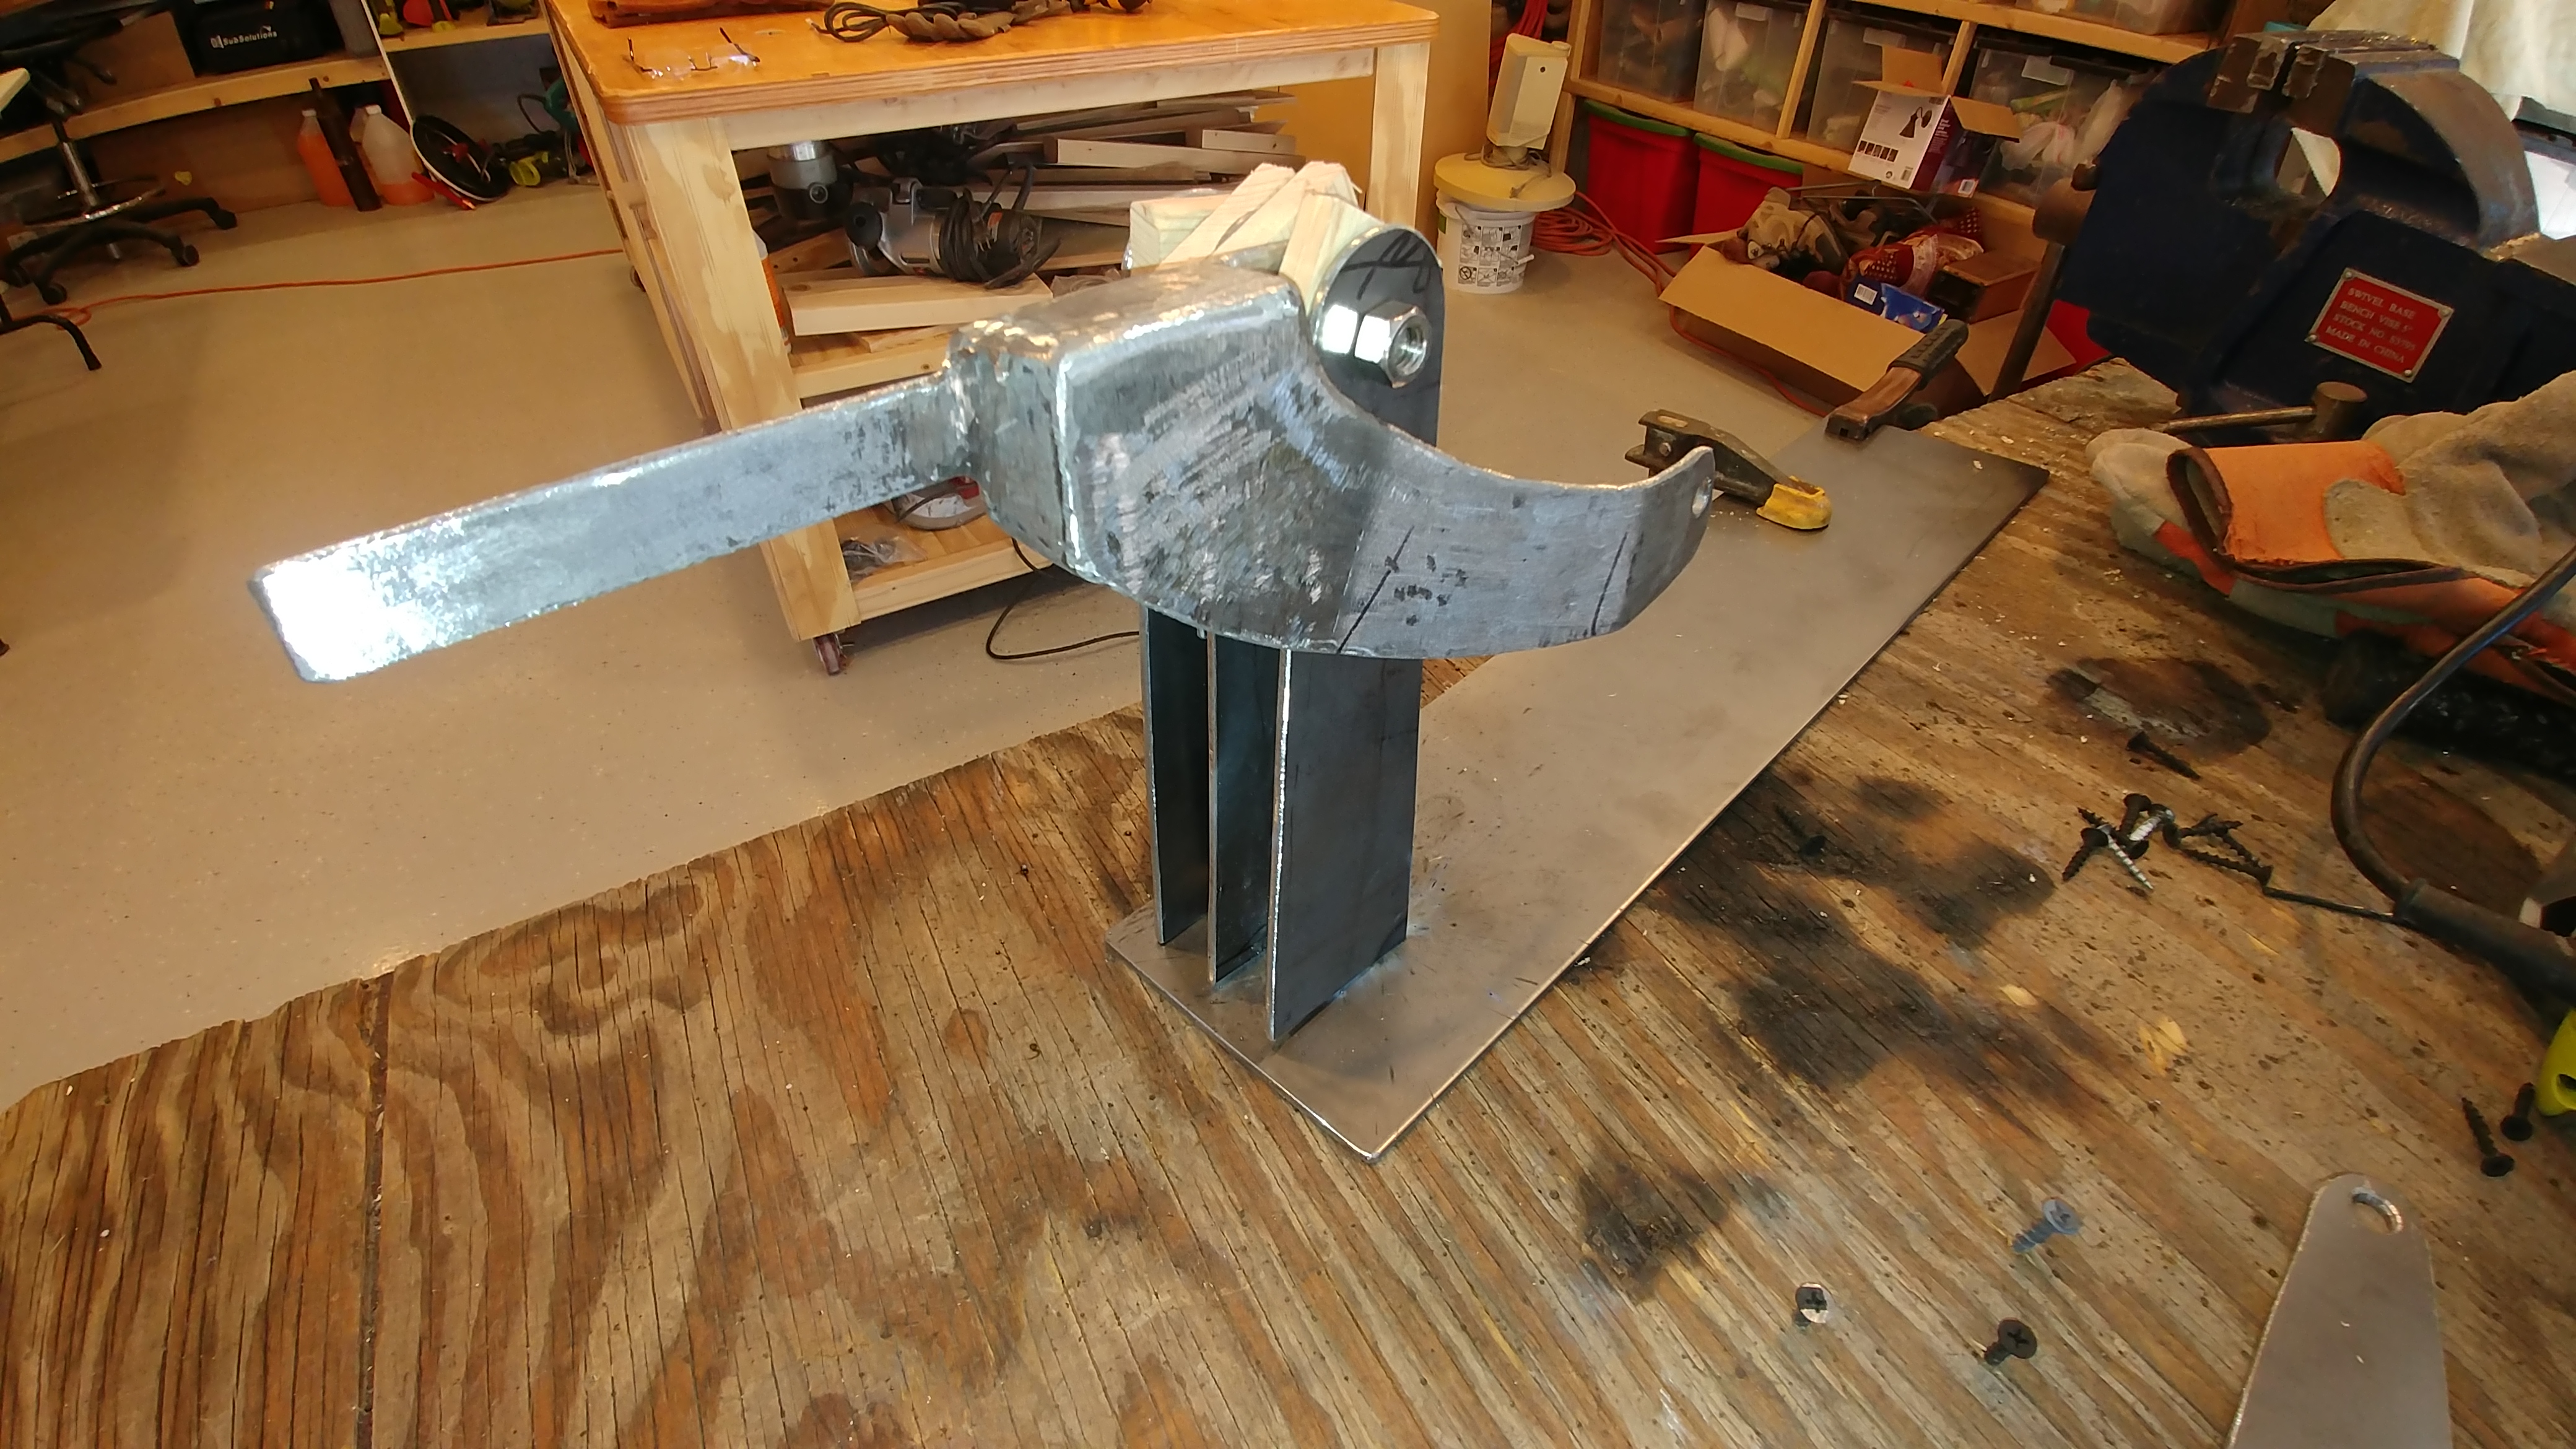
I used the same series of high quality, completely waterproof linear actuator motors as for the solar panel lifts. But this one only needed to be a 6″ travel model, because all we’re doing is pivoting the mount on an axis. It does have to be strong enough for wind storms and maybe being accidentally deployed against a branch or something. Just as in the design for the solar panels, I used the full extension of the actuator, and just designed the mechanism accordingly so that down is flat on the roof, and up is exactly 90 degrees upright.
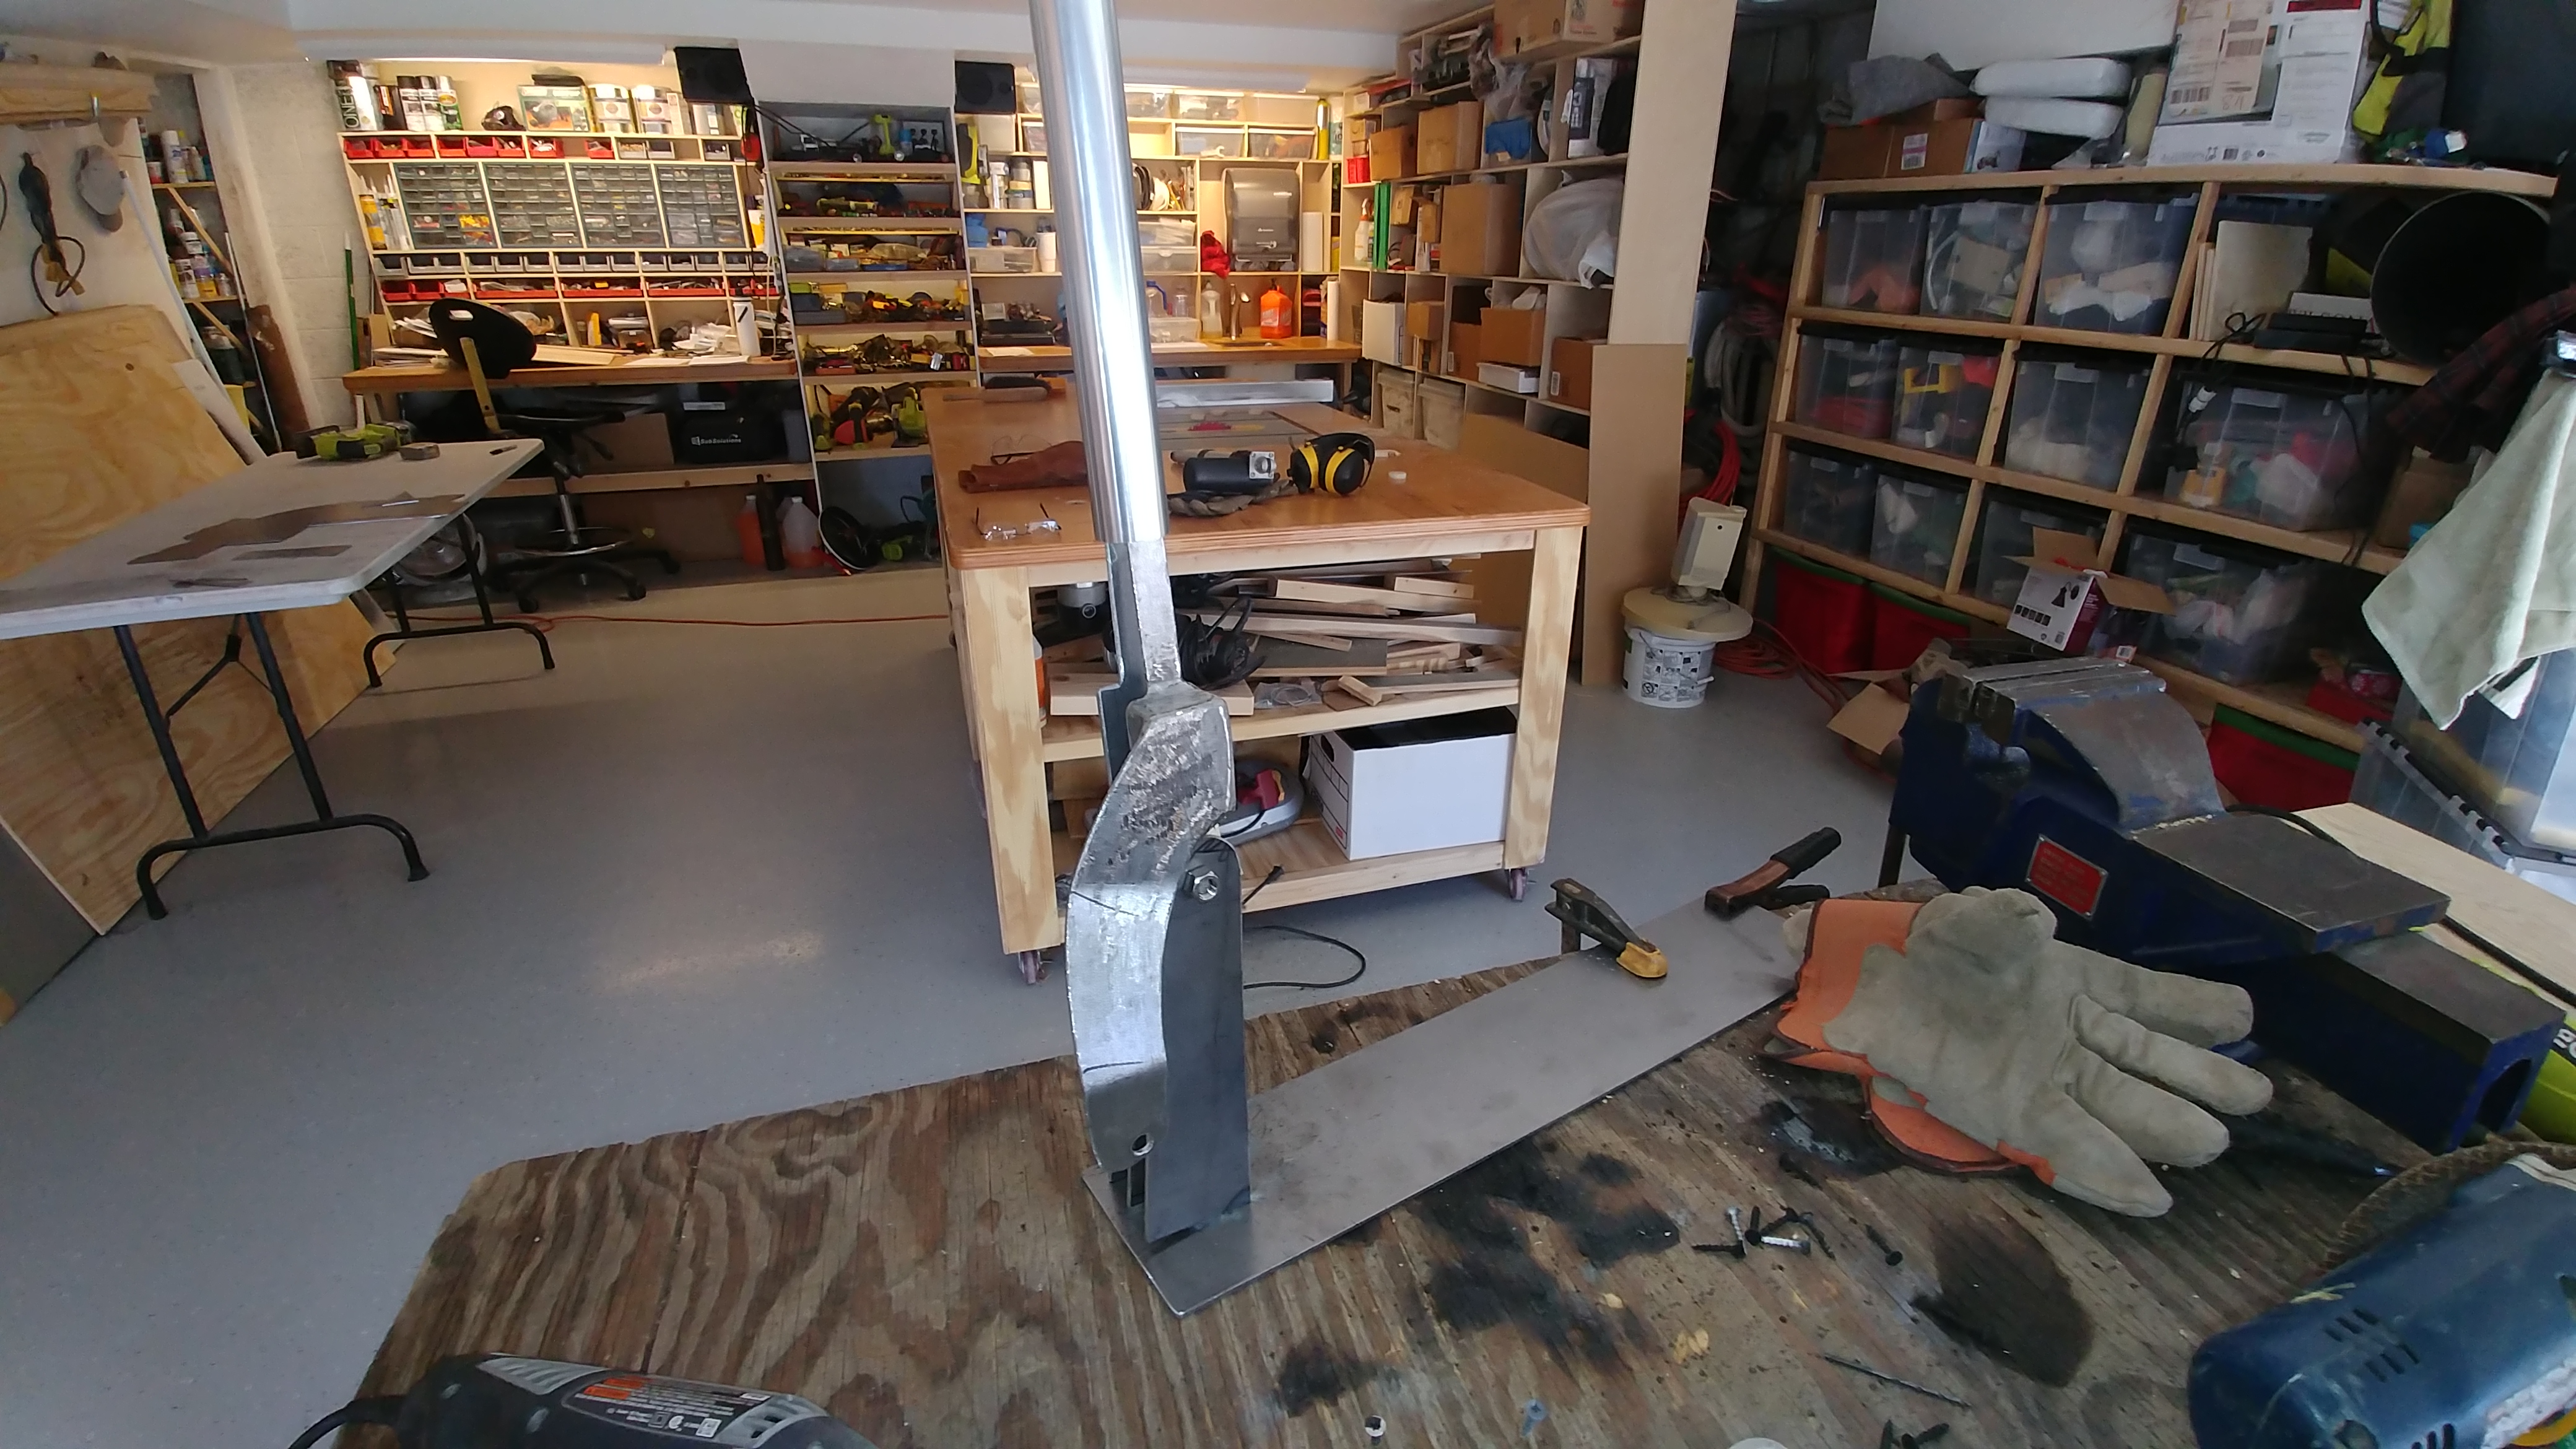
The little wood block spacers were only used during welding, and later replaced by nylon block spacers. So now we’ll be able to park in the back of the campground and hopefully stream some netflix, or even park down the street from a Starbucks, McDonalds, or motel, and get strong enough wifi to do some corrospondance, or download some podcasts, etc, and then be on our way! Of course, the real tricky part, is remembering to put it back down before driving off! We’ll have to develop some ironclad rule or technique for not forgetting, like hanging a note on the steeringwheel right when you put the antenna (or solar panels) up!
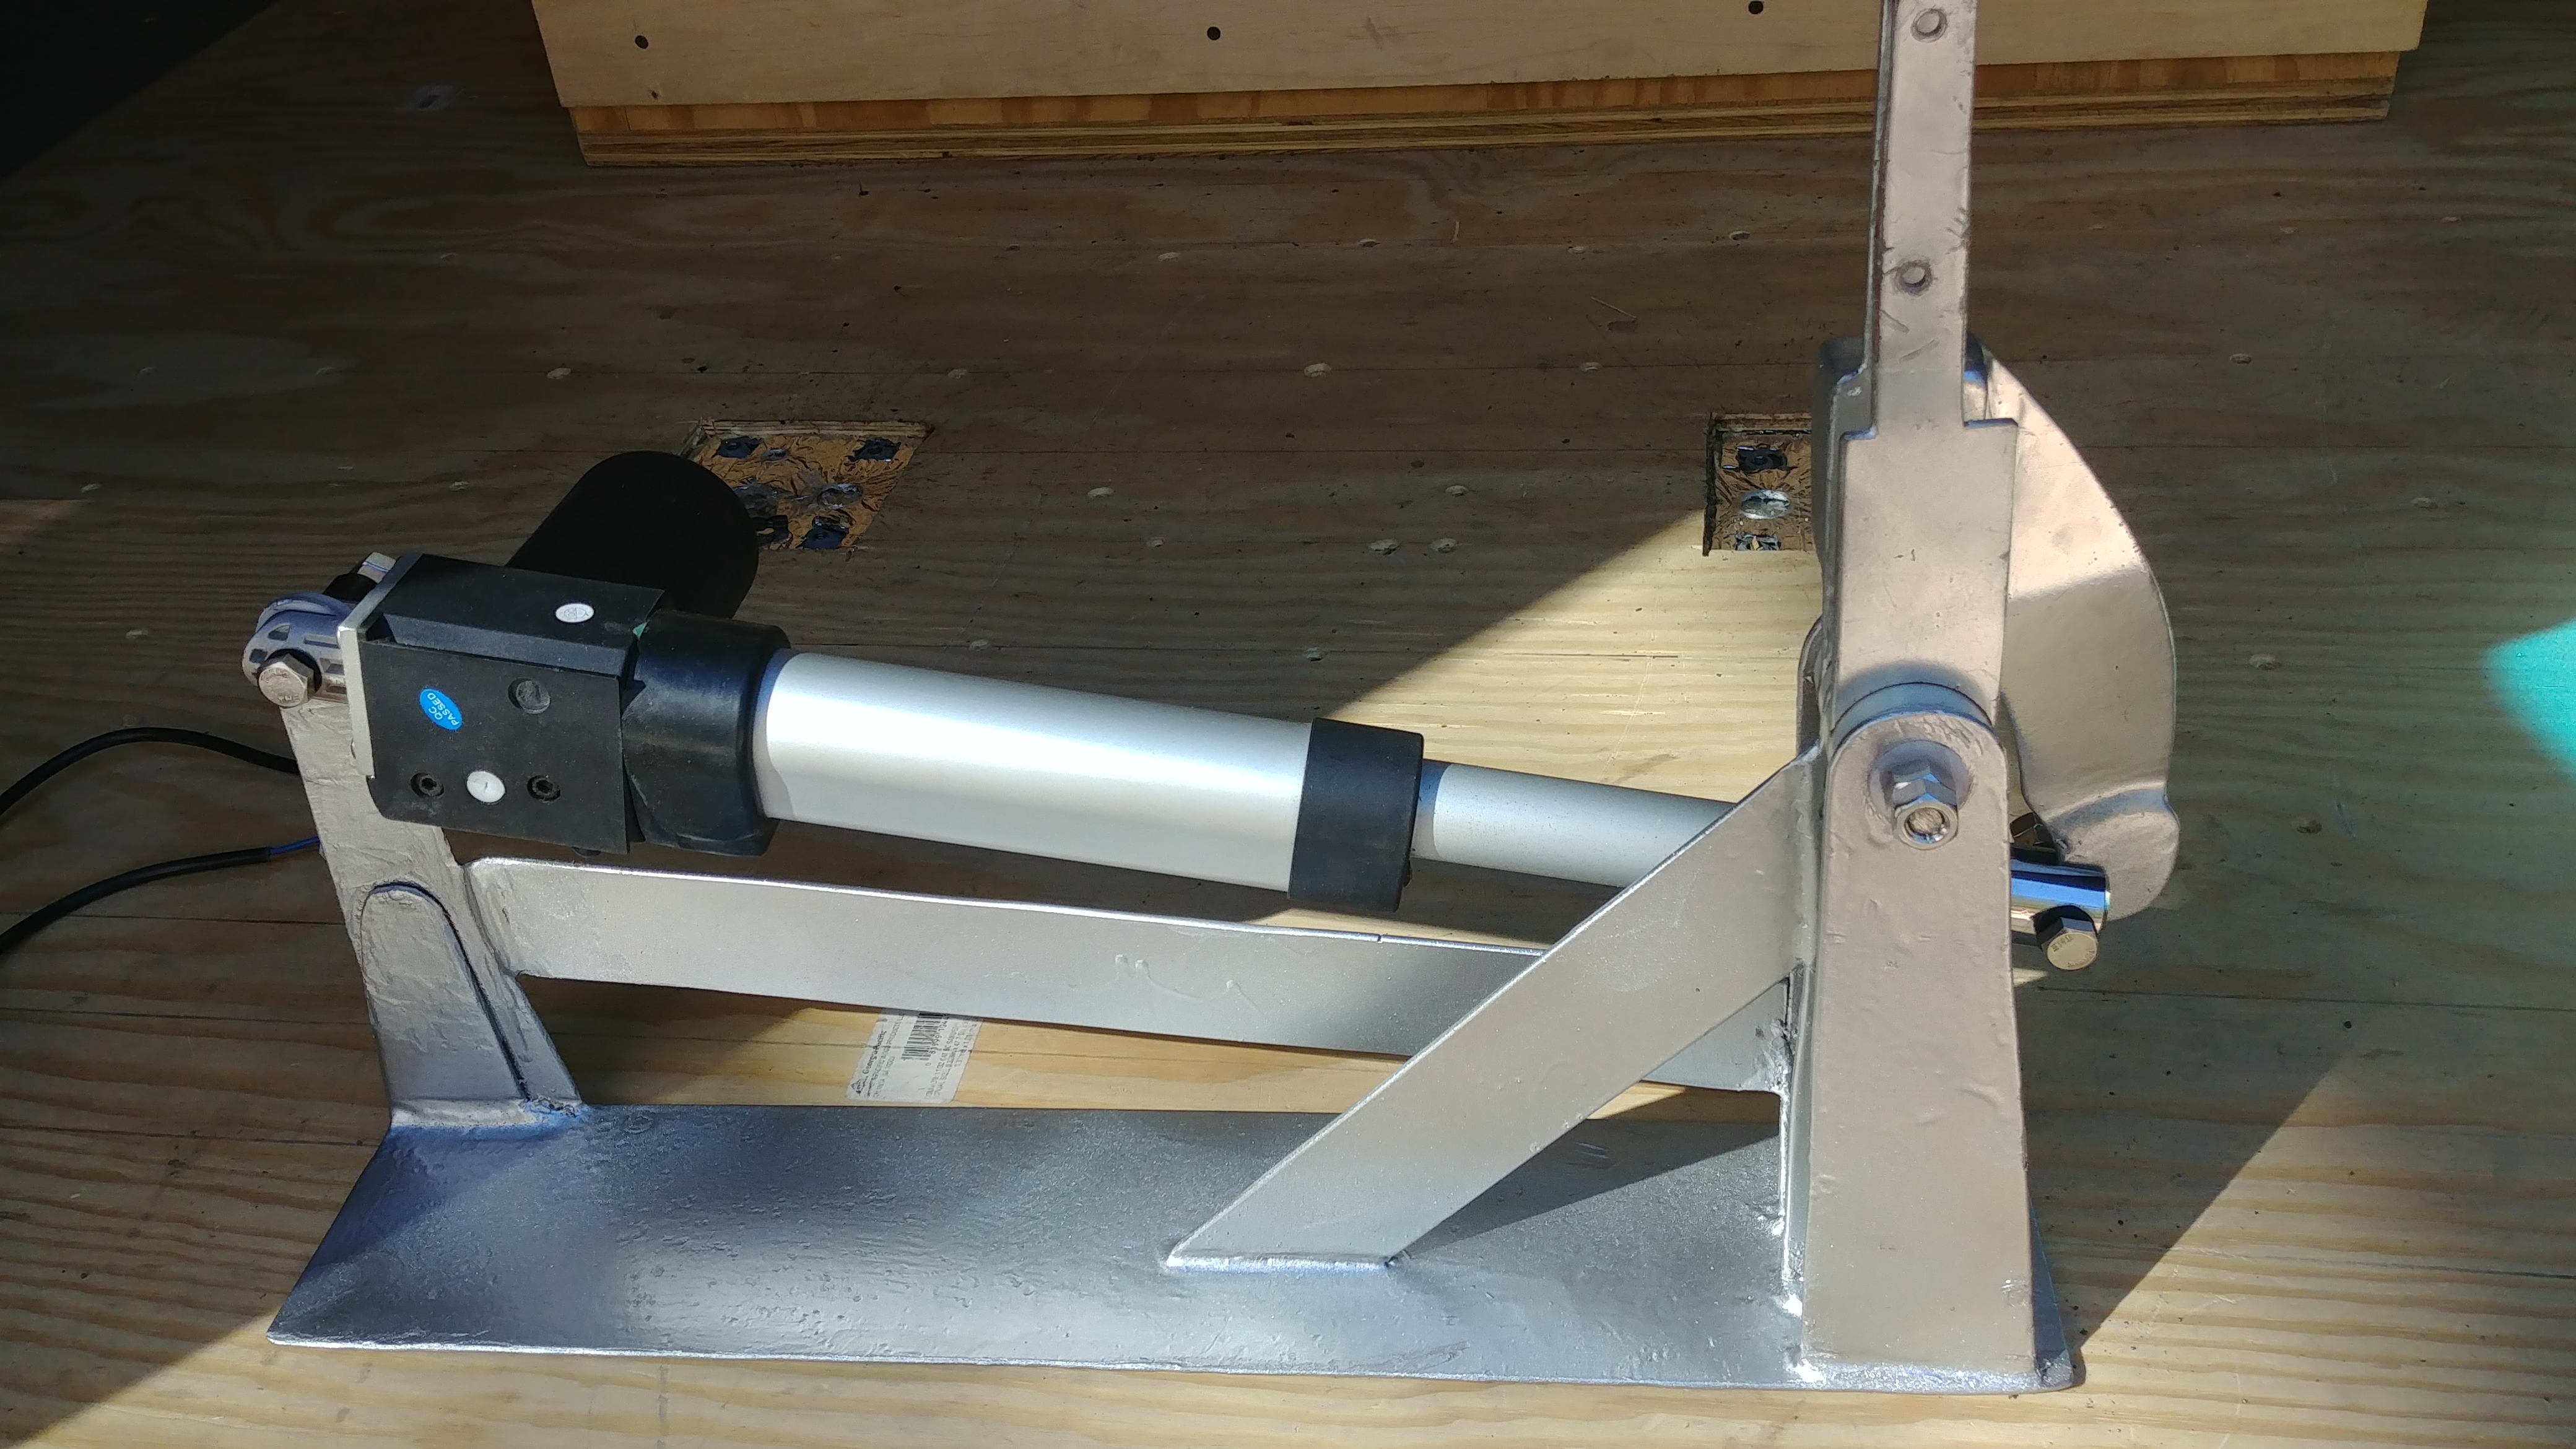
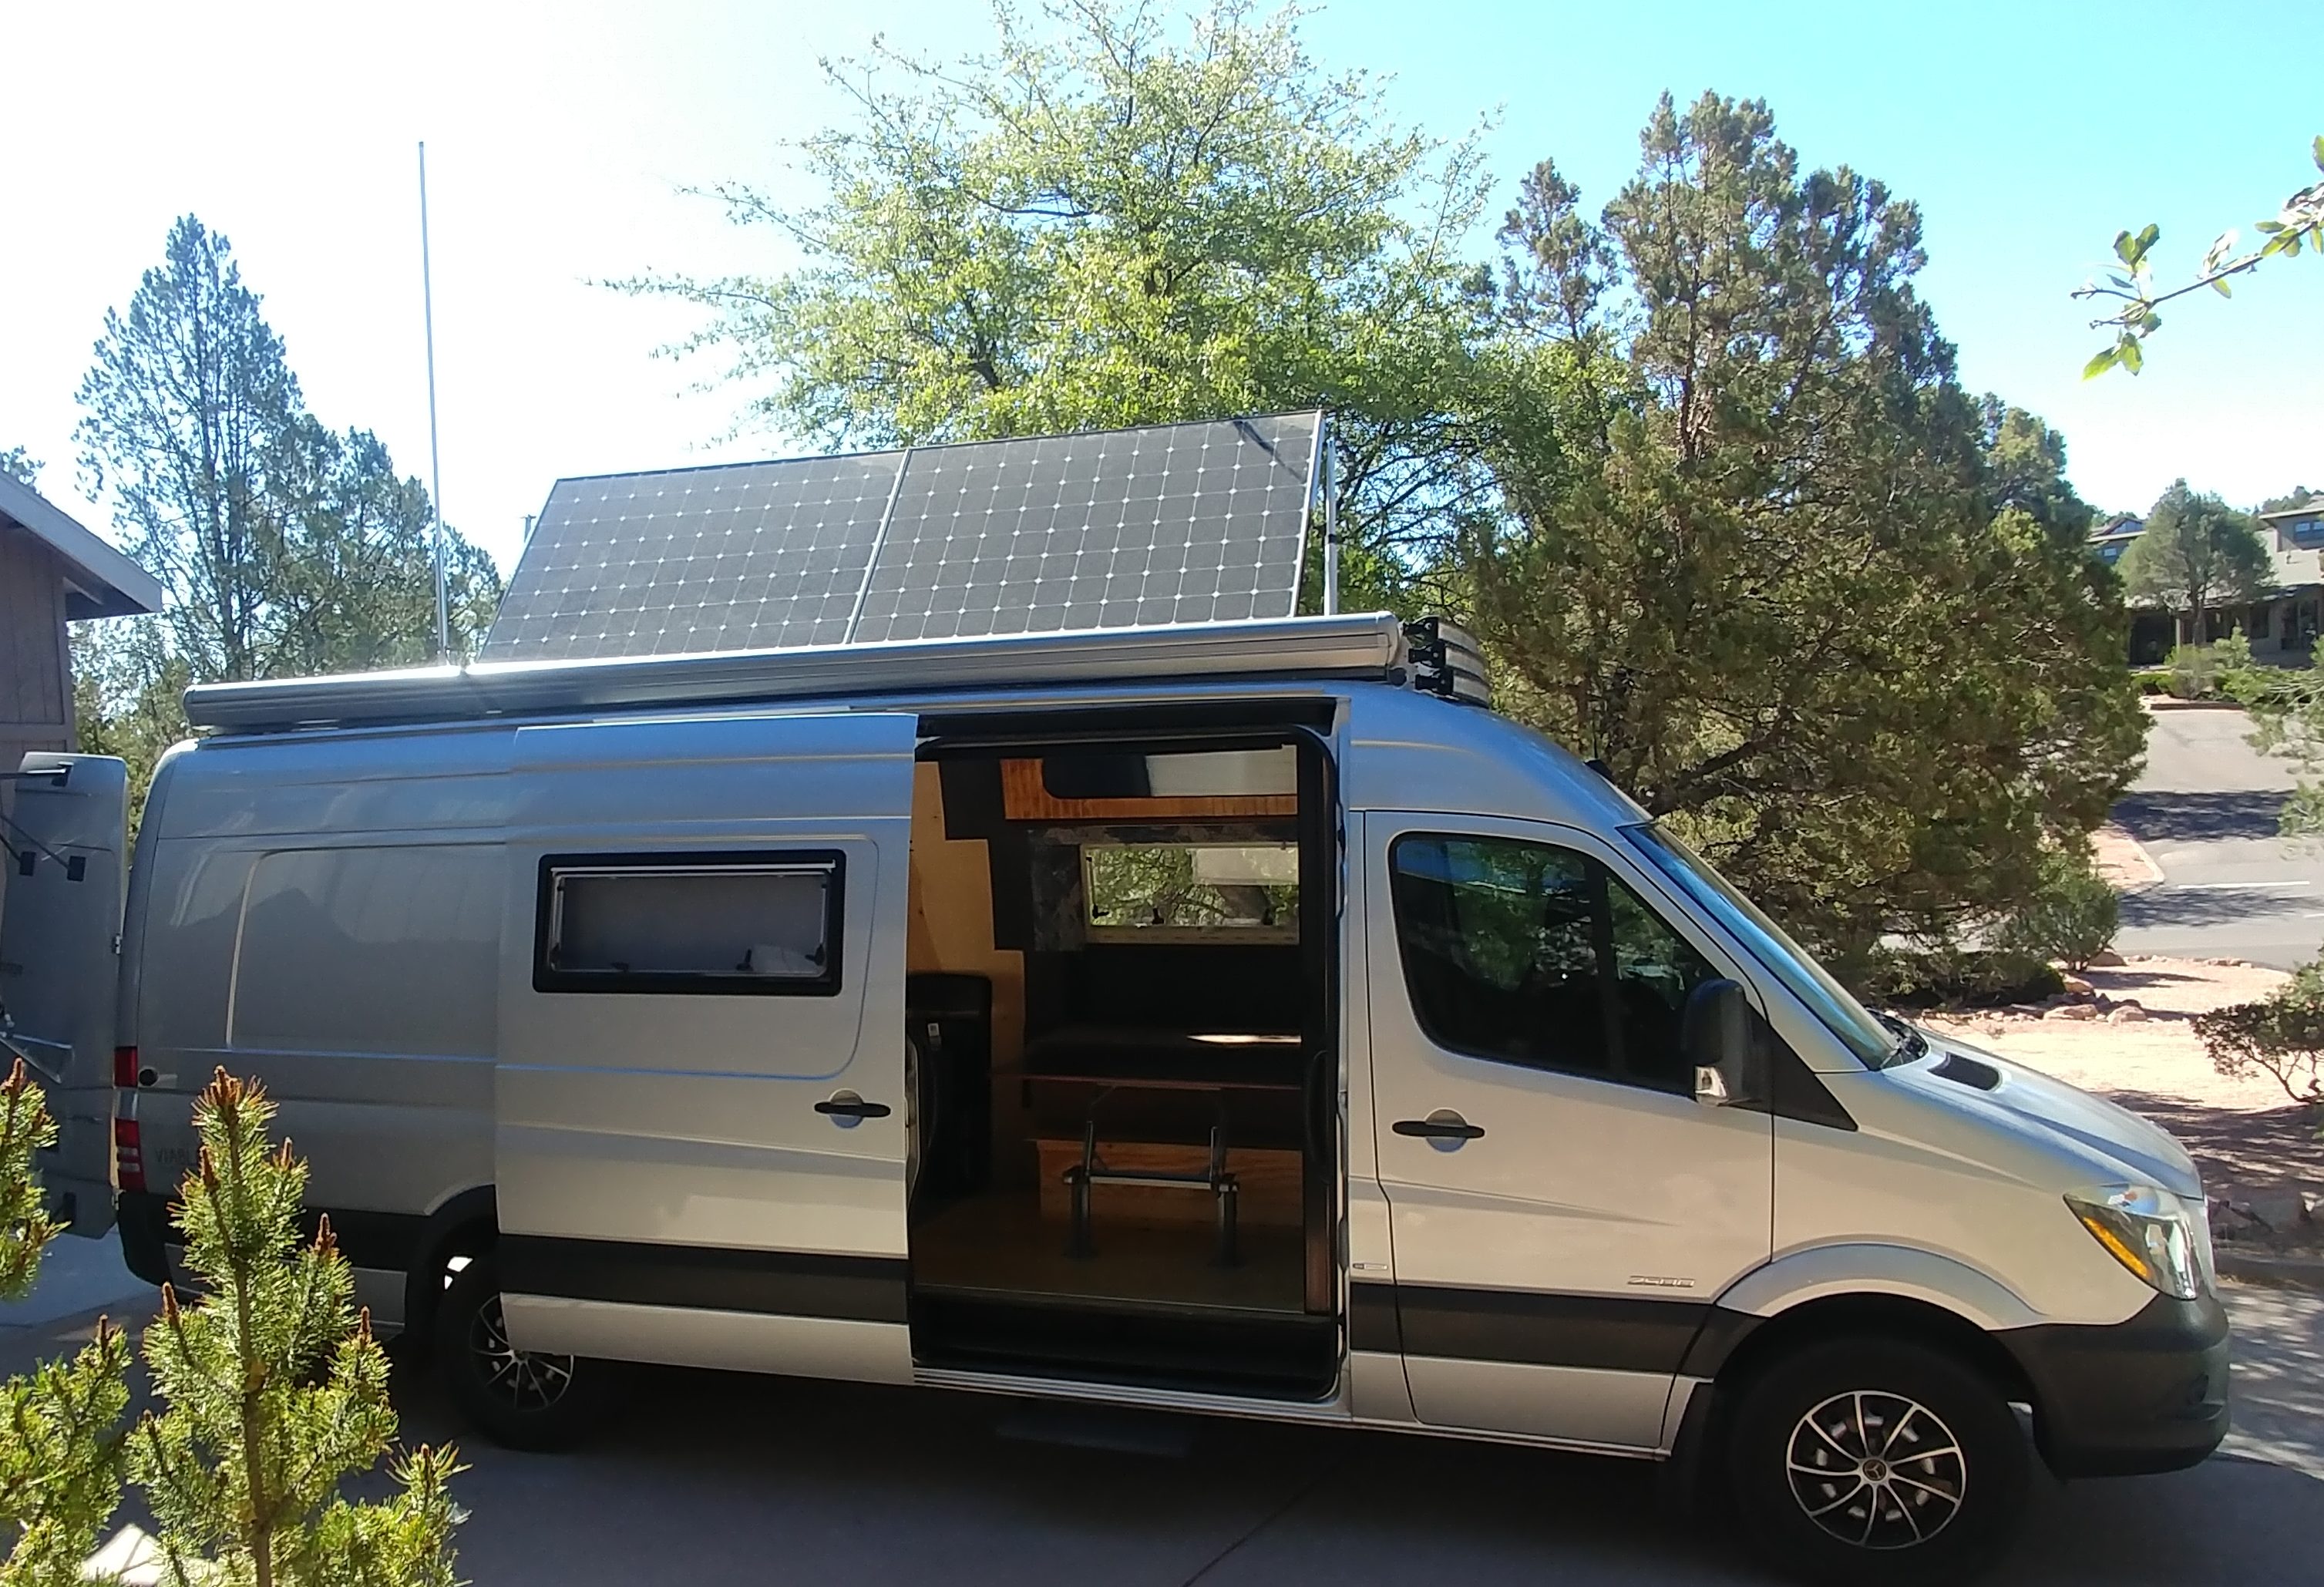
There are four axle support struts, and two pivoting arms that the mast slides onto and bolt into. By the way, the finished unit just gets glued to the roof, using today’s amazing adhesives, to avoid any possibility of a roof leak. The cable (which was run up onto the roof a year ago when everything was planned out and purchased) goes up between the two arms and screws into the base of the fiberglass antenna, just above the 1′ long aluminum mast base. Here you see it in it’s UP position before installing. You can also see the entire unit installed in the foreground of the solar lifting video above. I will add a video of the antenna lifting (only takes 4 seconds!)(for the antenna to raise, not for me to post stuff!) here soon. (you can see the antenna in the up position in the 7th photo/paragraph of the van in the driveway)