Seat Subs / Dash Stereo
This is a section on making the dash stereo sound terrific instead of terrible as it sounds with the factory in-dash head unit. Although the stock stereo looks terrific, it sounds terrible, mostly because of two things: High distortion from the low-power radio, and no discernable low frequencies.
The dash stereo is an important part of a viable RV, as there are many miles driven between target destinations, and a high quality sound system can really help make the drive enjoyable. This vehicle, like almost every other vehicle of any kind, has a need for strong fundamental low frequencies in order to sound ‘full’ and complete. The reason, is that there is ‘road rumble’ from the drive train as well as the tires hitting the pavement that masks the bass notes of music, eliminating the rhythm and it’s sound queues, leaving a bland sound.
The only way to restore those critical notes is to have a separate subwoofer of some kind that can play those low frequecies loud enough to be heard over the road rumble. This requires: a low frequency driver (or drivers), a proper enclosure, and a clean, ‘discrete’ amplifier to power the subwoofer and the high frequency speakers. This power amp requirement is most efficiently solved (both cost and install ease) by using a 4-channel amp, where 2 of the channels run the high frequencies, and the other 2 are used for the sub(s), often in ‘mono mode’. .
However, I chose to use two separate 2-channel amps so that I can switch off one or the other individually. The sub amp off, for extended listening at low volumes while dry camped to reduce power consumption, or the high freq amp off, sometimes while driving if using headphones while others sleep but still wanting low frequencies for the full music experience. This is easily done with a simple pair of toggle switches on the dash that interrupt the turn-on circuit from the deck to the amps
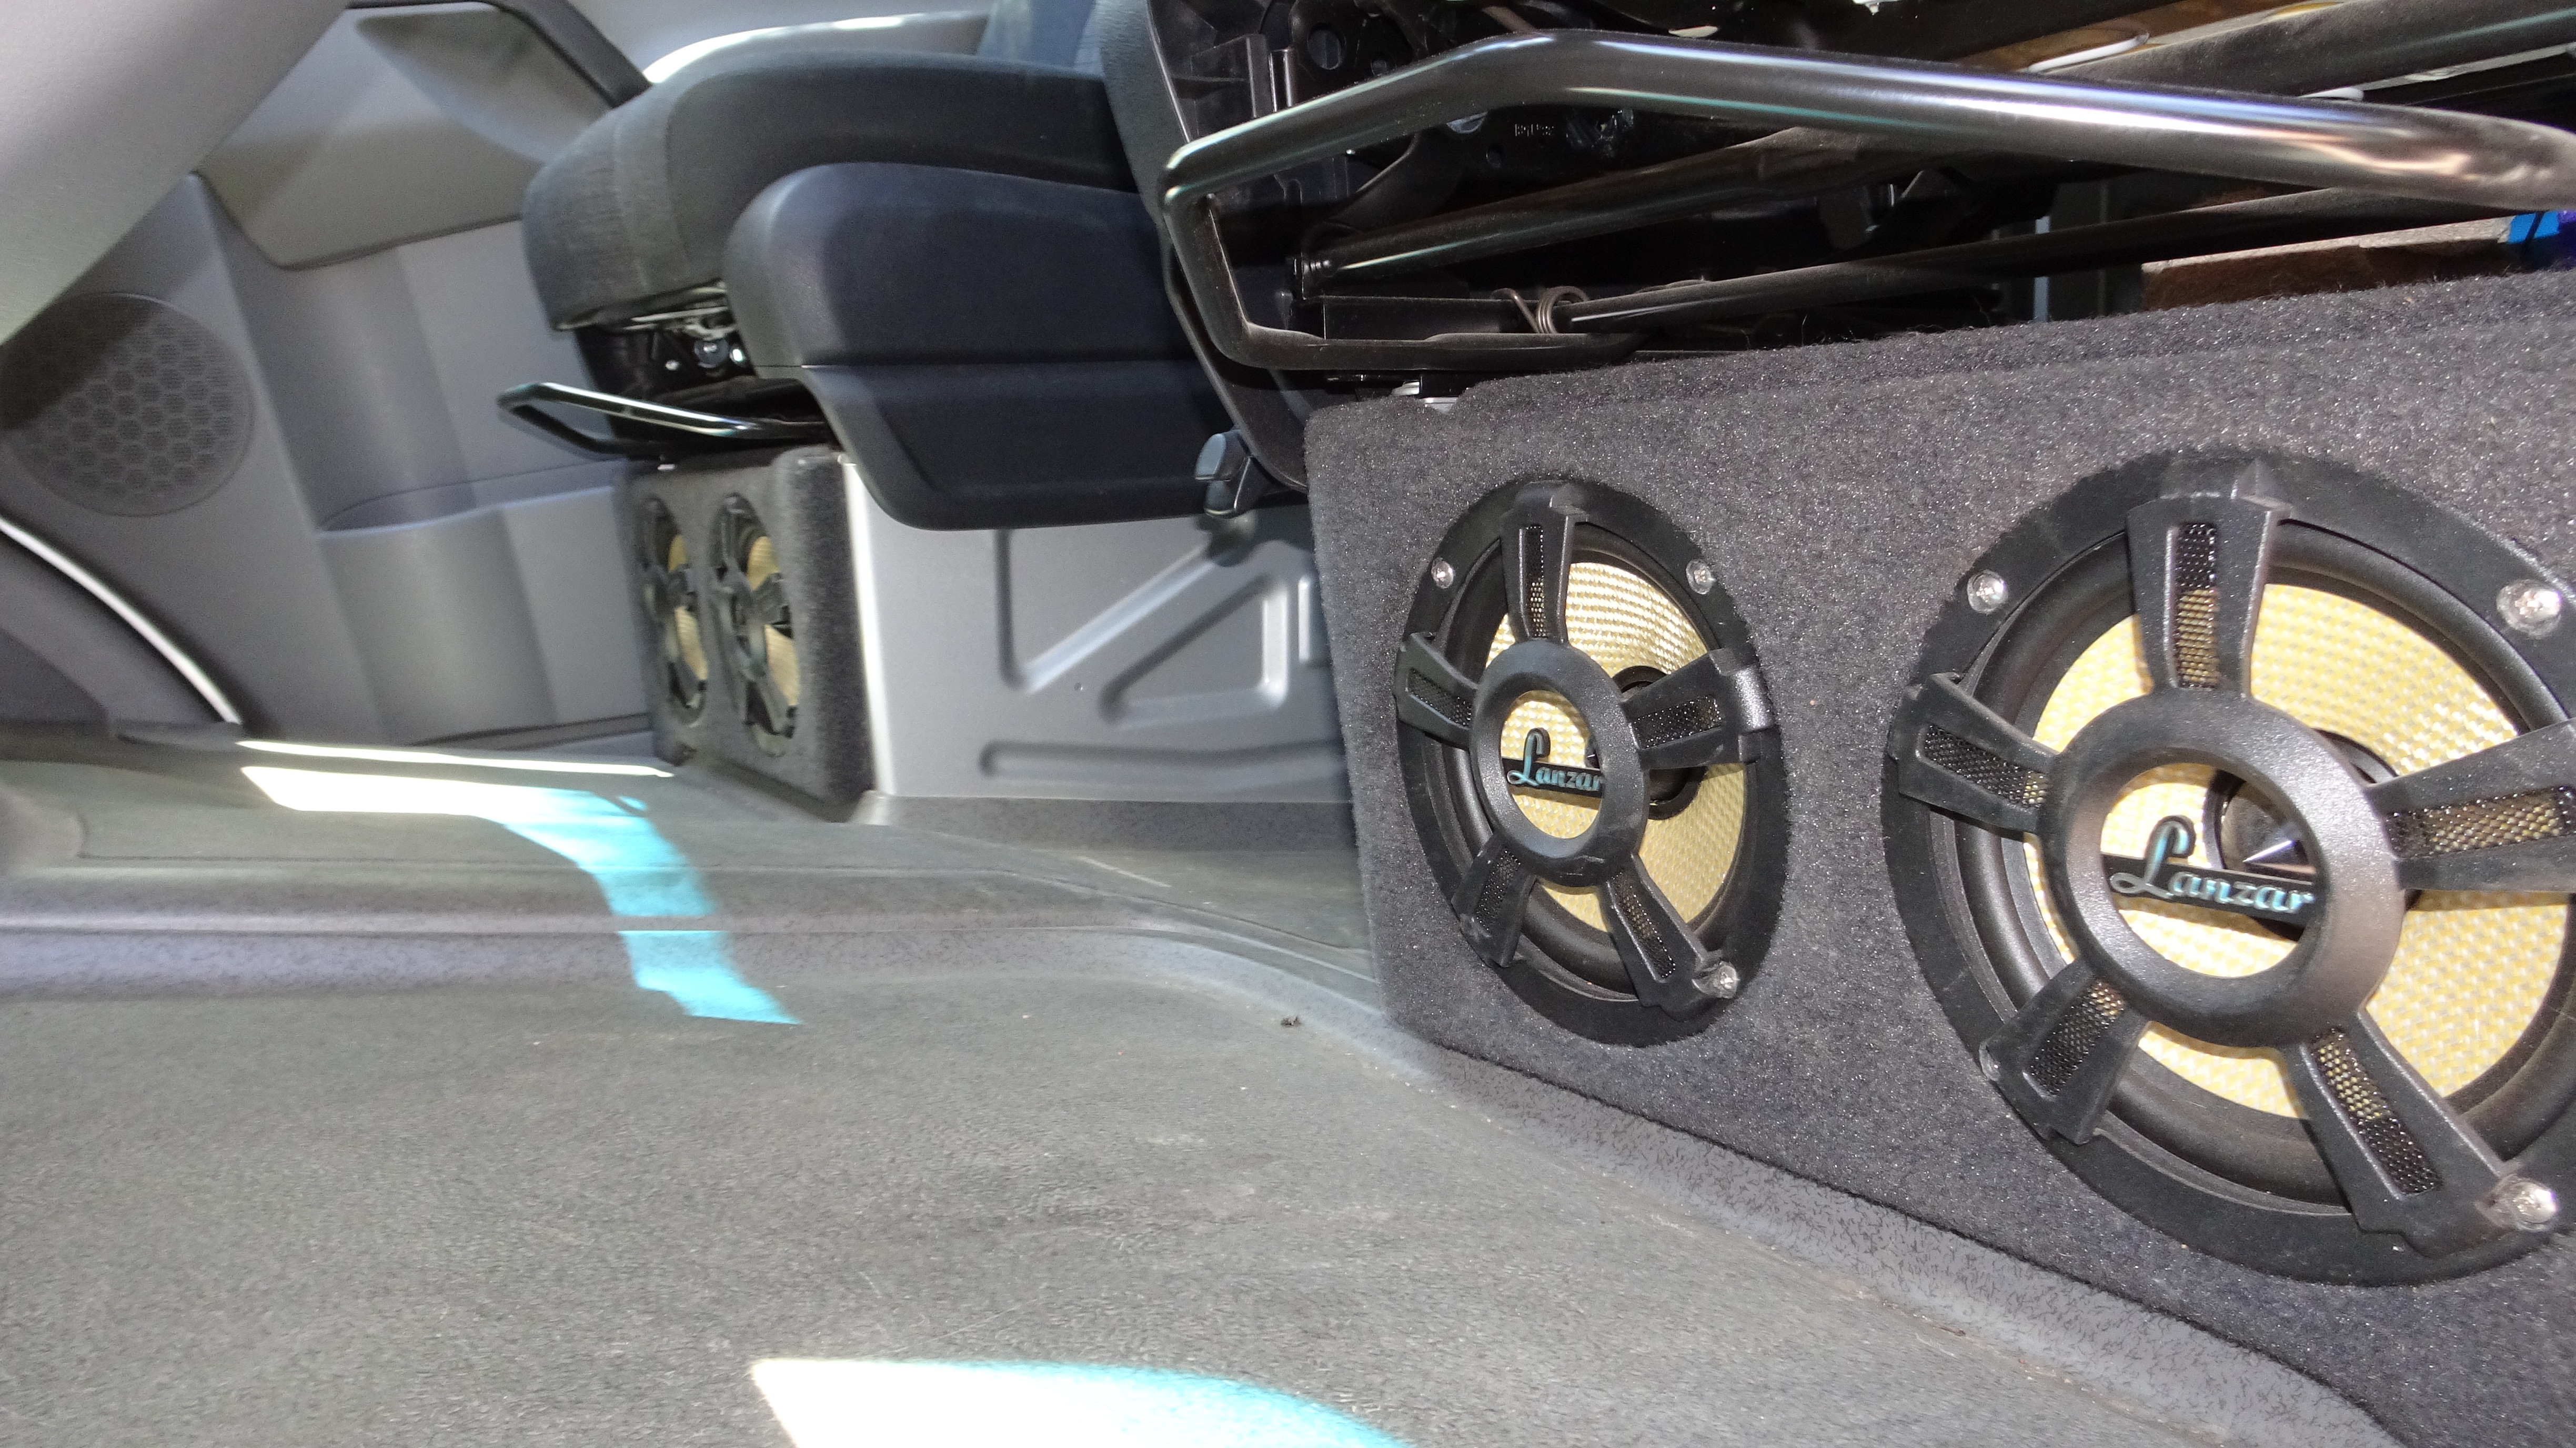
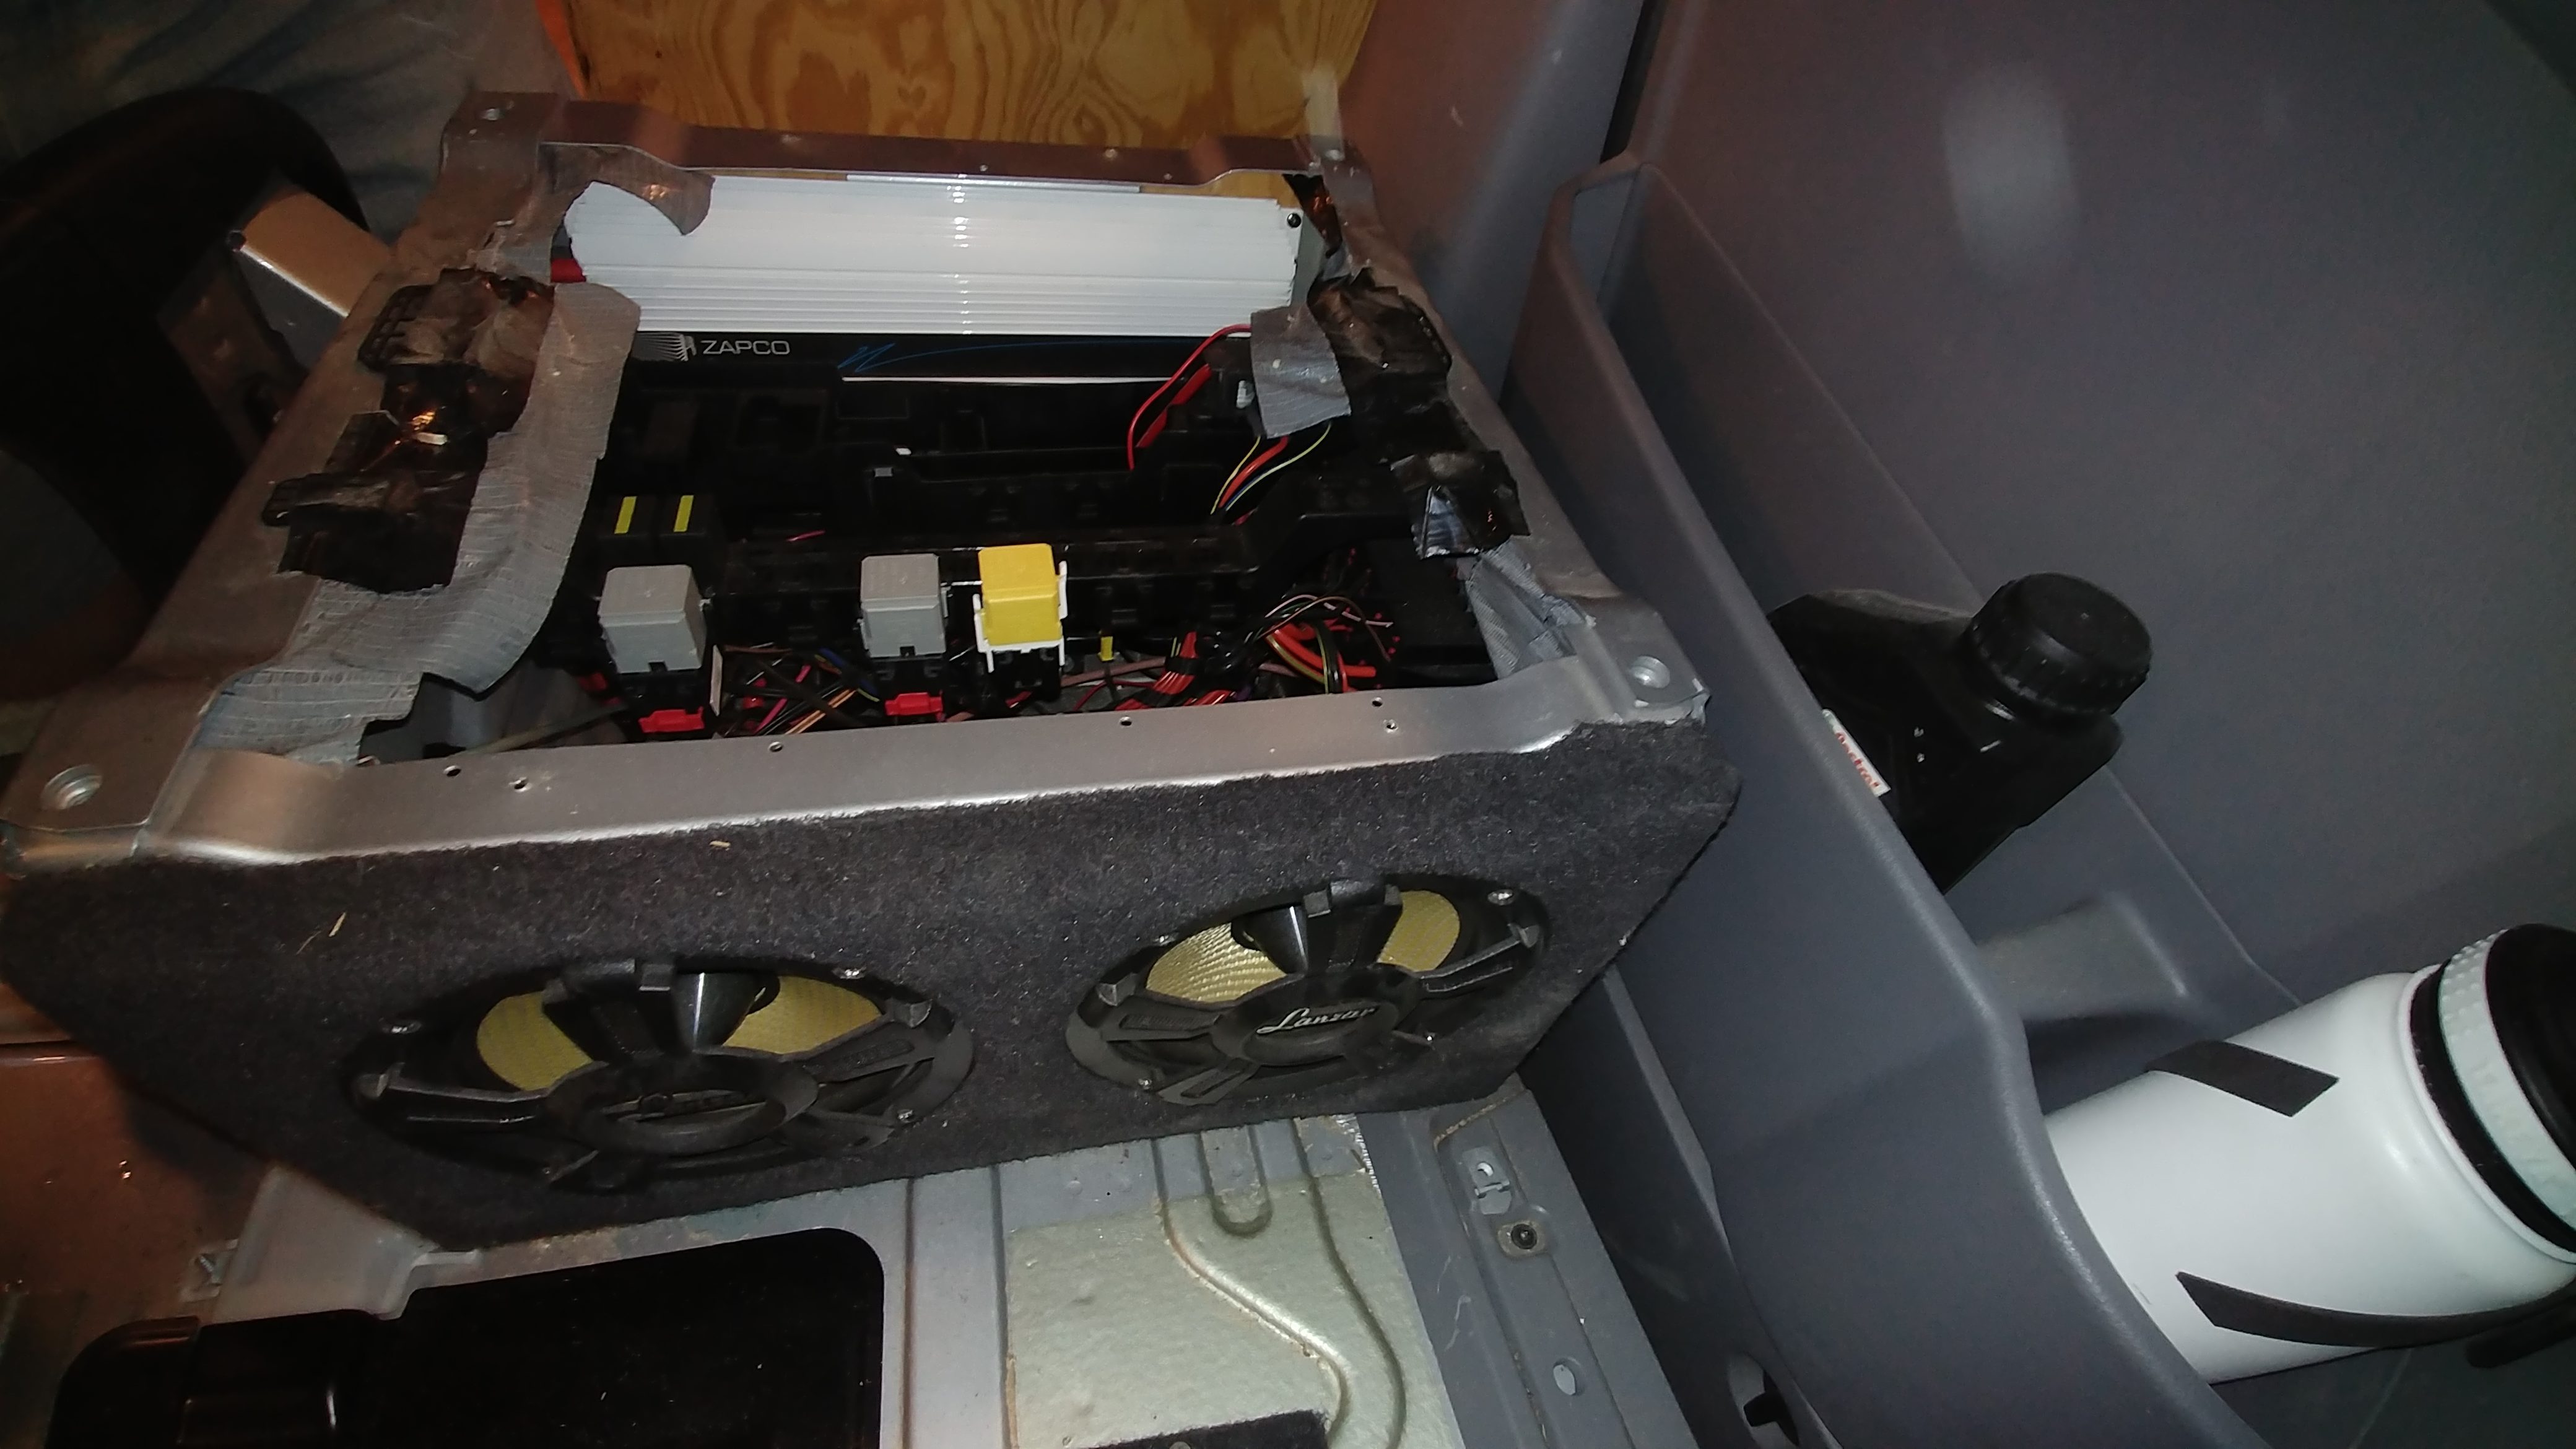
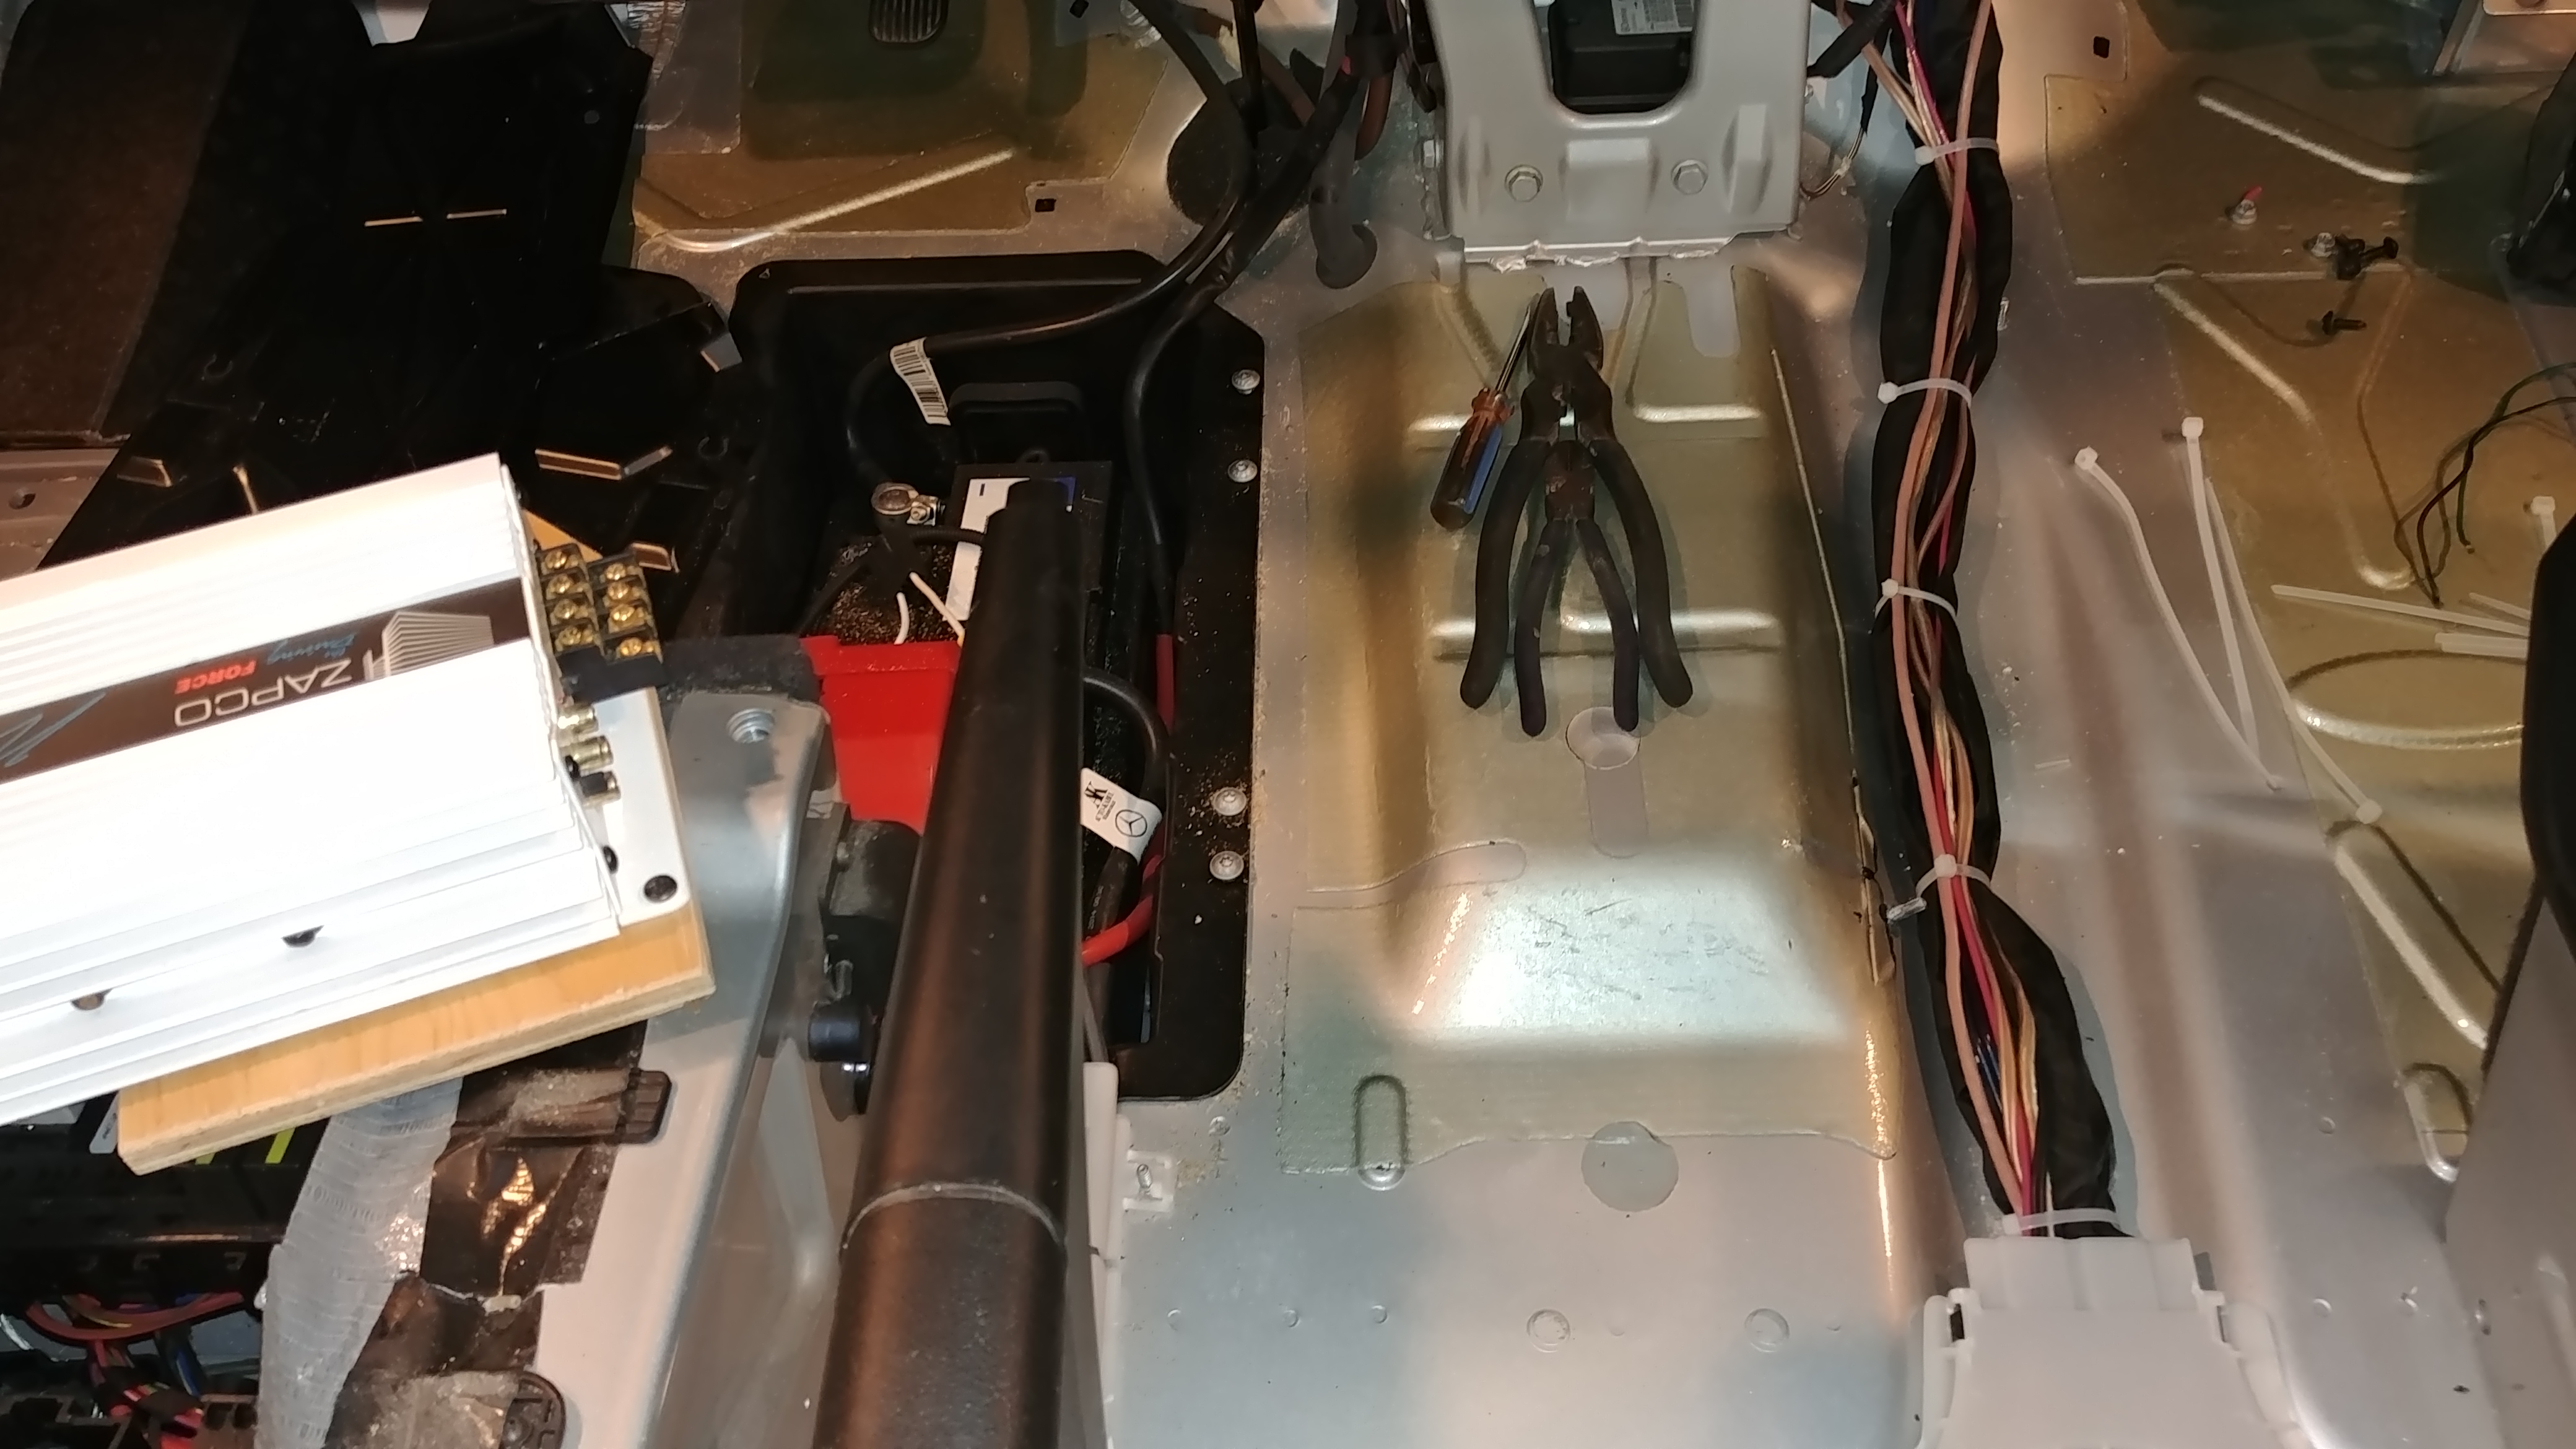
The install in a Sprinter is fairly easy as you can see in the photo above. The mats come up from the floor revealing nice wire track indents in the floor to easily run your: 2 pair of spkr wires, 2 pr. of RCA cables, 1 16 guage power wire for the radio, and 2 16 or even 18ga turn-on signal leads (or just one if you’re doing a 4-channel amp (and not two 2-chan amps). Also, since I did subs in each of the seat pedestals (though just one would sound pretty good) I ran a speaker wire pair from seat-to-seat pedestal. The amp(s) simply go inside the driver’s seat pedestal, as today’s amps do not need much cooling.
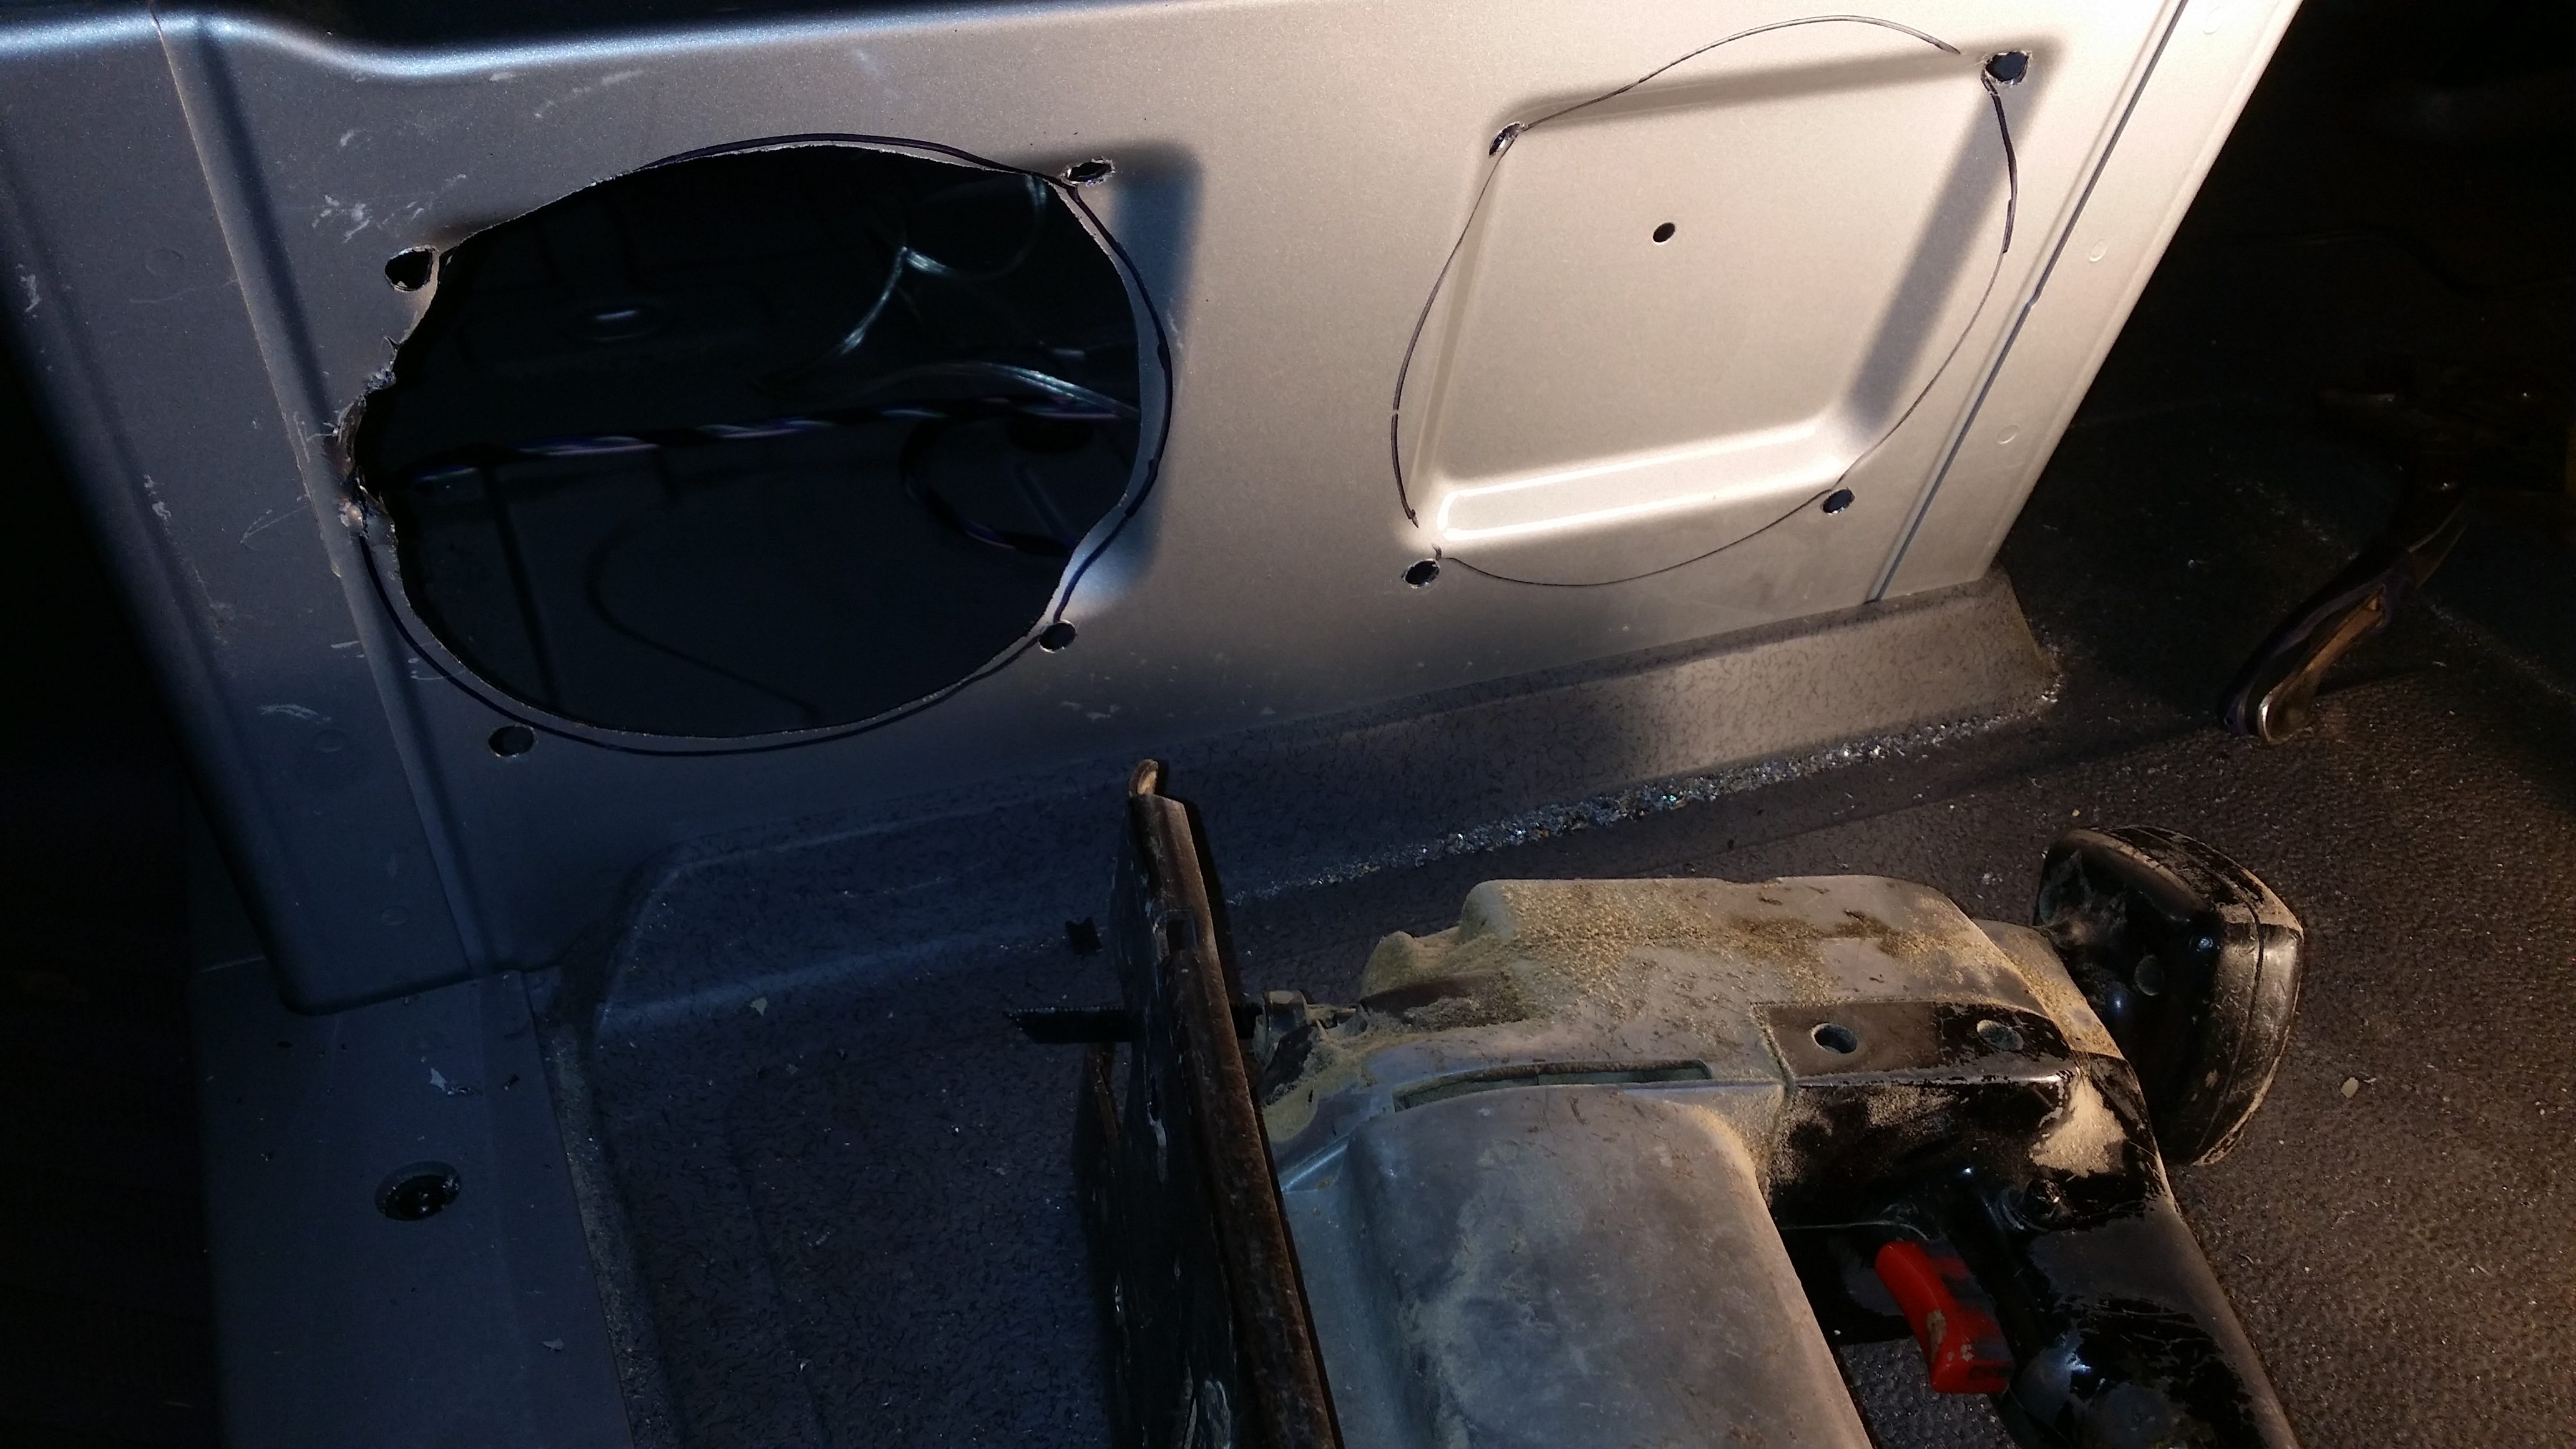
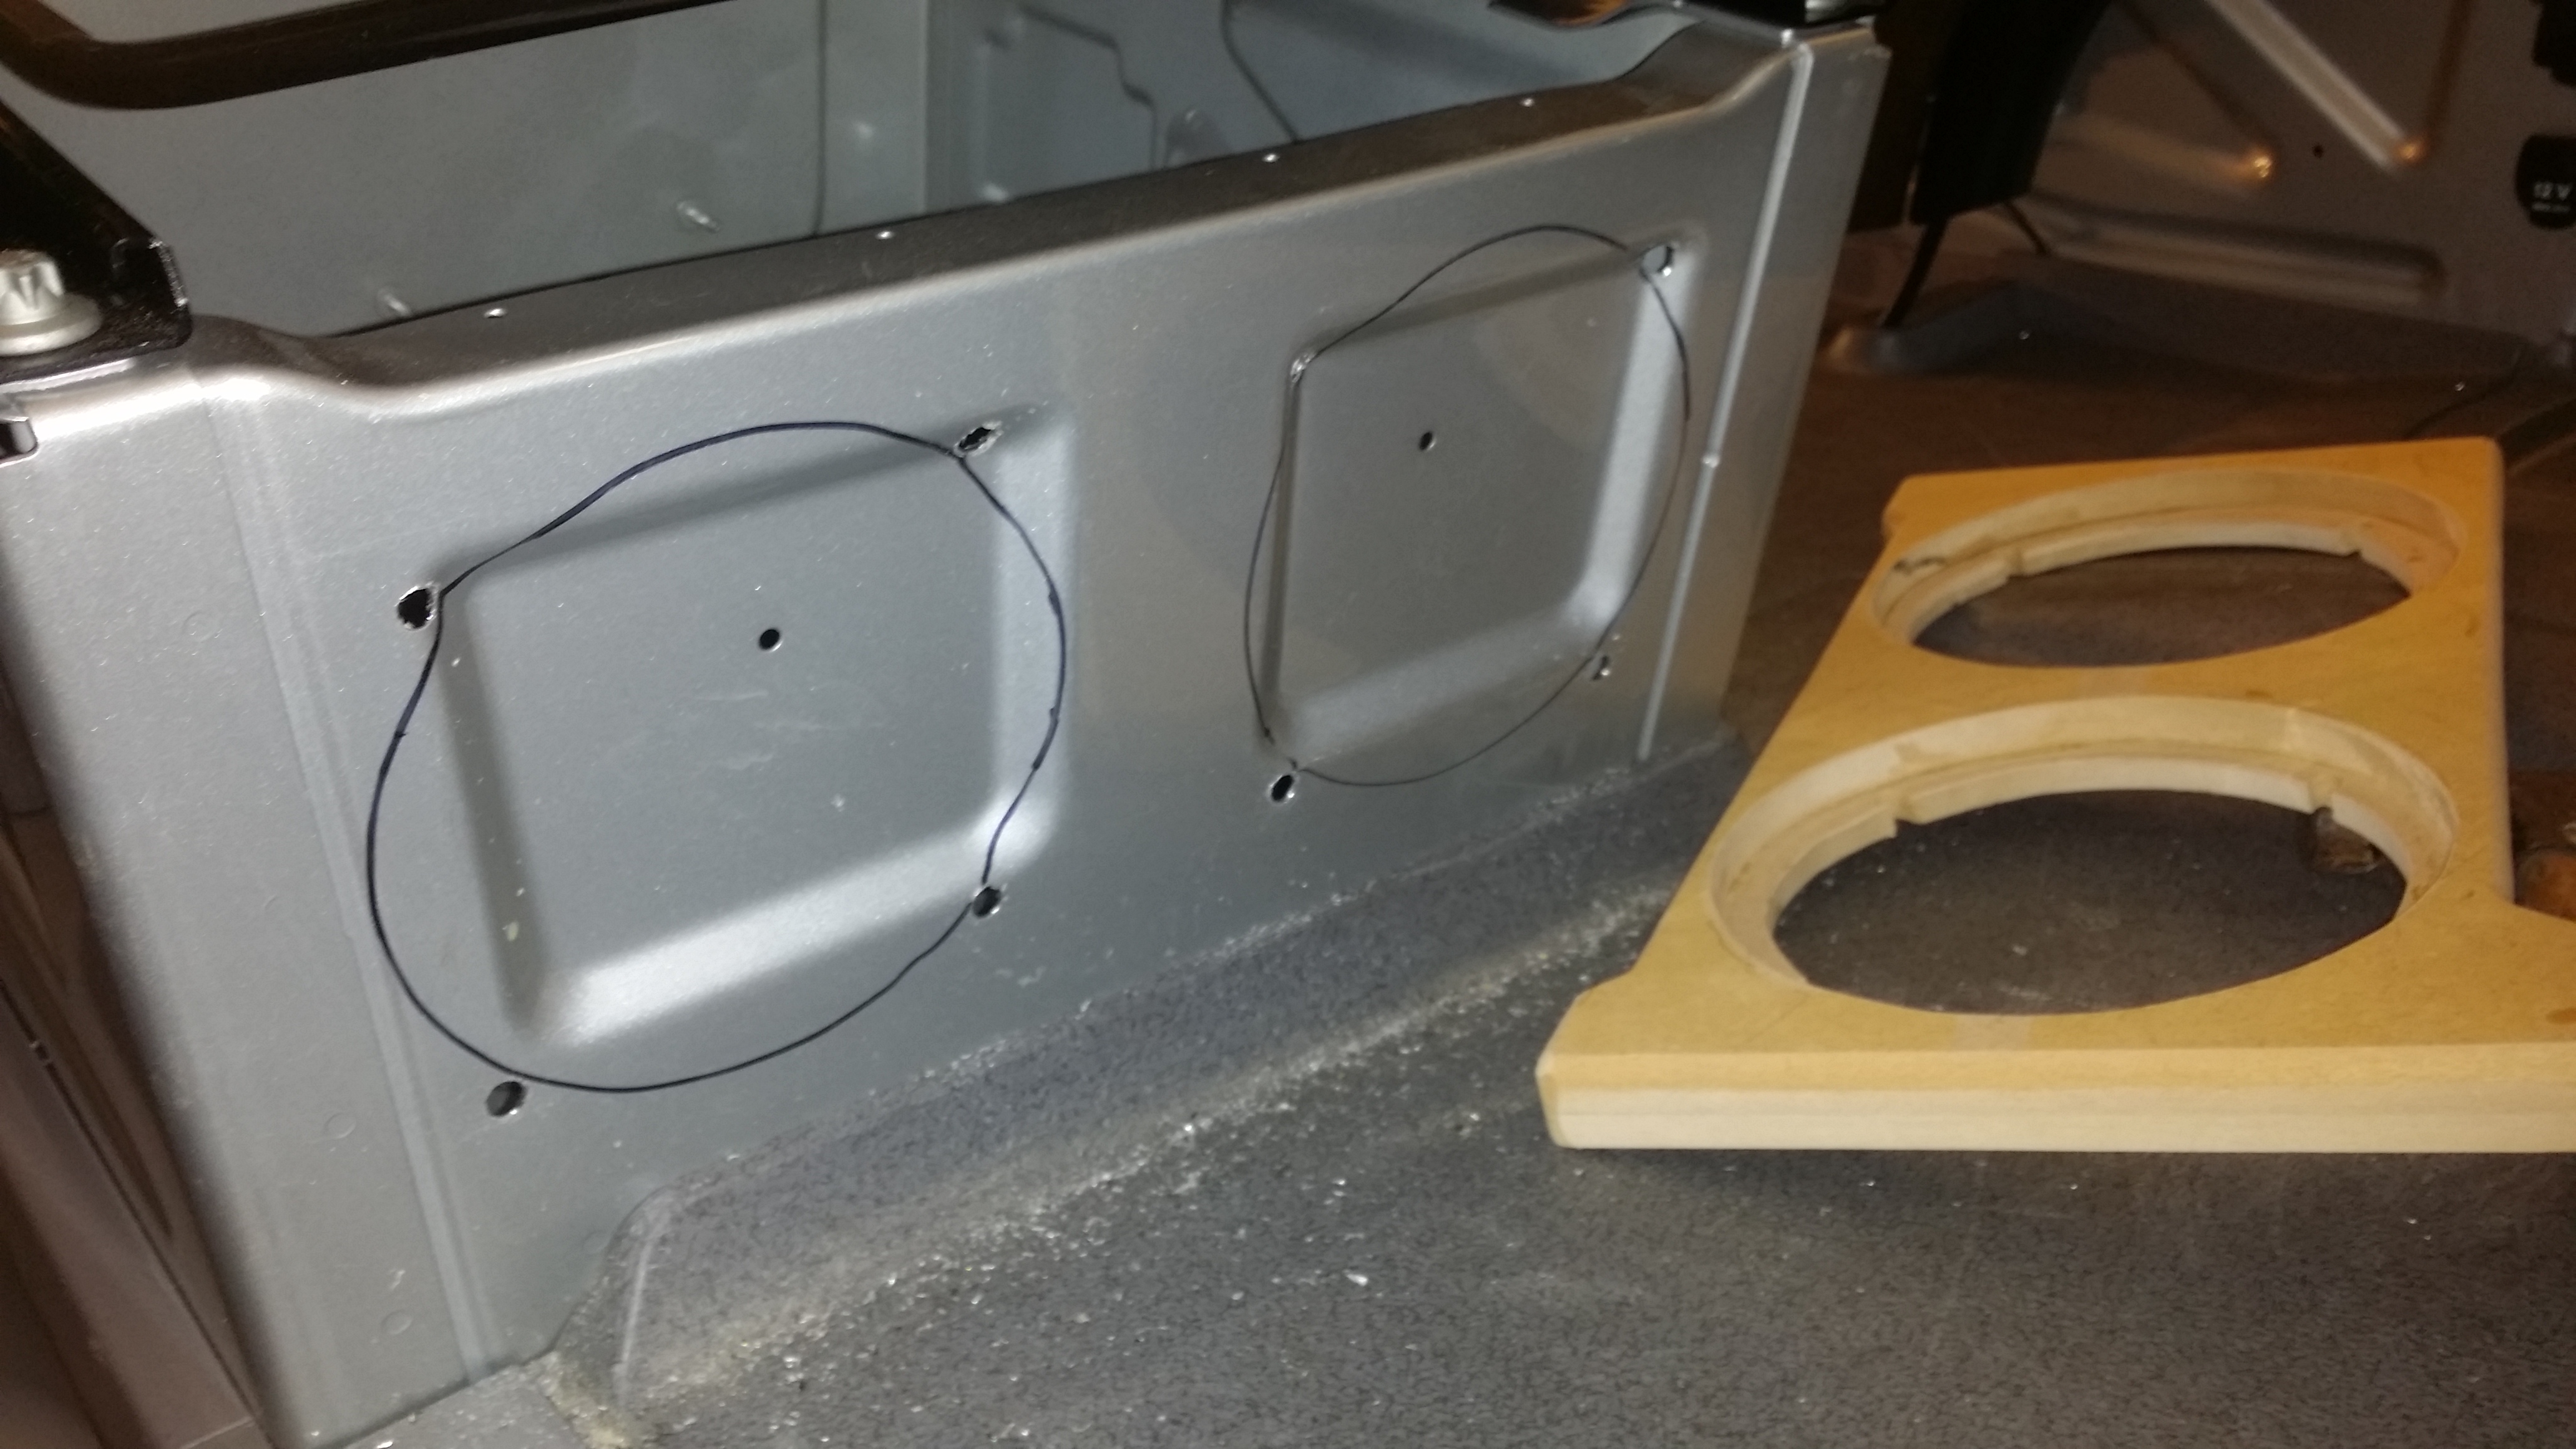
The seat pedestals make for a terrific enclosure as they are about the right size, out of the way/space not needed for anything else, and most of all, they allow for the subs to be way up front and even fire forward for great sounding “front sound stage bass” that “couples” seemlessly with the mids and elliminates the slightly disturbing ‘disconnected’ or delayed bass sound that comes from when you have to have your sub(s) farther away, behind you. I cut the holes with a scrolling sabre saw, but you can use tin snips as well. Then make a baffle board to mount the 6″ subs on a flat surface.
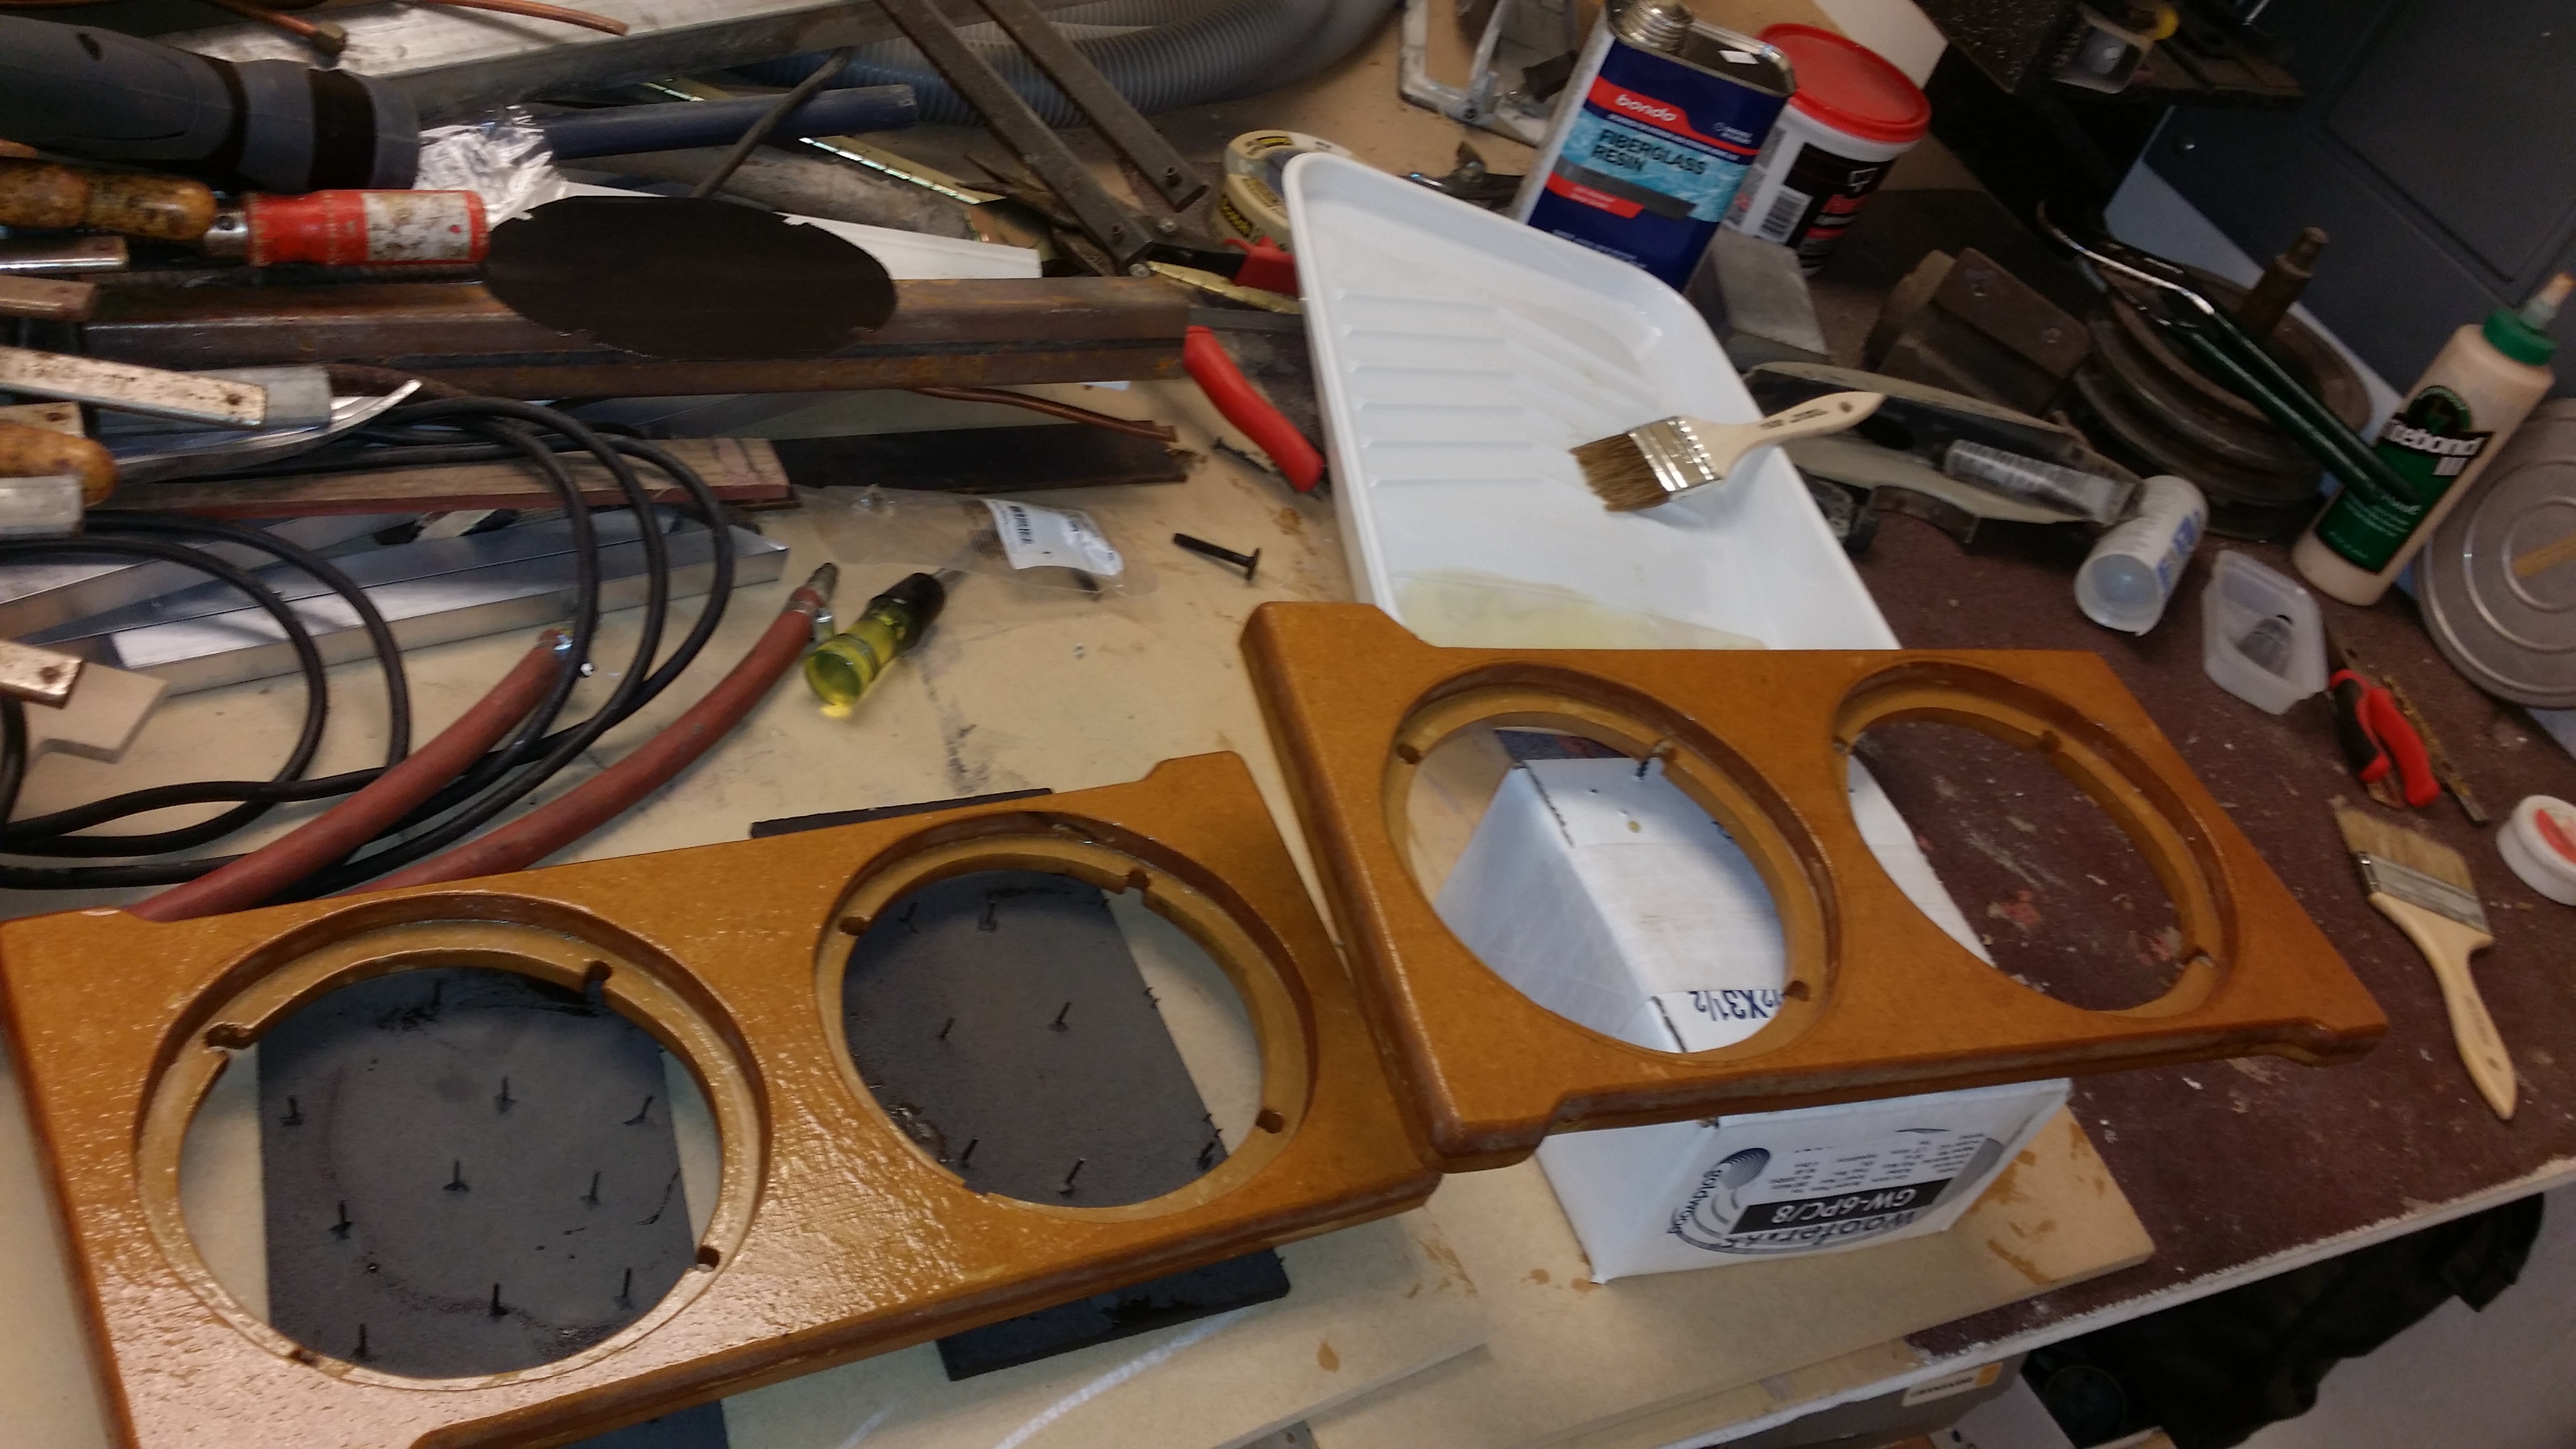
I made my baffle boards out of two pieces of 3/8 MDF, in order to easily make an inset for a flush look. I coated them with fiberglass resin for additional strength and durability, and then covered them with Ozite type fabric. The long bolts go thru the grilles, the drivers, the baffle boards, and the steel of the pedestal, and cinch everything together tightly.
O.K.,… So,…are you ready for the amazing, unbelievable part of this project? – …In order to get great sound in one of these vans, which agueably sound really bad from the factory, you need just 3 things: Subwoofer(s), an aftermarket head unit (“deck”) with line outputs, and clean, ‘discreet’ power amplifiers (either a 4-chan or two 2-chan ones). And that is all! And it will sound like a million bucks. – ‘Notice I did NOT mention replacing the door mids or dash tweeters with aftermarket ones? That is because they are fine (2010 or newer) and can perform suprisingly well, – I would say,…extremely well, once they are sent a clean, distortion-free signal from real power amps, and because they will have crossovers on them which block out all the bass, allowing them to play the midrange they are designed for, with incredible accuracy and clarity!
– Now, you might say “but if I’m going to all this trouble to install a system, why shouldn’t I just go the extra distance and buy some nice $300 set of speakers and spend another day or so swaping them out/making spacer mounts, etc. in order to have the best sound possible?” – And to that I would say “go for it!” It probably would sound a little bit better. So if you have the extra cash and time, and want the very best sound possible, then, sure! But I’m just telling you that for just only about $400 ($100 deck, $100 4-chan amp, $150 for four, 6″ subs, and ~$50 for a deck mounting kit, cables, antenna adapter and some materials), and a weekends’ install, you can have an amazing sounding system that is crystal clear, smooth frequency response, distortion free, and is a joy to listen to for hours on end. I suggest you do just this, and listen to it for a week or two, then decide if you want to swap the mids or not. I have not. Though I may someday, after I’ve done everything else on the van build. Because it sound’s terrific already
– Note: there is one other reason to leave the stock speakers….these vans are wide vehicles, and to help the stereo sound stage imaging, they have a center speaker on the dash which is a 3″ dual voice coil speaker. After I installed the deck, subs, and amps, and wired up the high freq amp to the left and right speaker pairs on the stock harness, I popped off the center spkr grill, unscrewed the center speaker and disconnected it. Then I listened to various favorite known music, then re-connected, listened,….and compared carefully, repeatedly. It sounded much better with it connected on all types of music! In other words, you can buy the fanciest set of two-way components and swap the door mids and dash tweeters, but you may still feel it sound’s best by leaving in the stock center dual-voicecoil speaker for optimum imaging!
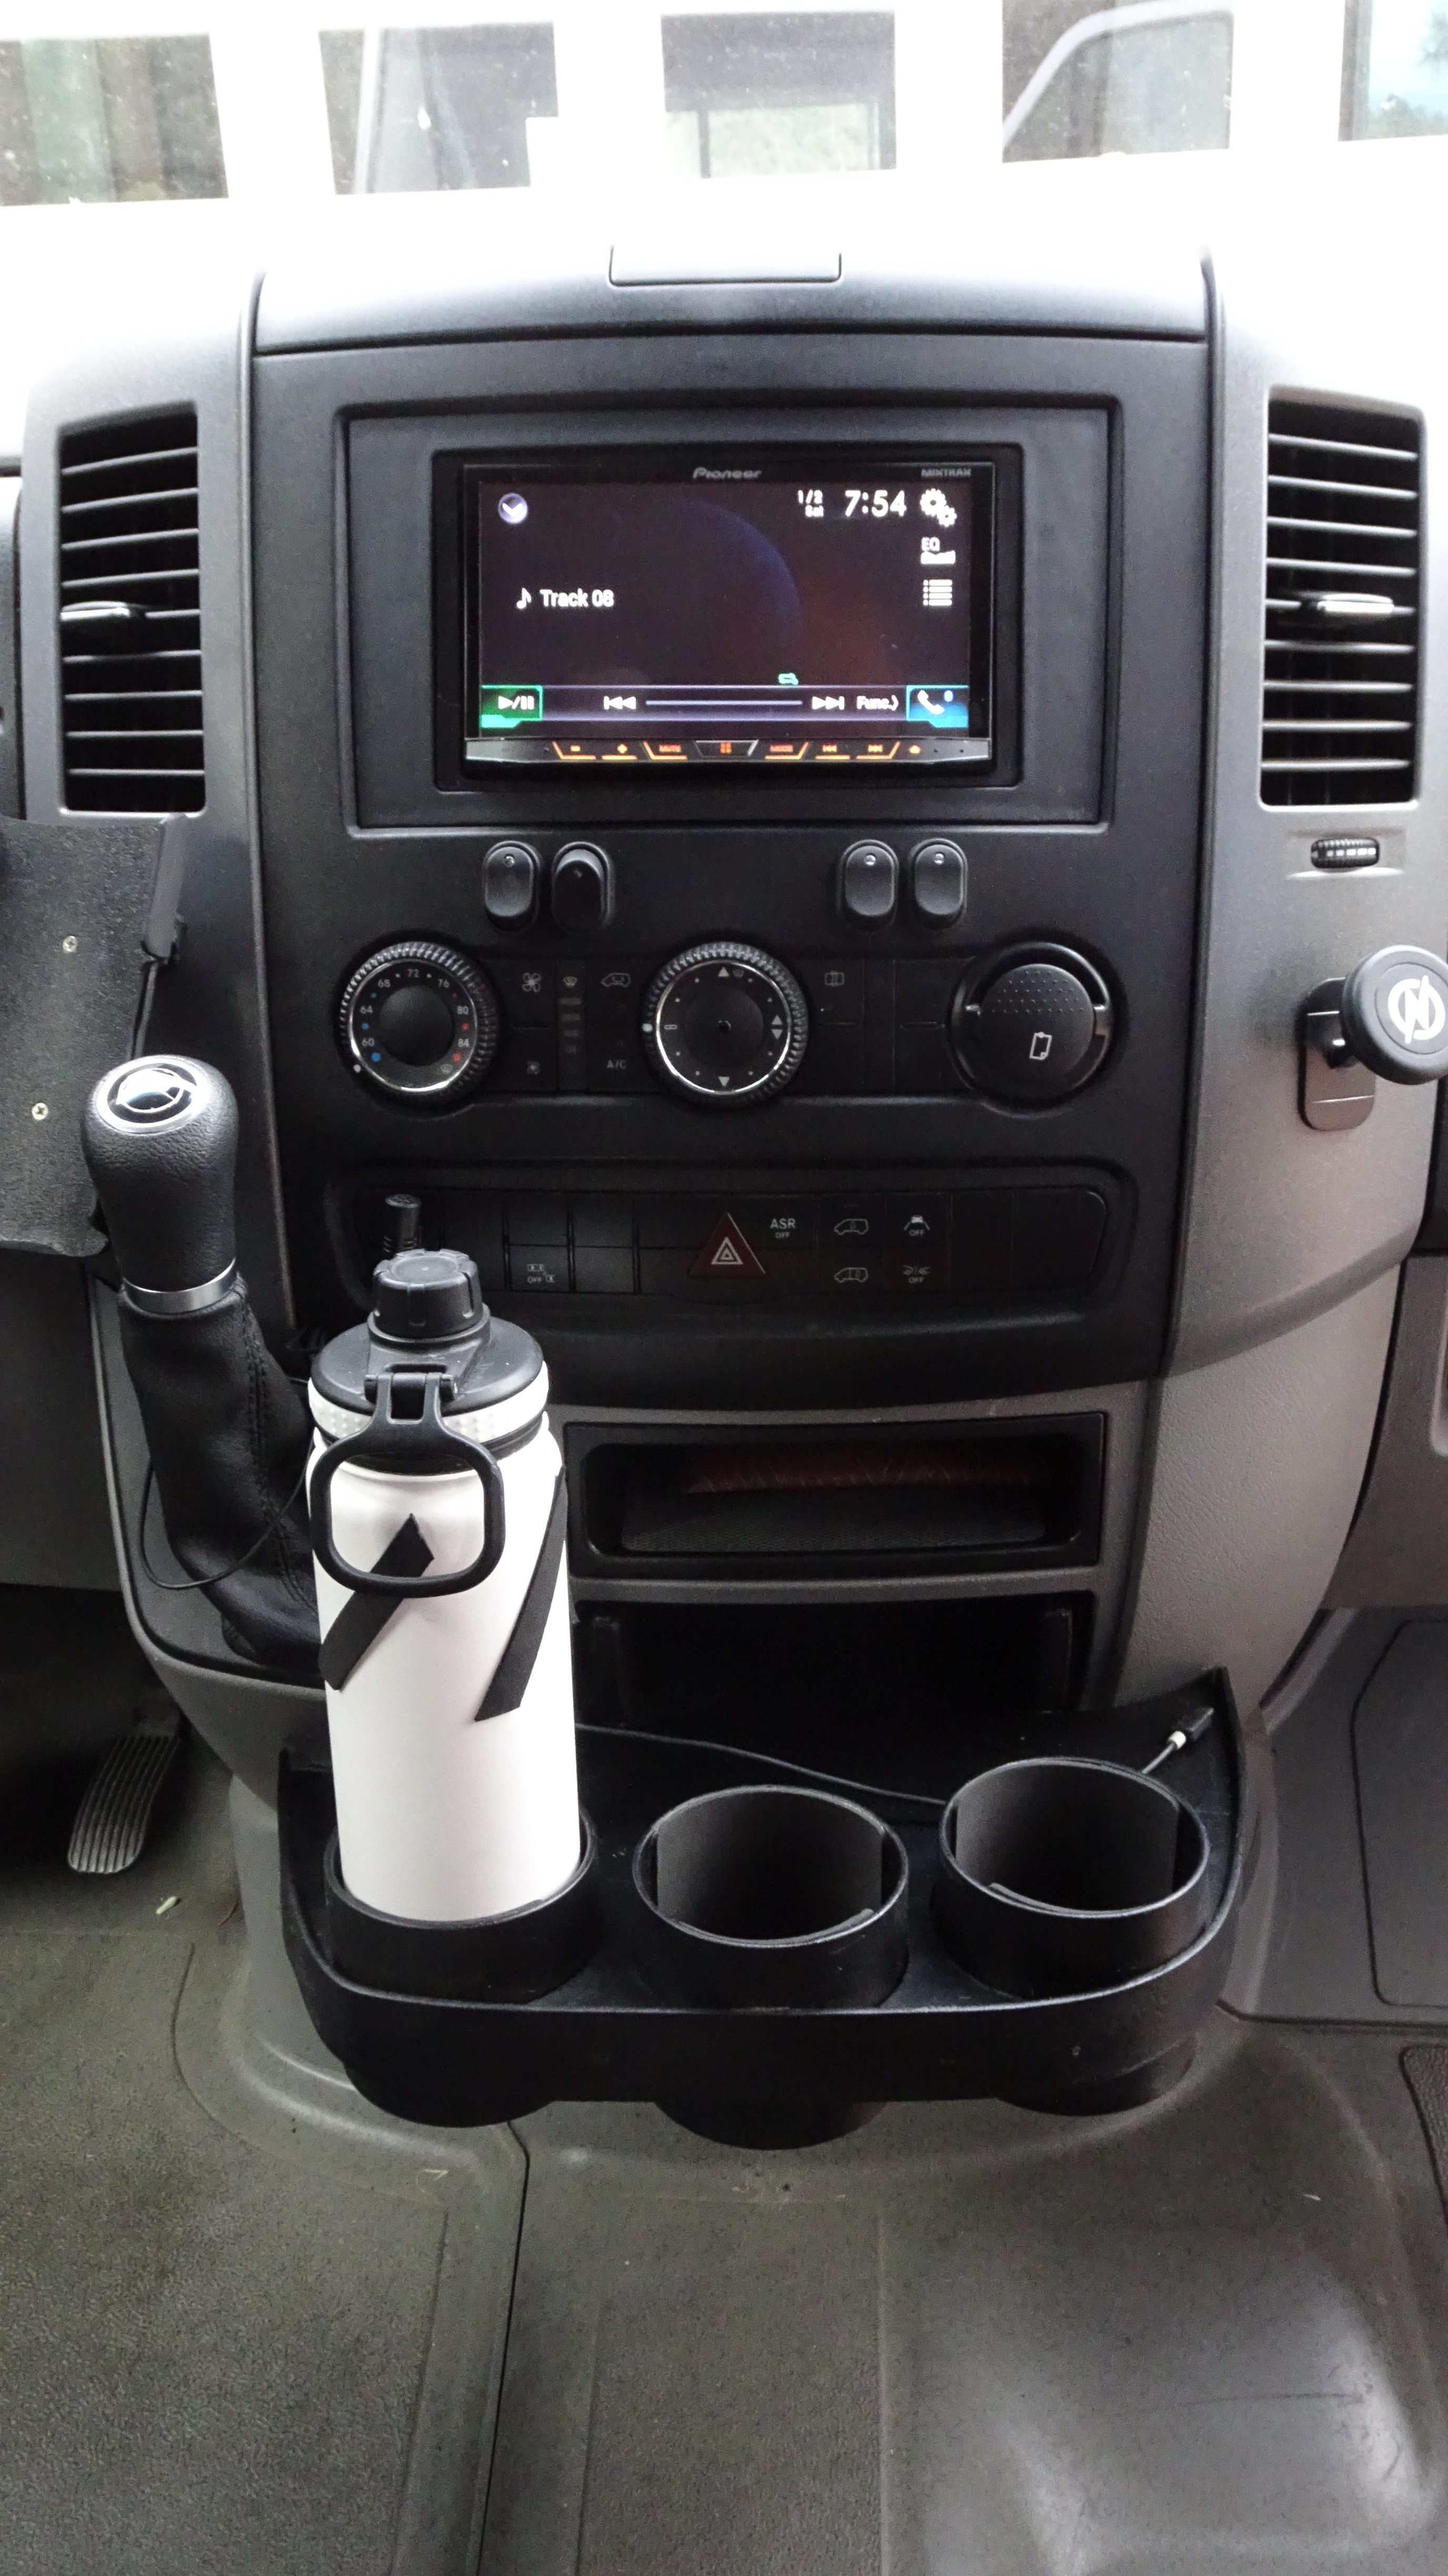
Now, about the deck, any deck with line outs will sound good. If you have a 2019 Sprinter or other vehicle where you want to leave the stock deck, you’ll need a “line level converter” which wires to the speaker output wires and generates as clean of a line-level signal as possible to send to the amps. But an aftermarket deck with true line-level RCA outputs will always sound a little better. These will only cost $100 and will have bluetooth and just about everything you’d want. I did, however, decide to get a high-end $400 deck, as opposed to a more basic $100 one. Even though there is no sound quality difference between them. As long as you have line-level outputs (which, unfortunately excludes the nice looking mercedes decks that come with the 2018 or older vans), then you will have clean, distortion-free, pre-amp level signals to send to your amps and then your speakers, and ultimately, your ears. The stock deck only has speaker-level outputs which, sadly, has already gone thru the dirty, high-distortion chip-amp inside the deck, and is putting out about 1 to 5% distortion (minimum), compared to the .1% distortion (max) that you’ll have with an aftermarket system, and THAT is why the stock stereo sounds so bad. Fact. I only went for the fancy deck (Pioneer 4200) to get the extra features that do not add to sound quality, only convenience, like touch screen, graphical display, SiriusXM tuner, CD/DVD drive, steering wheel control interface, two video inputs for backup cams, and most of all Android-Auto/Apple Car-Play to make certain features from my phone show up easily on the touch screen like google maps, music in my phone, spotify, etc.
Now, you should also know, if you’re building an RV, or even just have one of any kind, that there is a logical way to power up the dash stereo system. Since you will want to play it while camped, perhaps for many hours, if you make it sound as nice as mine does, it should not be on the ignition key circuit, the way that cars do. And it is the way that the van comes wired from the factory. Because you have to have your ignition key in and turned partially on, and then other parts of the vehicle’s system have power and it is all draining your start battery and may keep you from starting it and strand you somewhere.
Also, on a 2010 or newer, Mercedes puts in a computer time-out circuit which turns your radio off after about 20 mins (to help prevent a dead battery). So, since it is an RV, and has a separate house battery, the dash stereo should be powered from it, and not your start battery. So that you can listen all day and even if you drain your house battery, at least you’re not stranded. In order to do this, you have to run a power wire from the house battery, obviously, AND you have to add a toggle switch on your dash which will be the way you turn your radio on and off.
You can’t use the radio’s power button, because, since it was designed to be in a car and on an ignition circuit, they decided to leave various lights on, on the radio’s face, even after you push the power button to off, which is obnoxious while trying to sleep. You can see that I have four rocker type switches that I’ve added below the stereo. One is stereo on/off, one is subwoofer amp on/off, one is mids amp on/off, and one is backup camera input activation on the deck. The amp one’s stay in ‘on’ position most of the time, but of course the amps go on and off with the stereo, the switches are just for selective turning off sometimes.